Need advice? Let's talk.
Get straightforward guidance from your broadcasting partner. Schedule a call to chat with the team about your radio station.
Book DemoHow to Edit Your Radio Shows with Adobe Audition
How you can edit your radio shows with Adobe Audition for pre-recorded segments to sound like you're broadcasting live radio.

Everyone in the radio industry should know a thing or two about how to edit audio, that's why we're going to show you how you can edit your radio shows with Adobe Audition for pre-recorded segments to sound like you're broadcasting live radio.
Edit Your Radio Shows with Adobe Audition
Adobe Audition
Adobe Audition has been a staple of radio studios for over 15 years, even going by the name "Cool Edit Pro" around a decade ago - Most radio stations expect that you know the basics of how to use Audition or something similar to edit radio shows, but for this guide you will learn how to use Adobe Audition.
If you don't already have Audition then you can get it as part of the Adobe Creative Cloud package.
Multitrack Session
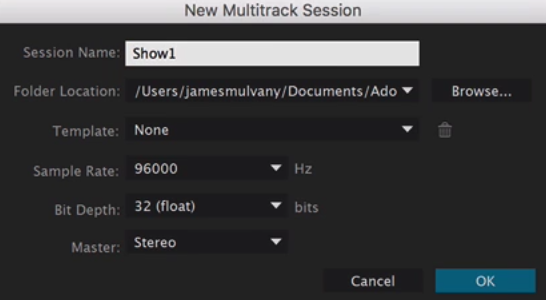
The first thing you need to do when Audition is open is to create a new multi-track session where all of your audio files will live - Select "Multitrack" and enter a "Session Name" for your show.
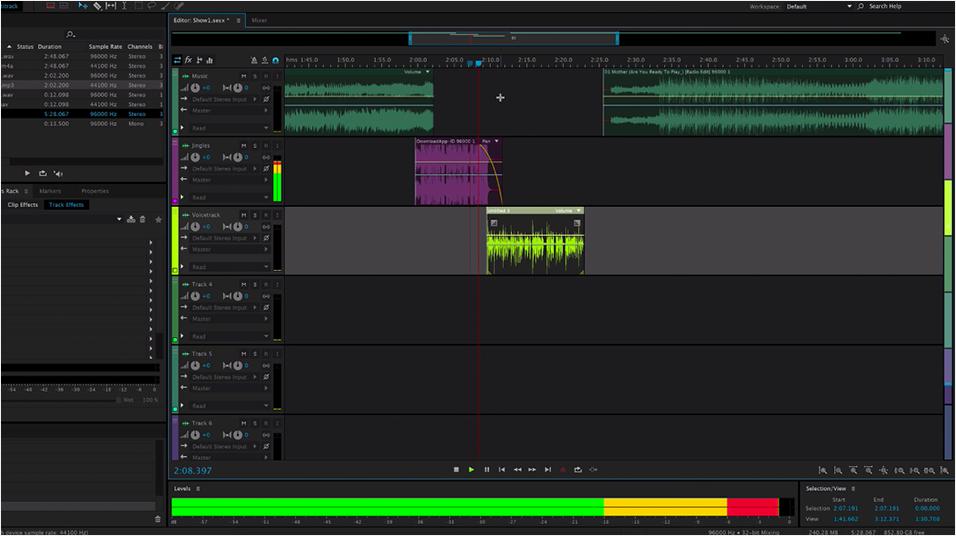
This will bring up the multitrack editor where there's lots of different layers for your audio.

In this example we will add music at the 1st layer, jingles/sweepers for the 2nd layer, and finally a voice-track for the 3rd layer.
On a basic level this is how you can structure radio shows to manage each type of audio.
Adding Tracks
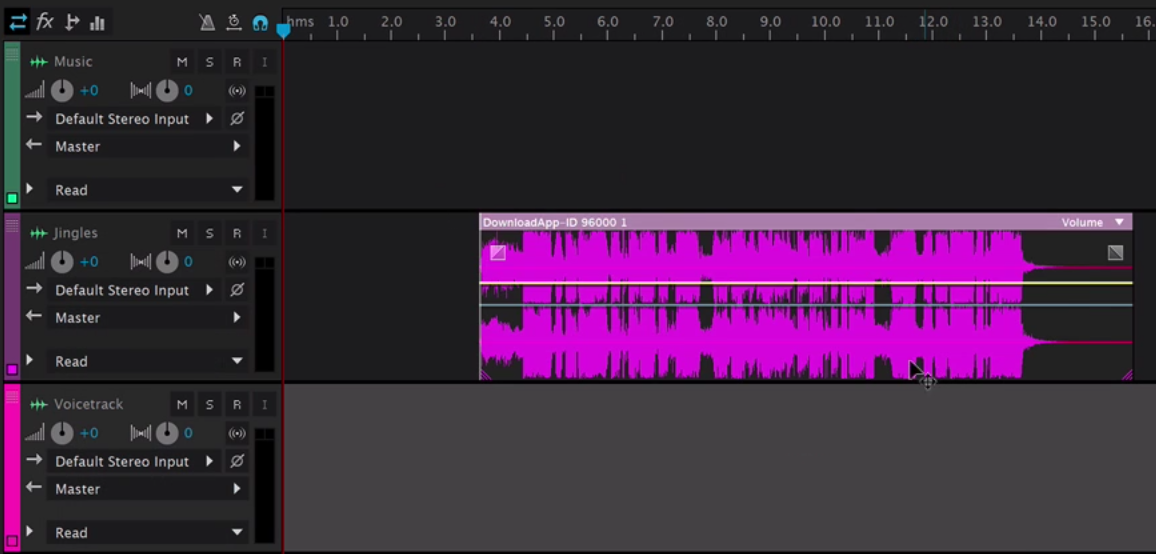
Drag and drop tracks directly into Audition, either in the "Files" section for you to save the track for later or you can add it directly into your multitrack session on a layer, for example we have added a jingle onto the timeline.
The great thing about Audition is it will convert any file, so it doesn't matter what file you add, whether it's an .mp3, .mp4, or .wav it will automatically convert it to a unified format for the project you are working on which is handy if you have an assortment of different types of tracks.
Segue Between Tracks
When you have a couple of tracks in your multitrack editor it should look something like this:
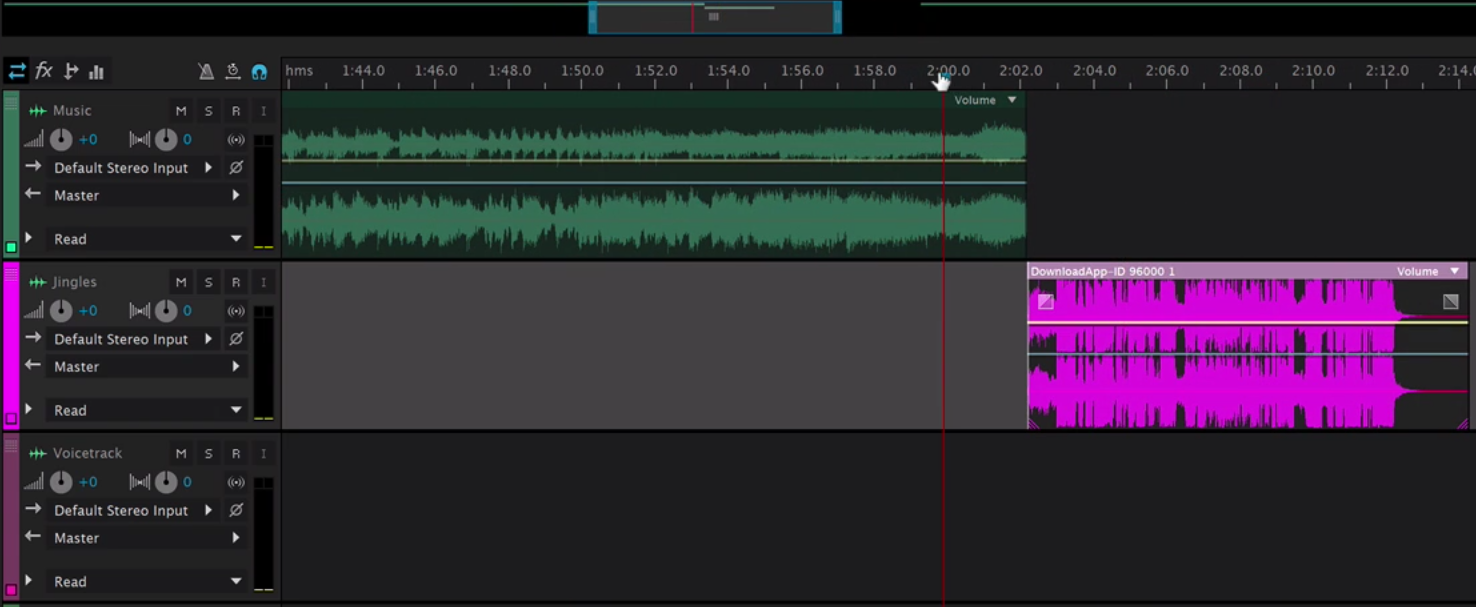
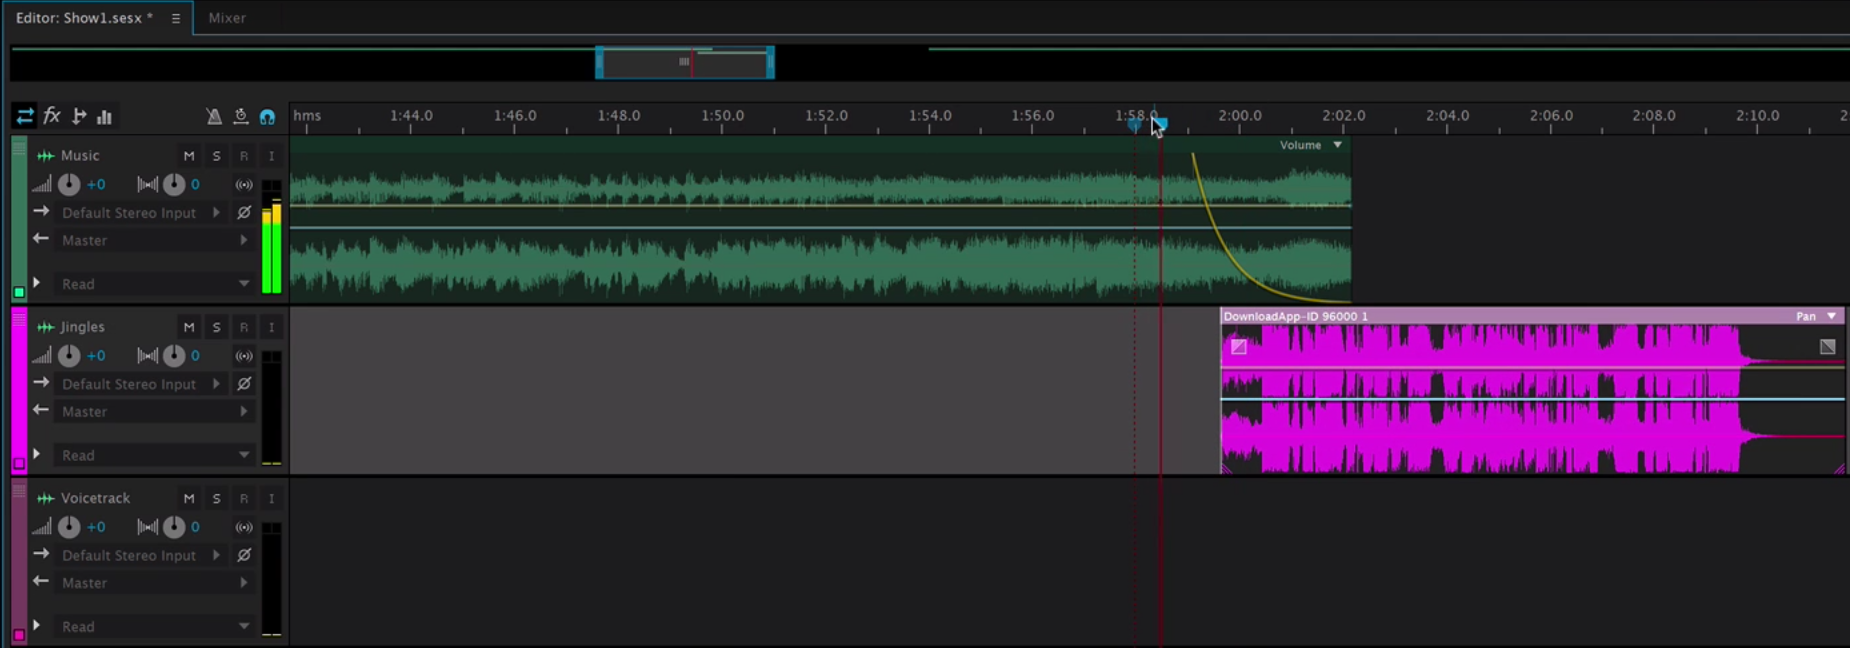
You want your shows to sound radio friendly, so going from one track to another it should have no gaps, be nicely faded between items, and edited together for seamless transitions.
One way you can edit a track is to trim either the start or end, this is ideal for audio that already have a fade in or out - You can easily trim the file by grabbing the edge and moving it to cut the audio.

Alternatively use the crossfade to fade in and out tracks. The line on the file represents the audio, if you have it long with no curve then it will slowly fade out over time or a sudden dip means the audio will drop quickly.
Grab the box at the end of the file and move it to adjust the curvature and length of the crossfade - It's best to adjust this, playback the audio to test, and make further adjustments until you get a good sounding fade.
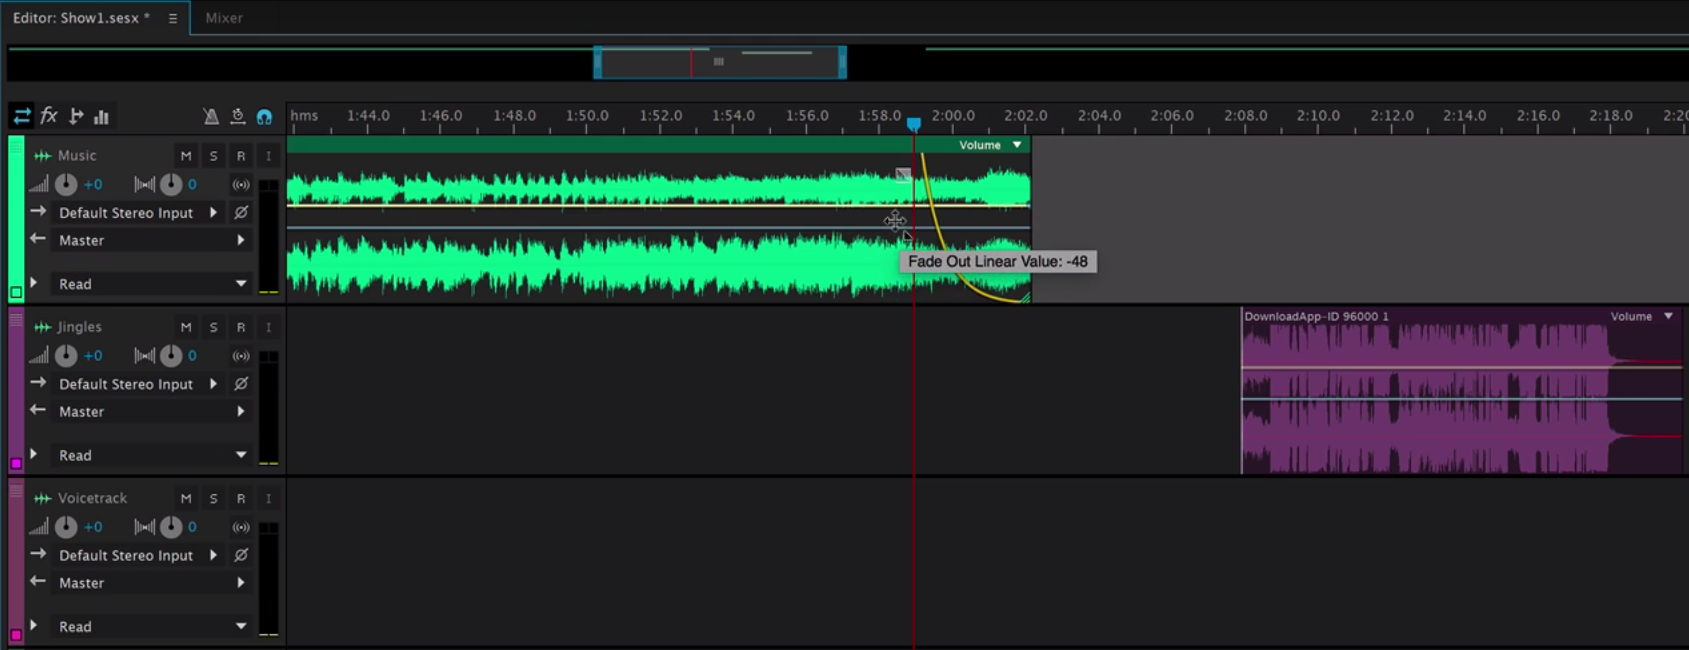
As the track dips down you want new audio to take over, in this instance we're going from track to jingle, so we just need to grab the jingle and move it as the previous track fades out.
Recording Your Voice
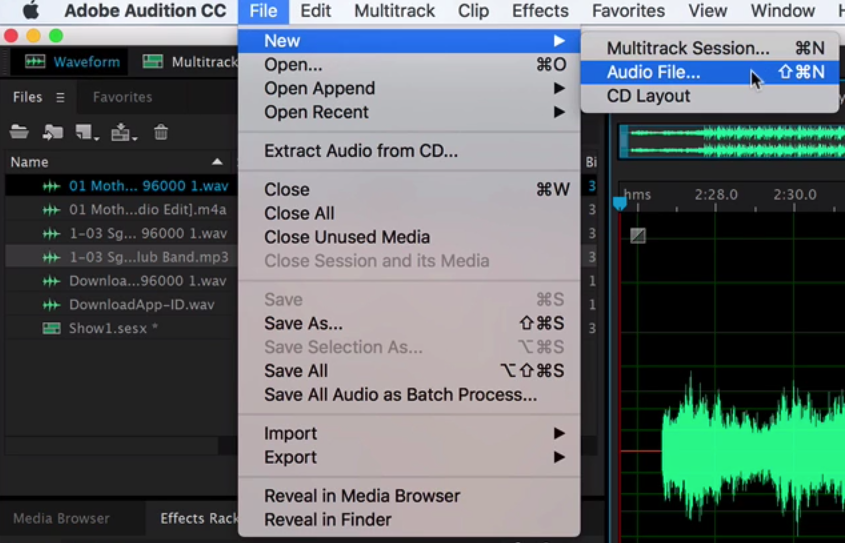
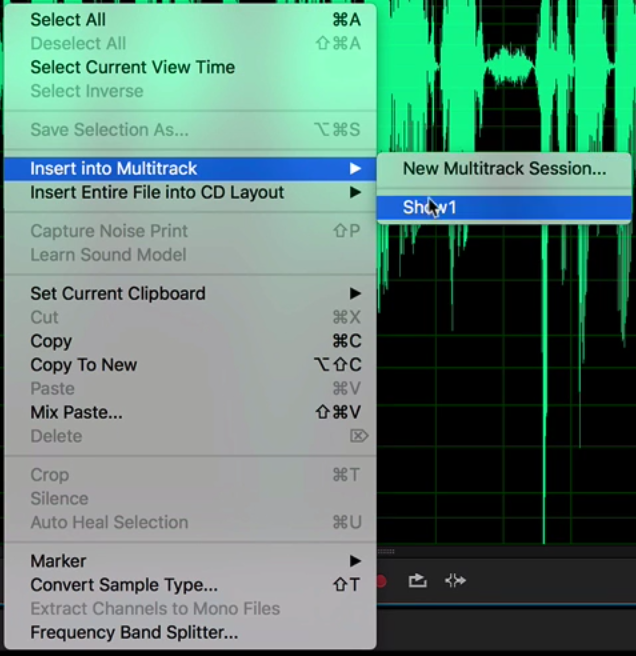
To mimic a live broadcast you need to include a voiceover between tracks - With Adobe Audition you can record audio and add directly to your multitrack session.
Open up a new file by clicking on "Waveform", then File -> New -> Audio File... - This brings up a new blank audio file for your recordings.
Clicking the red record button on the page starts to record audio from either your built in or external microphone - Once you're finished hit stop.
The great thing about recording files in Audition is if you make mistakes you can re-record or chop off bits at the start or end by selecting and deleting.

Insert the audio file into the multitrack by right-clicking, selecting "Insert into Multitrack", and then the name of your multitrack session.
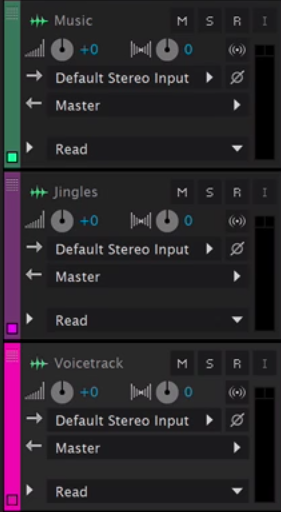
Bonus Tip: Layer Colour
One of the cool things you can do in Audition is to change layer colours to make it easier to manage tracks in overview.
Once your recorded track has been added to your multitrack and moved onto the right layer, in this case "Voicetrack", double-click on the current label colour to bring up the colour wheel.
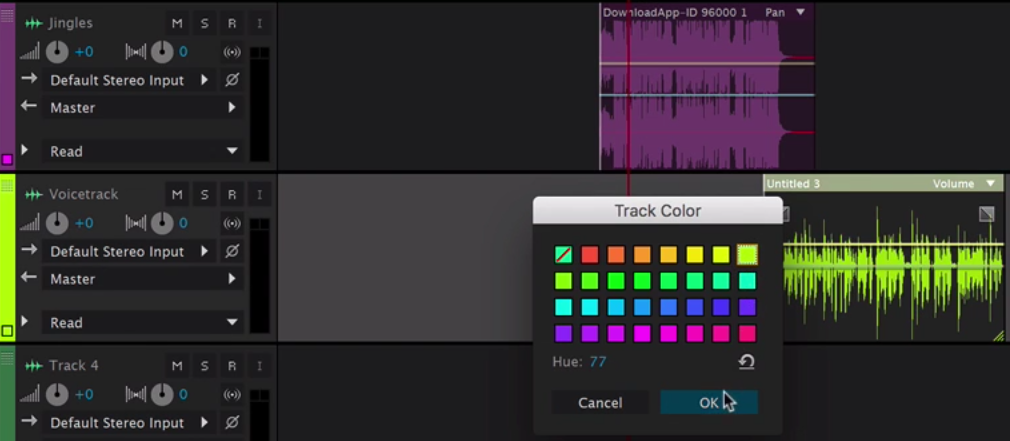
Select a new colour and hit "OK" - All of your layer's audio file colours should now have changed so they are distinguished from the others.
Background Track
It's quite common in radio to speak on top of tracks before vocals kick in, this way hosts can chat over the intro with a nice beat in the background before it officially starts.
Sound waves that are lower then the rest of the track in the intro or outro indicate that vocals or loud noises aren't present, so you can overlap your voice track, however if the audio is loud you can lower the volume in the track.
Adjust the volume by grabbing the yellow line on the track; the lower it is the more quite the audio will be.
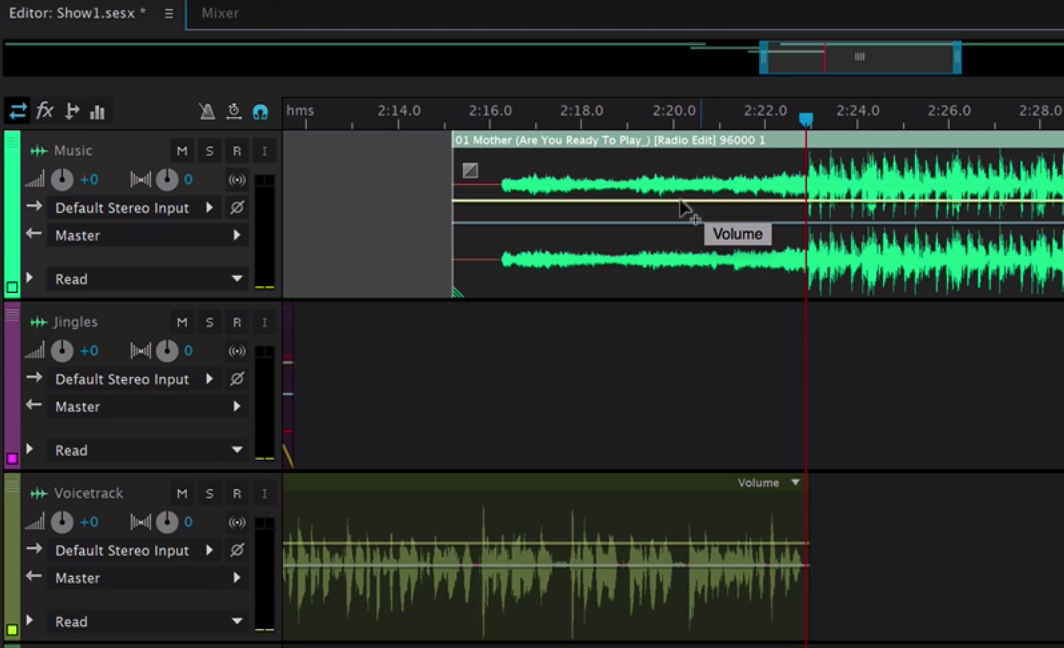
When the voice-track is finished you want the volume of the audio to go up to match the voice over, this is how cue points come in handy.
Cue points are volume adjustment markers, add one or many by clicking the yellow line on track at various points, then move the line to adjust the volume.

You can adjust the volume for intros and outros on the rest of your tracks to segue between each one for a professional show all the way through.
Exporting Shows
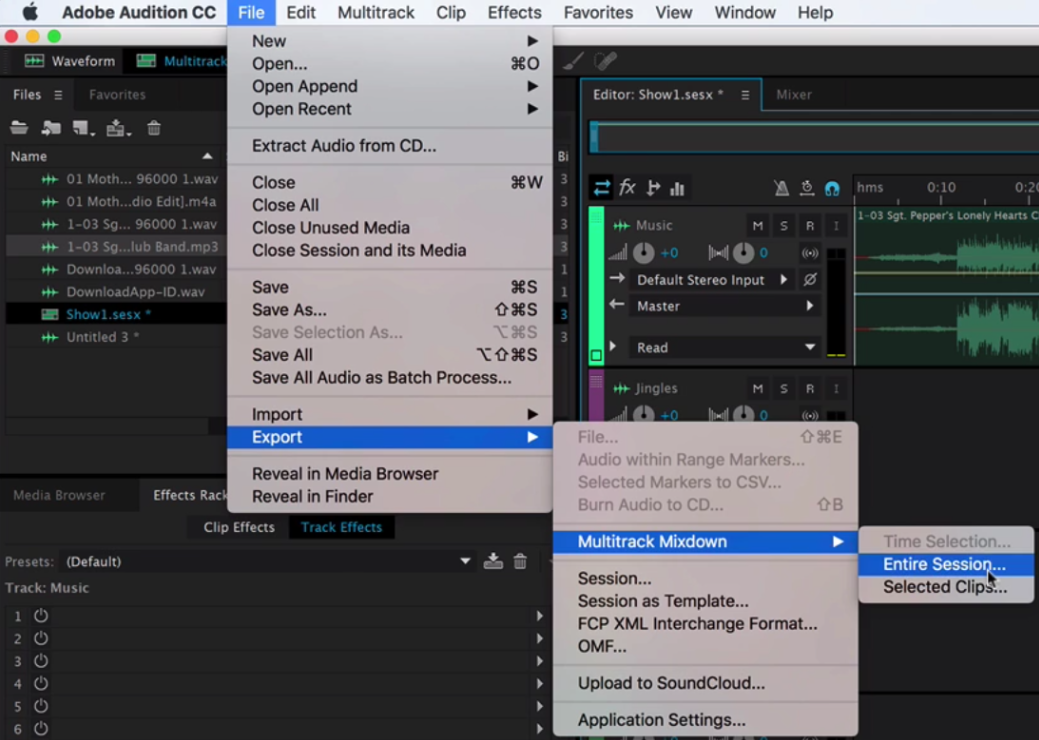
When you have your show ready you can export the entire final product as a single audio file all mixed together including all the adjustments you have made.
Export your shows by going to File -> Export -> Multitrack Mixdown -> Entire Session...
Once your show has been exported you can upload it to Radio.co, then add it to playlist and schedule it broadcast at a time you want - The best part is your listeners won't know any different as it sounds like it's live radio.
You can use this guide to create multiple shows and schedule them throughout the week so it sounds like you have a radio station full of live shows.
If you haven't checked it out, Radio.co is an awesome way to start your own internet radio station - Start your free 7 day trial today by clicking the button below.


