Need advice? Let's talk.
Get straightforward guidance from your broadcasting partner. Schedule a call to chat with the team about your radio station.
Book DemoThe Essential Audacity Radio Editing Guide for Beginners
Easy Audacity Radio Editing Guide - Produce professional high quality audio by following these essential tips to edit your audio using Audacity.
Sometimes recorded audio might not sound right. Whether that’s a distant noise in the background, dead air, or it’s too quiet in parts. It’s best to polish these blemishes out so you’re left with professional sounding audio. Follow this essential Audacity radio editing guide that covers the basics to produce high quality shows.
Throughout we’ll be looking at a bunch of different techniques used by industry experts in both radio and podcasting. However, we can’t all afford high-end software, so for this guide we’ll be using Audacity as it’s an intuitive program that’s completely free.
Get Audacity
Audacity is one of the best free programs that’s easy to use and works with most platforms like Windows, Mac, and Linux systems. It’s ideal for recording interviews, voiceovers, music, and pretty much everything else.
There’s a little bit of a learning curve at first, but once you’ve got the basics down from this guide it’ll become one of your core tools. Grab Audacity now for your system by heading here.
Record Audio
To edit your show you first need to record it. We show you just exactly what you need to do to get Audacity setup and how to use it to capture your audio here.
Import Audio
You can take existing shows you've recorded and edit them in the Audacity radio editing program. Import the file by selecting File -> Import -> Audio.
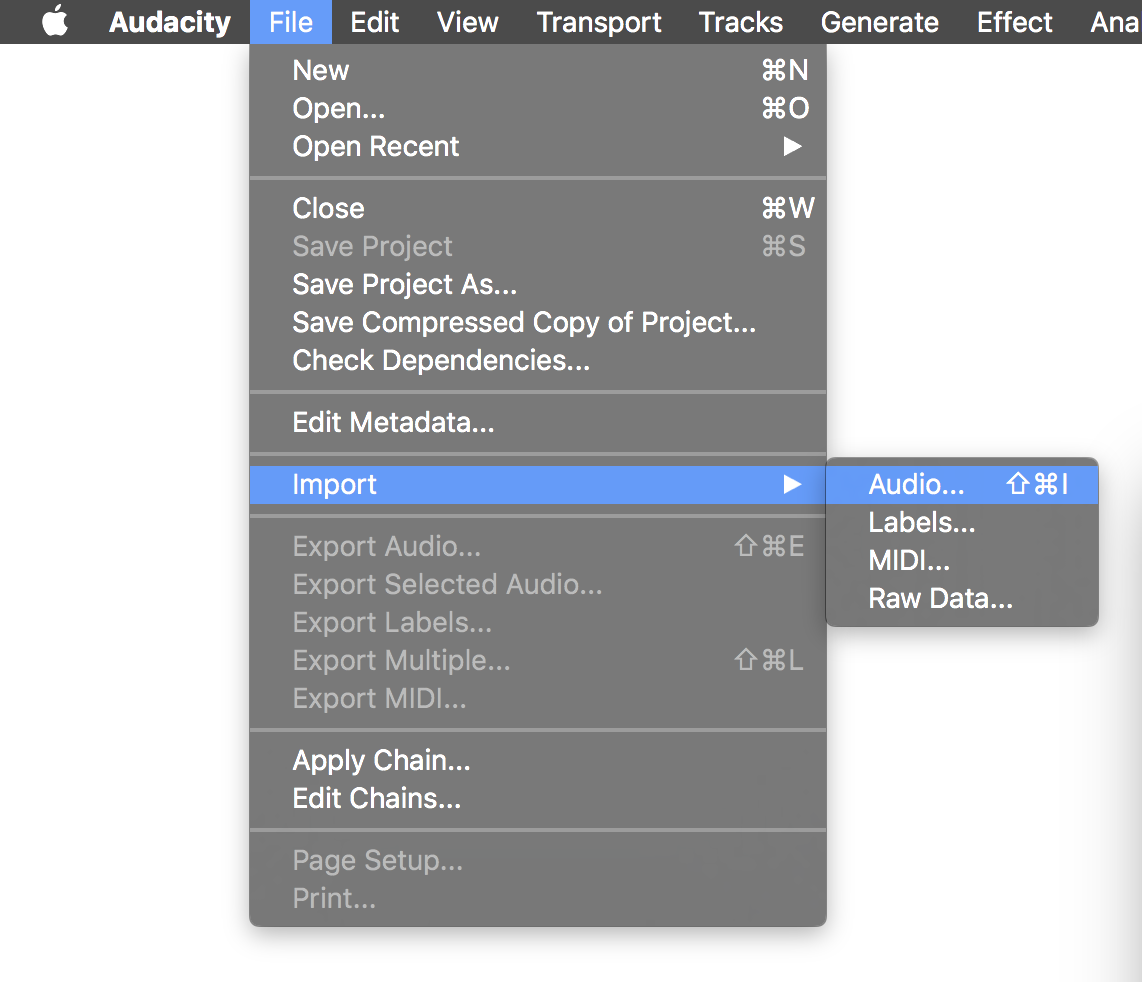
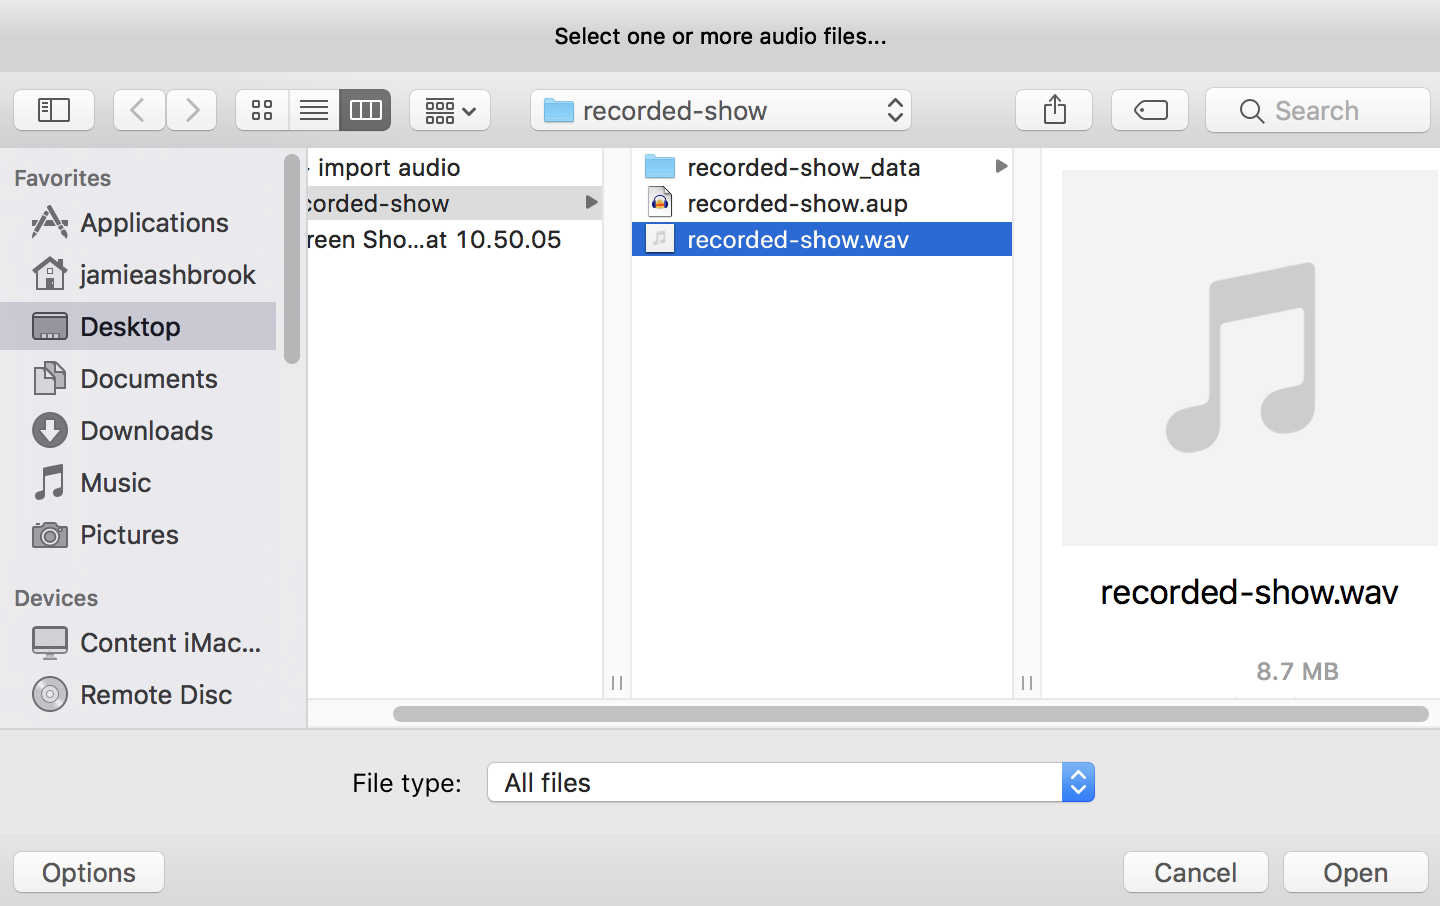
Choose the audio file you want to import. It's best to edit in WAV or AIFF format as they're ideal for preserving sound quality.
Once it's been imported the file should show it's waveforms for both the left and right channels.
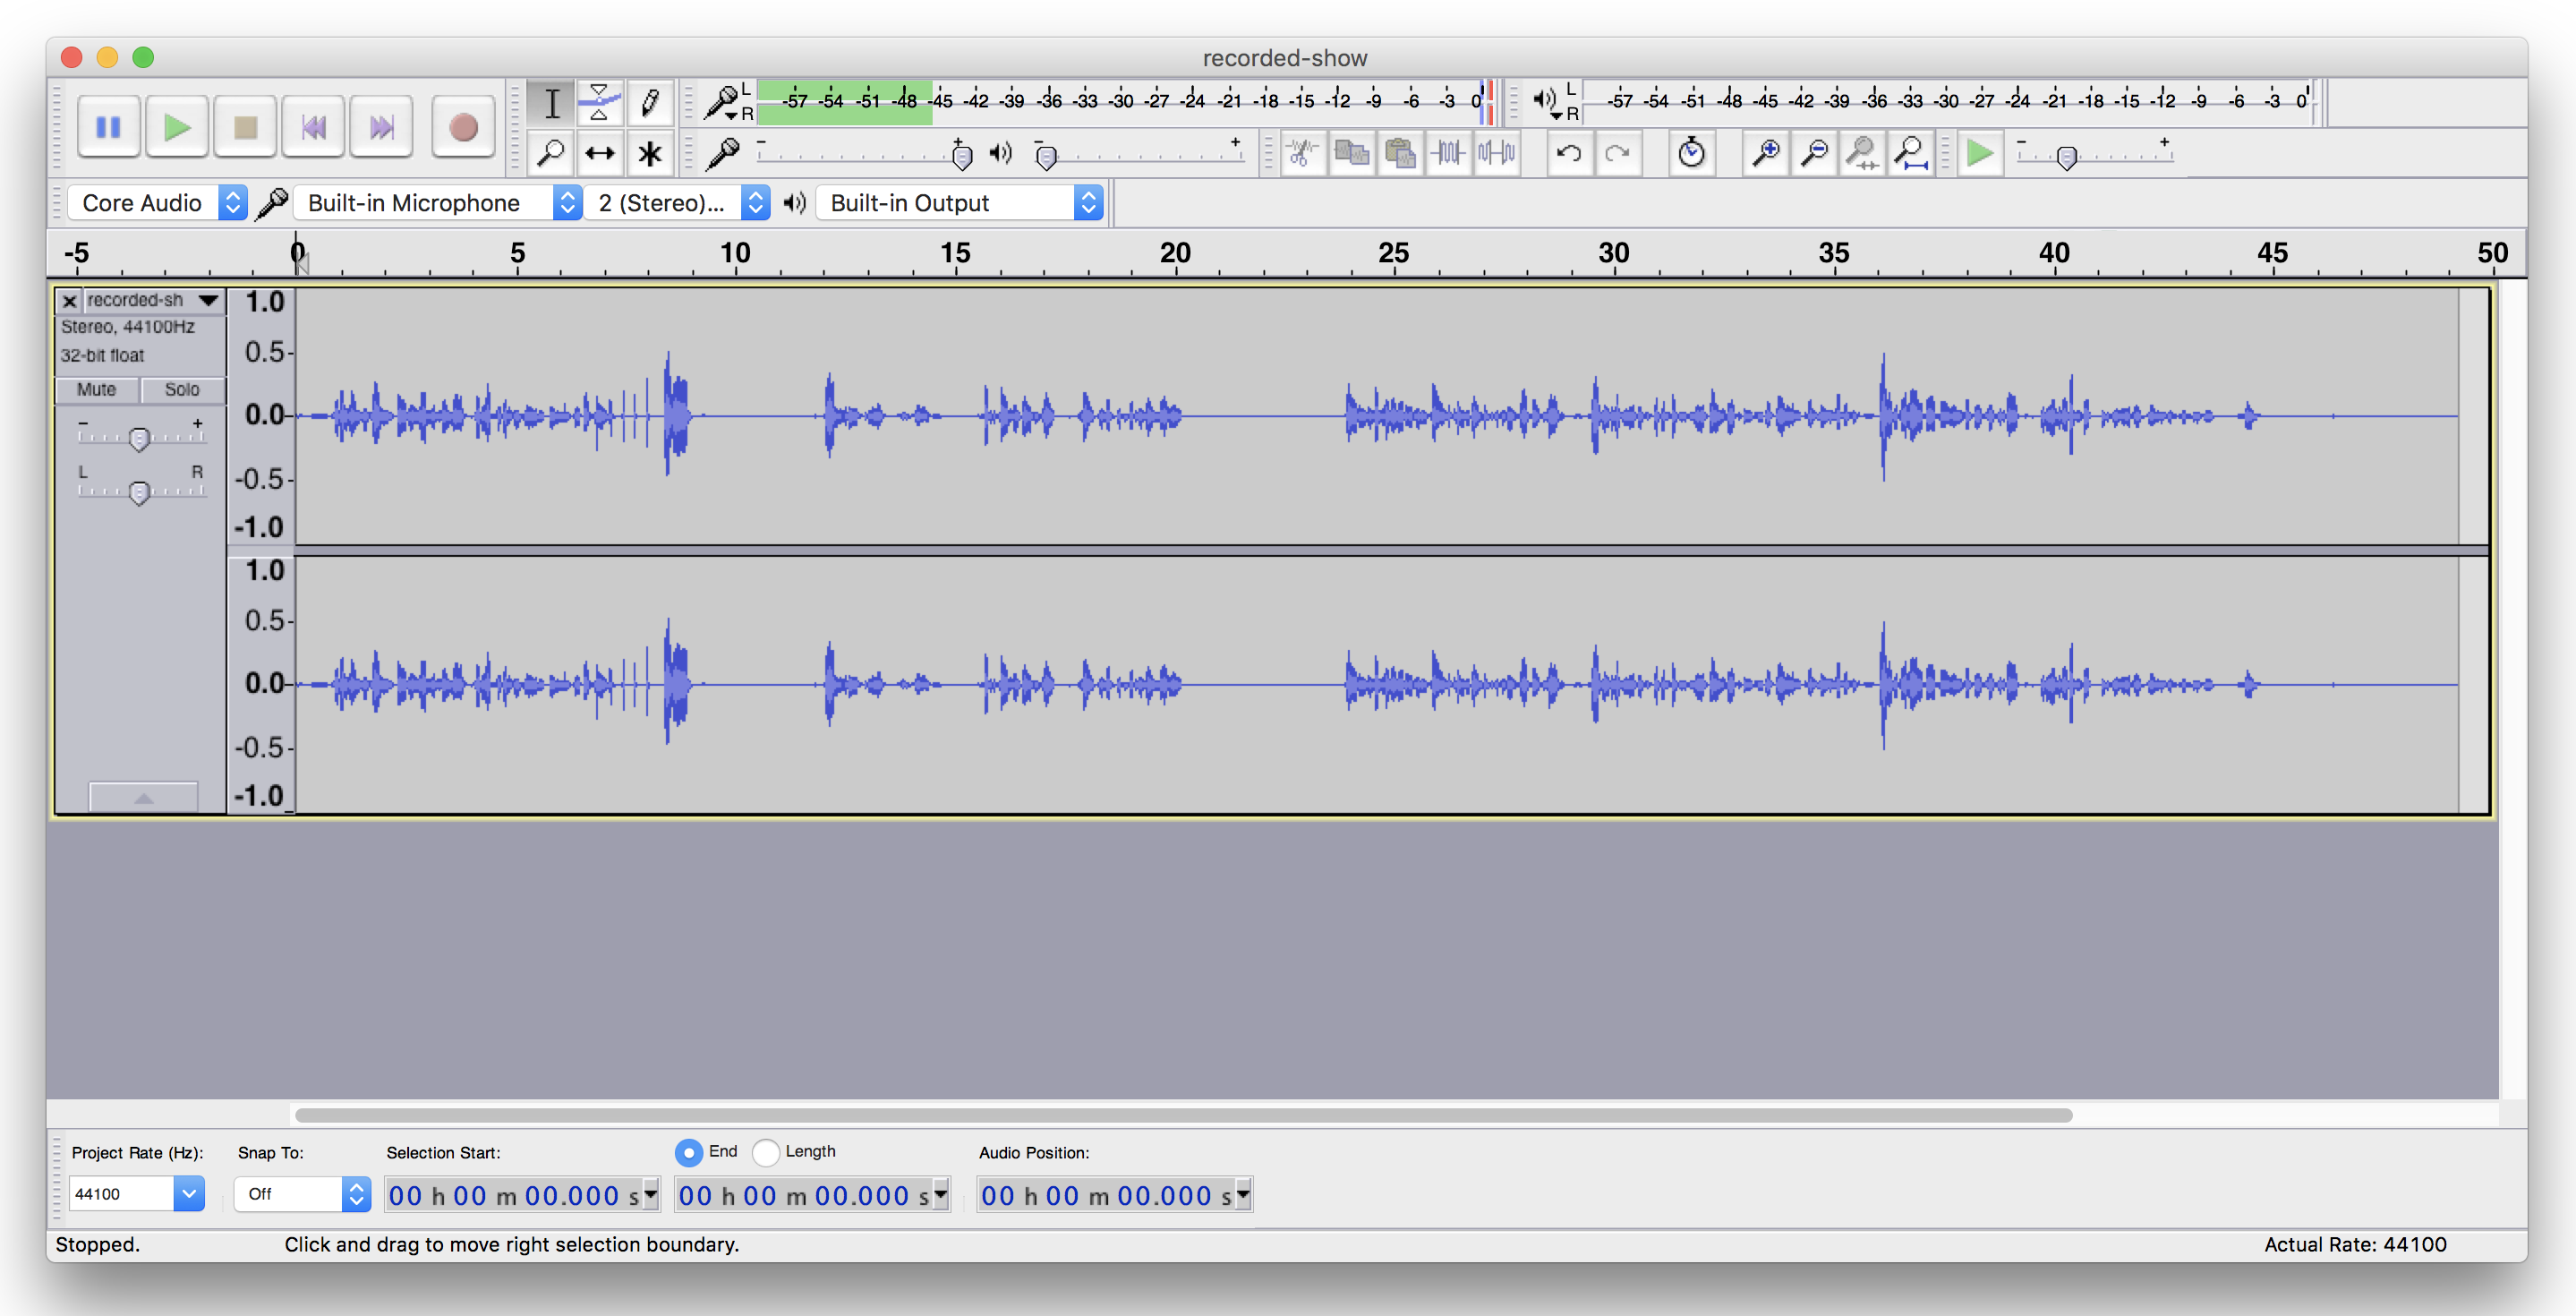
Check the file has been imported successfully by clicking the play button and listening for a couple of seconds.
Remove Background Noise
Microphones often pickup audio from far away or capture what's known as "background static", which is a low level buzz noise. In your waveform they're quite tricky to spot, but you can find them as they're constant low waves. You can get a better look by zooming in to the waveform with the + magnifying glass.
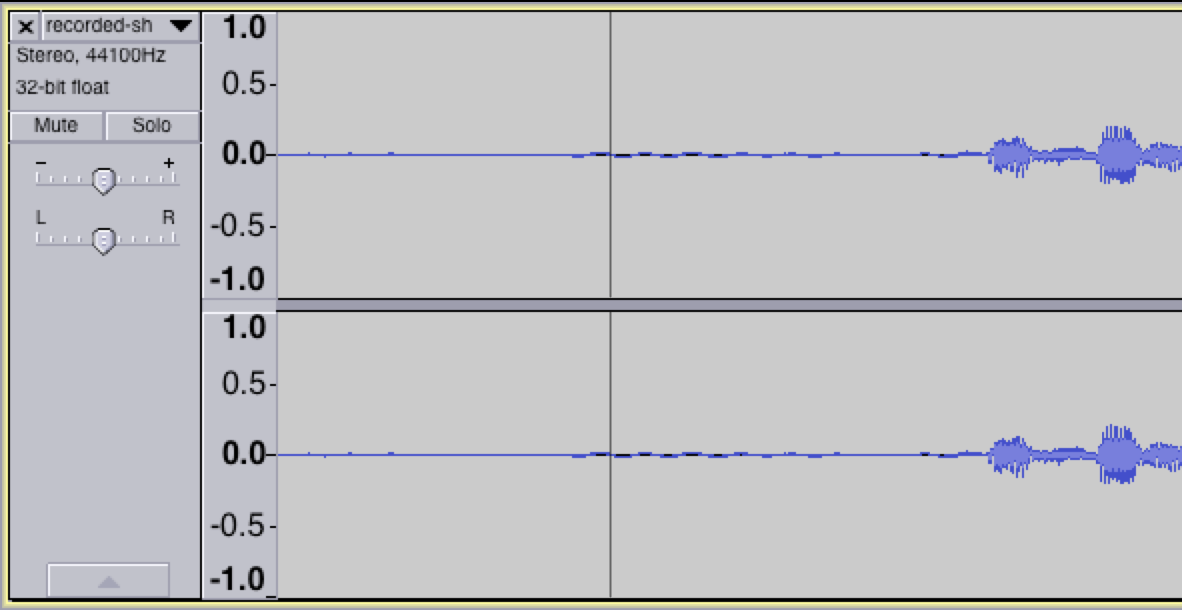
These unwanted sounds can easily be removed in the Audacity radio editing program. Firstly highlight some of the background noise you found. Next go to Effects -> Noise Reduction, then select Get Noise Profile. This captures the highlighted noise which we'll use in a minute.
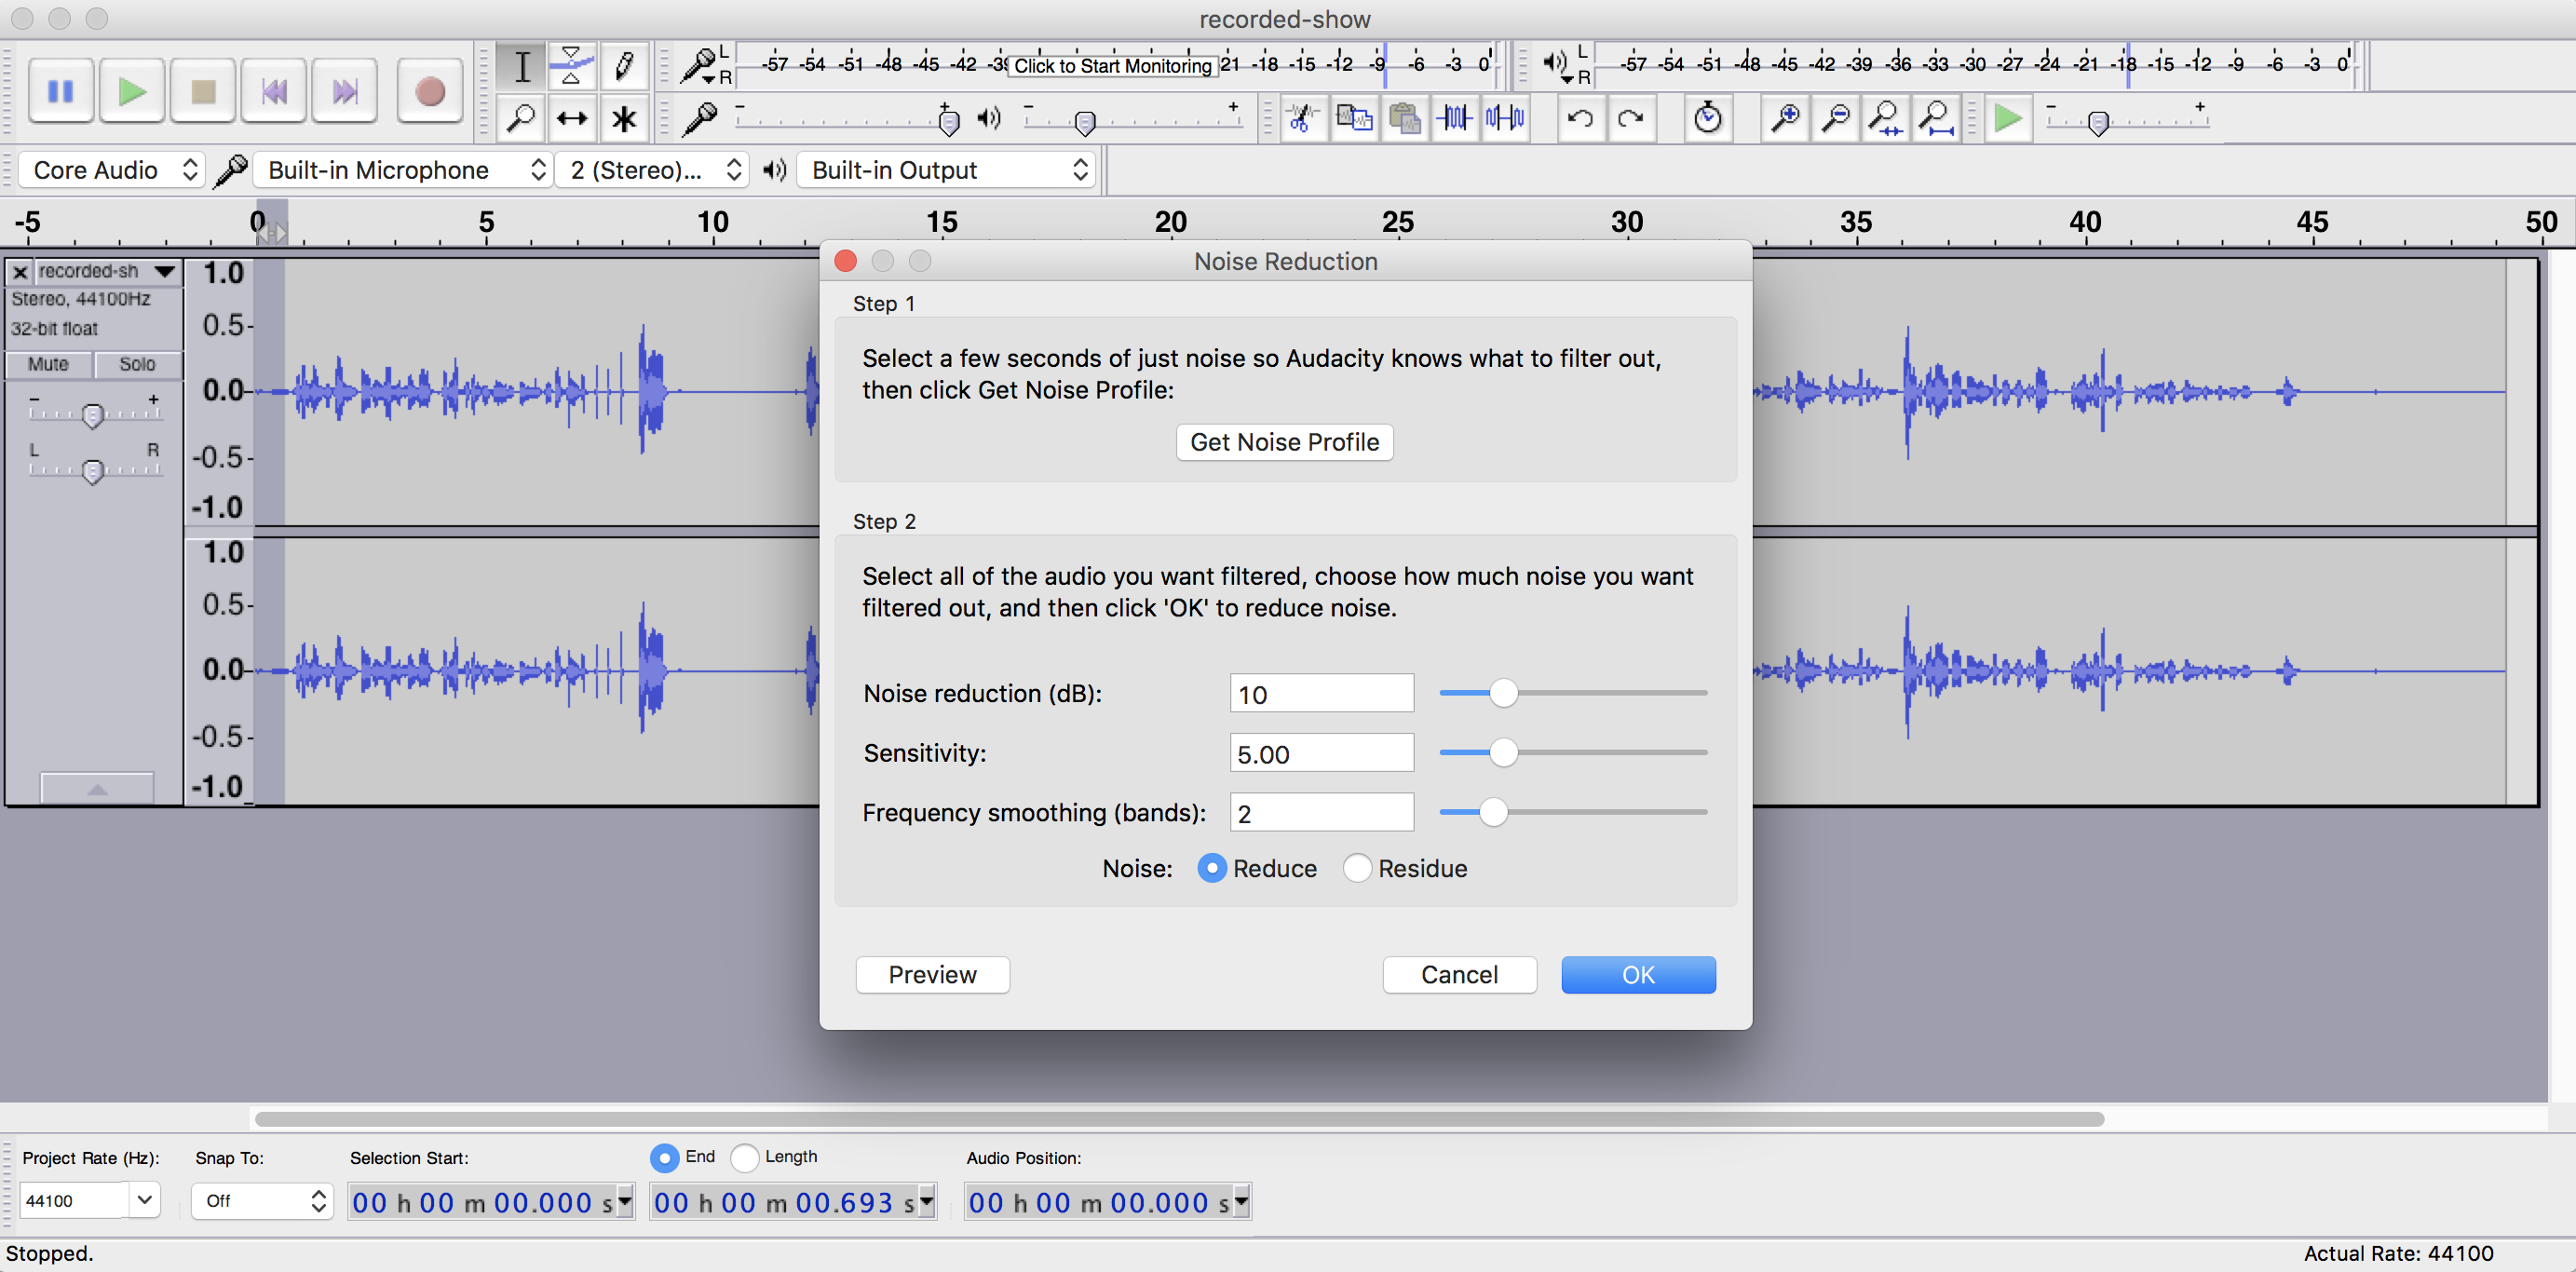
Now highlight all your audio in your waveform, then head back to Noise Reduction. Adjust the Noise Reduction (dB) to 5, Sensitivity to 0.50, and Frequency Smooth (Bands) to 1. Finally apply the changes.
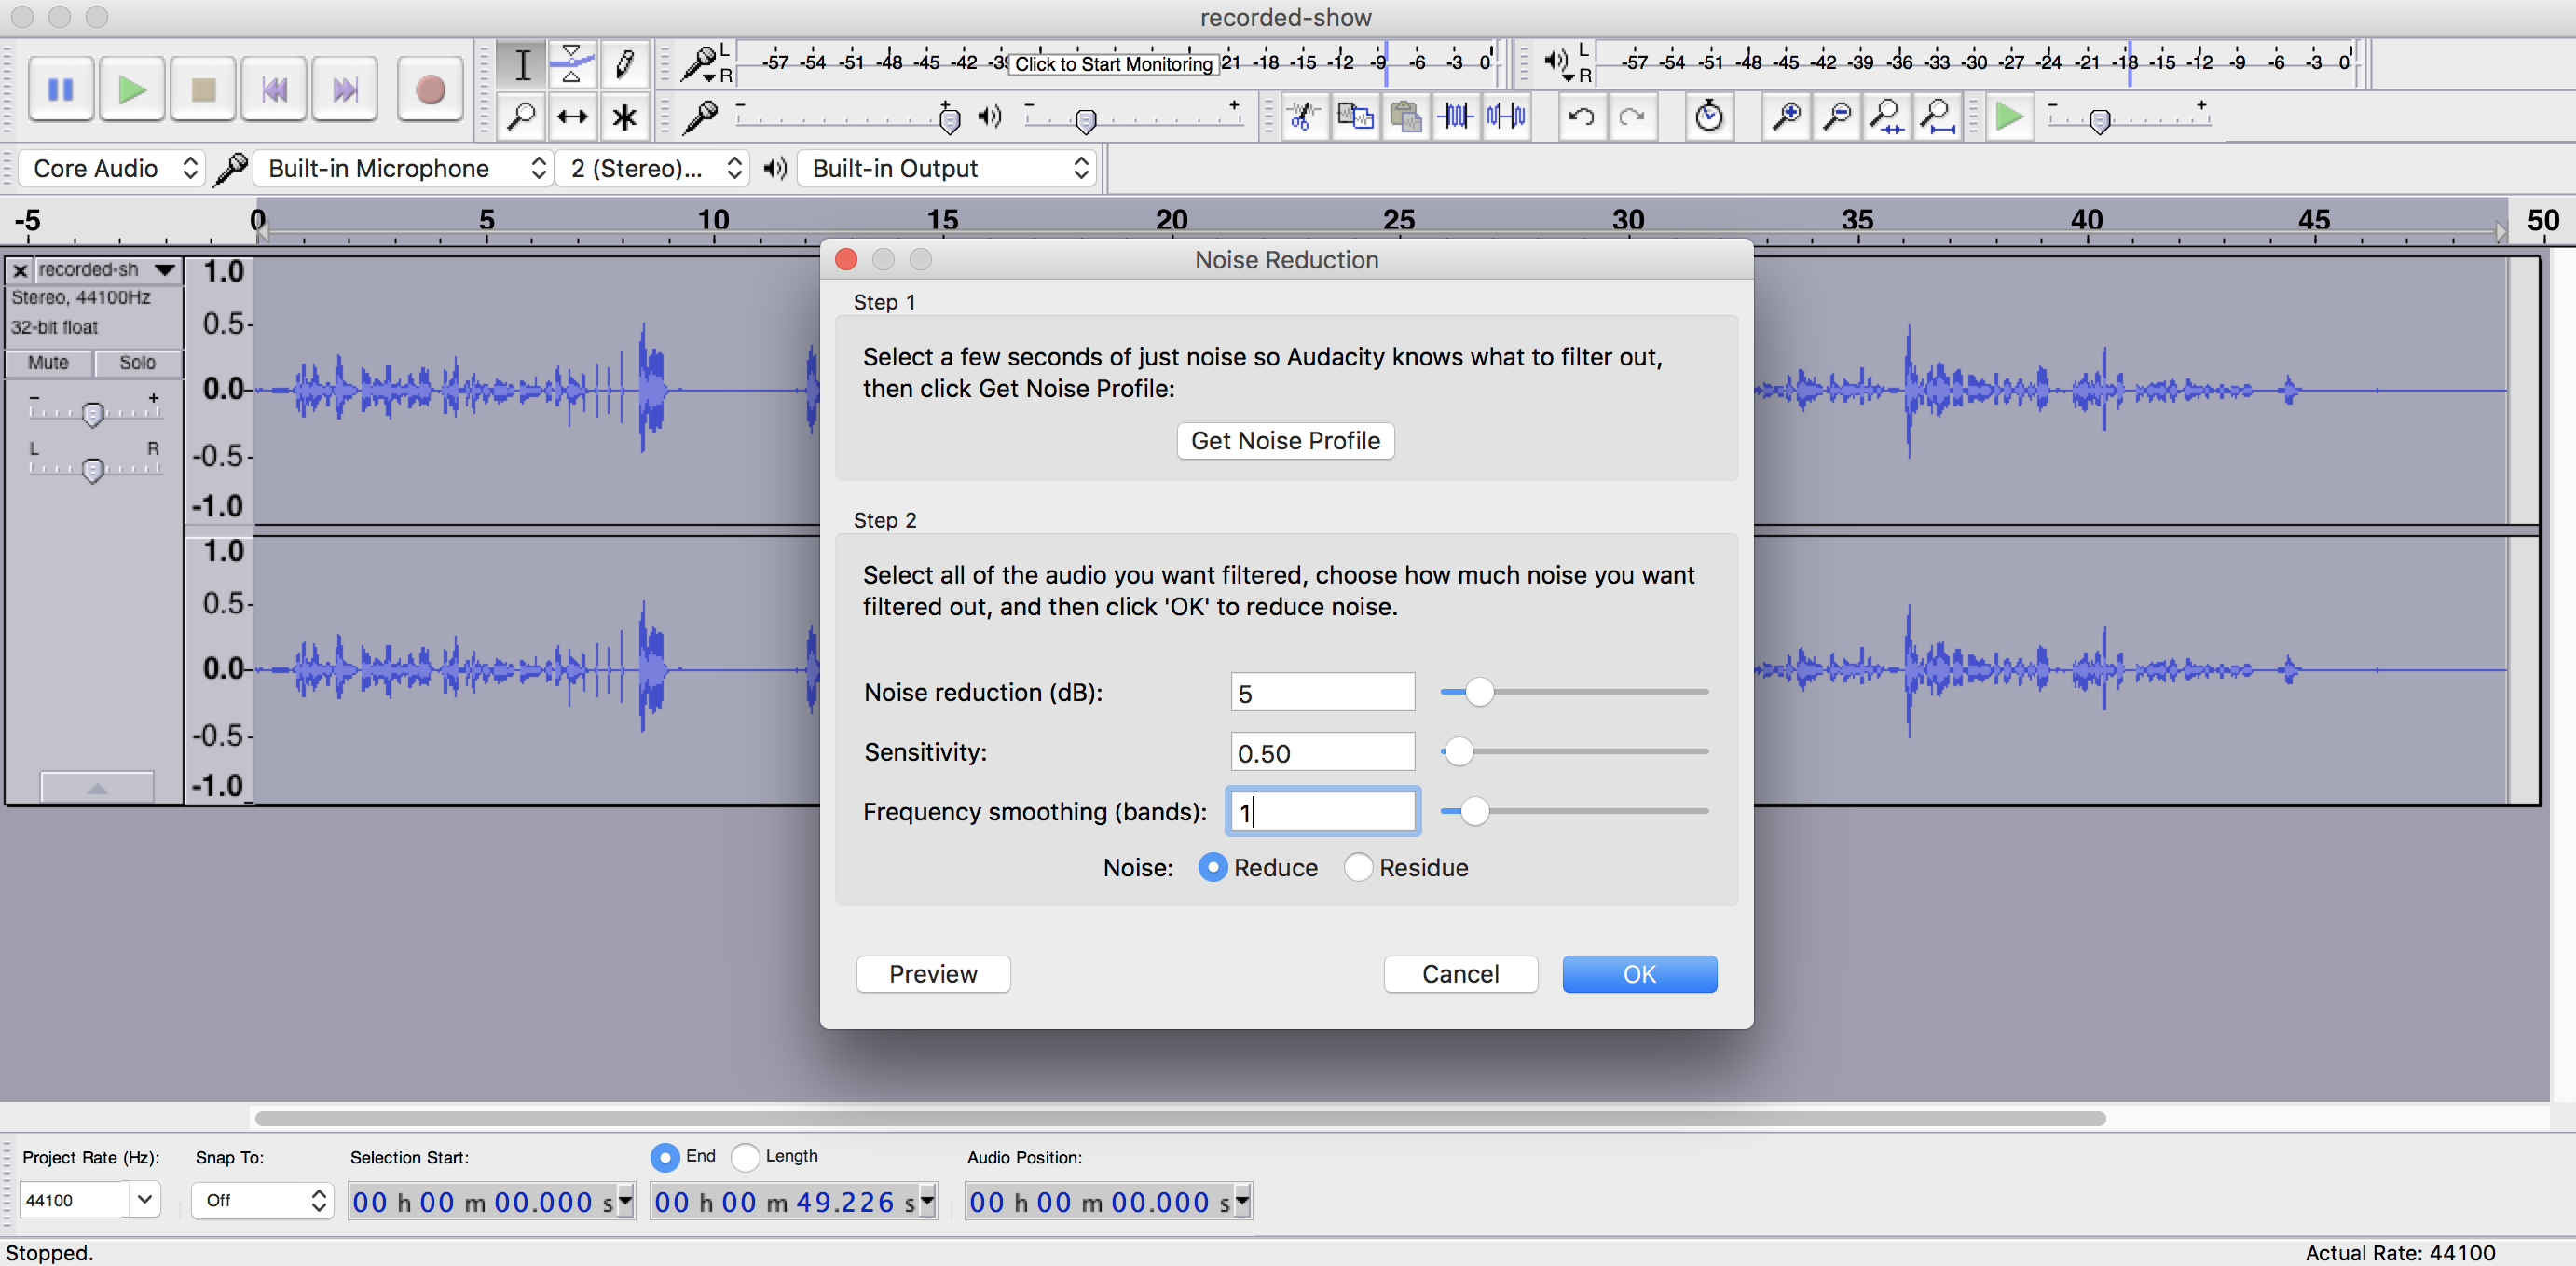
You should notice the background noise has been reduced throughout your waveform, however you may need to adjust the settings further to remove it completely. Increase the settings mentioned and preview the audio, do this until the background noise has been reduced enough so you can barely hear it.
Cut Audio
Background noise maybe too loud to reduce, for example trying to get rid of loud noises across your entire audio file using the noise reduction method will distort it. Instead be selective and cut the audio that's causing the most trouble using Audacity radio editing.
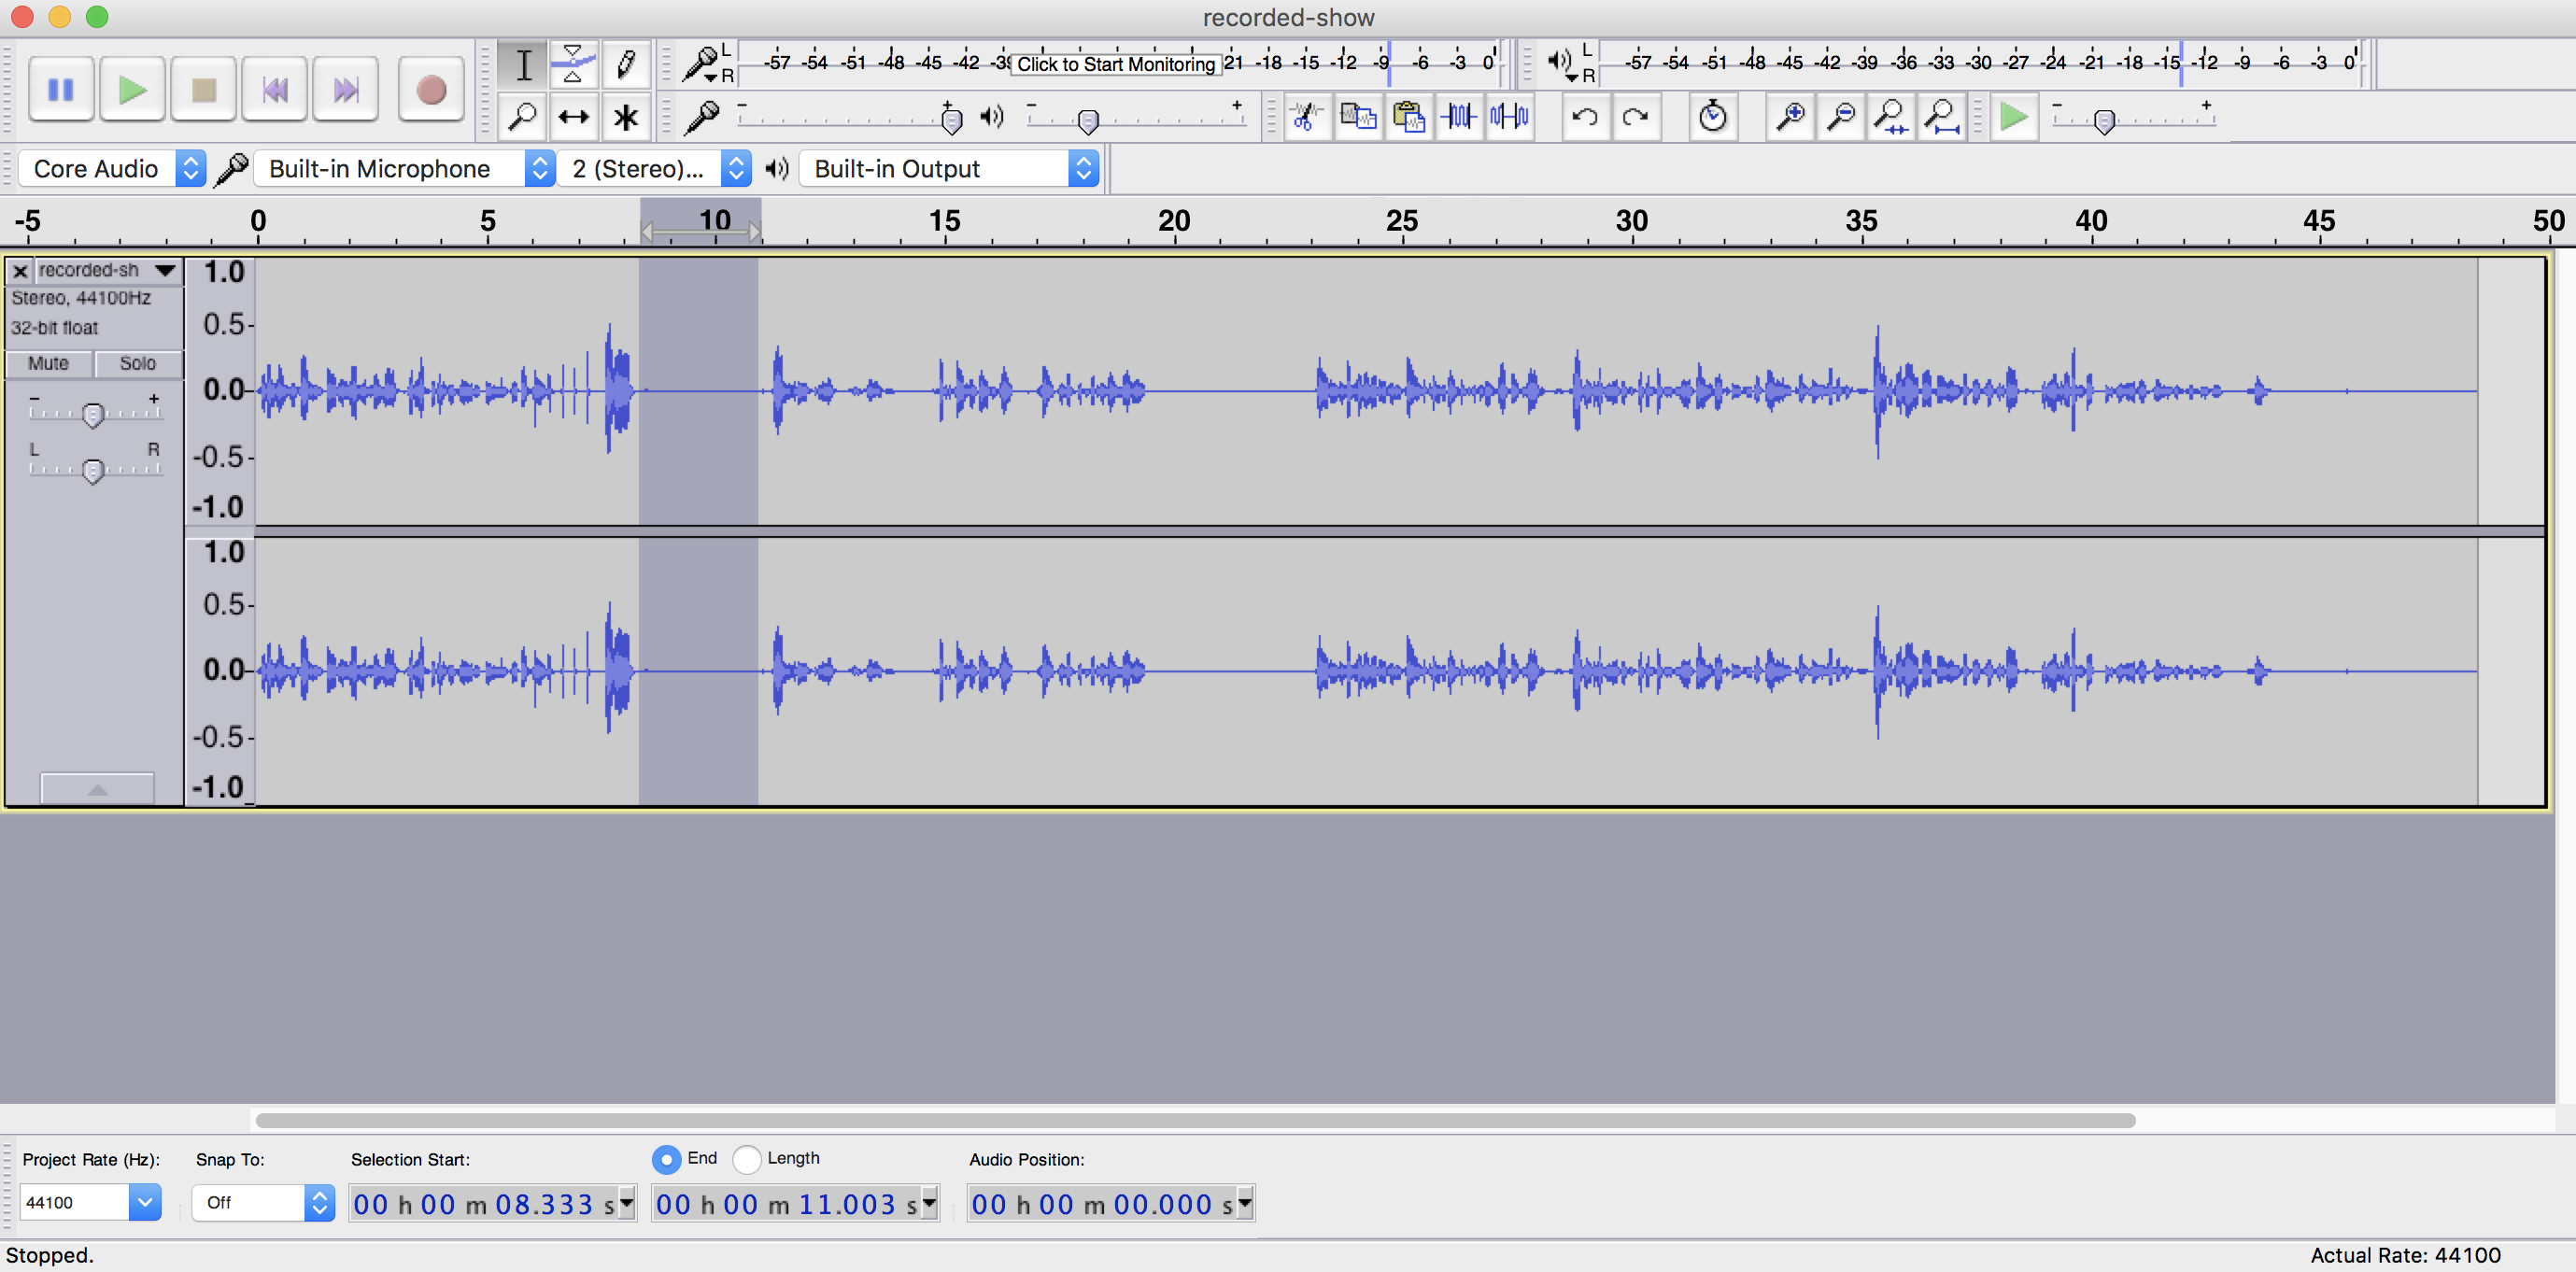
Highlight the audio you want gone, then go to Edit -> Cut - Alternatively hit the delete key as a shortcut. Do this throughout your track to remove background noise or any dead air.
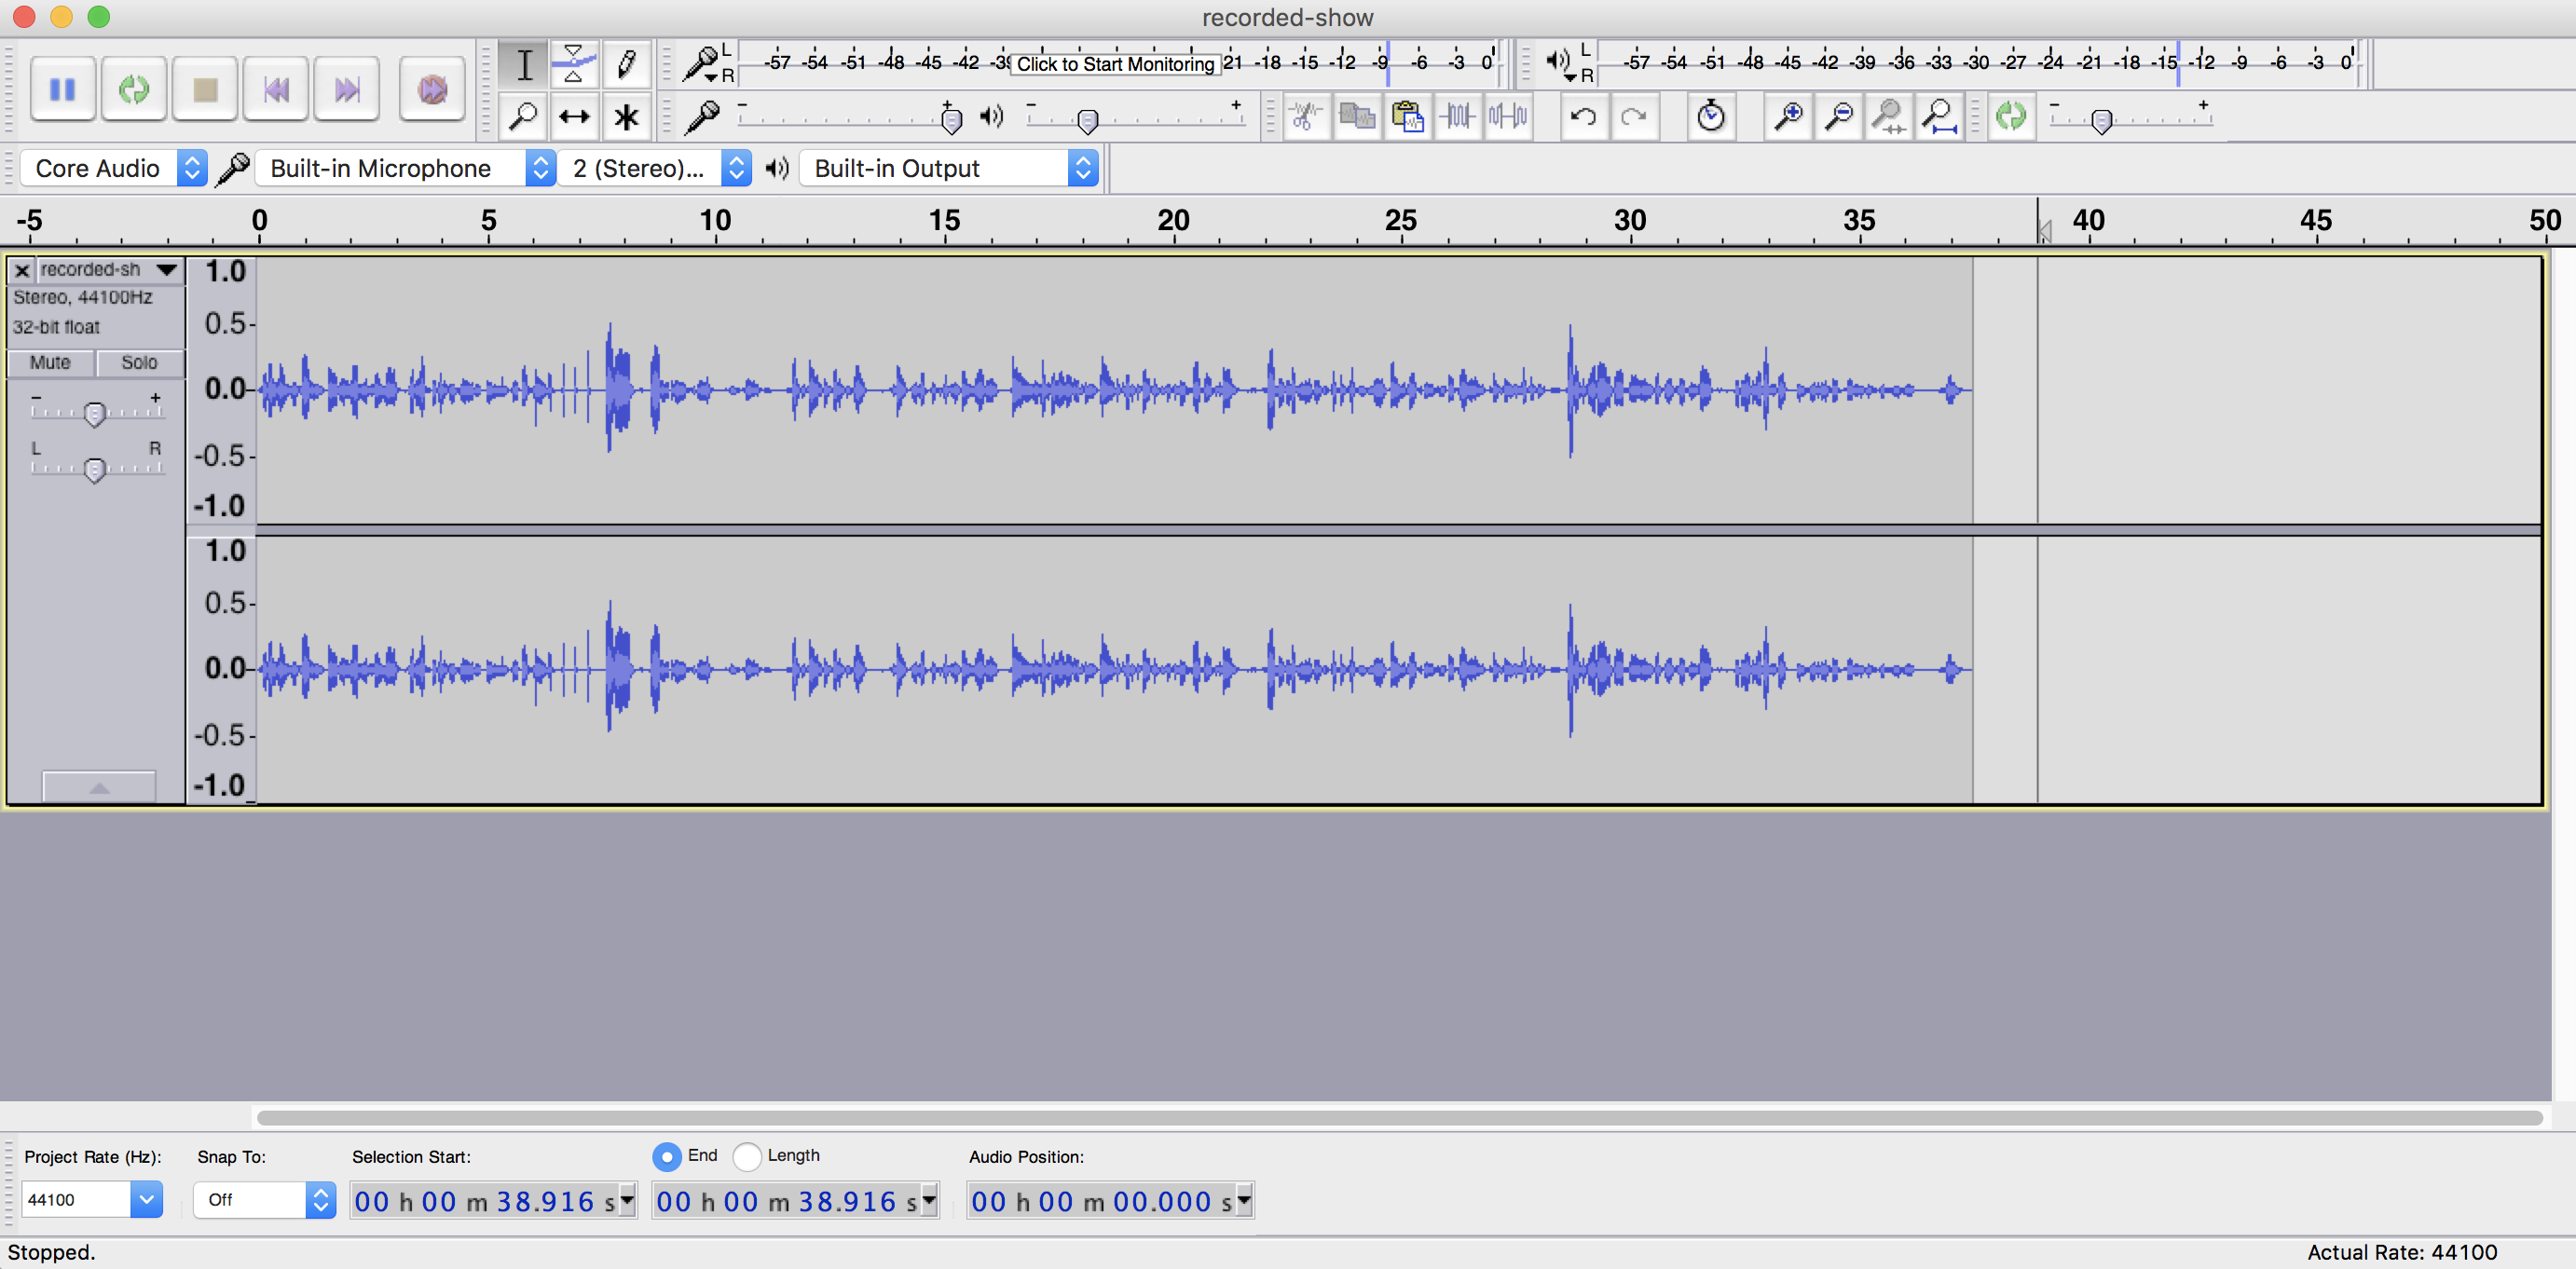
Fade In & Fade Out
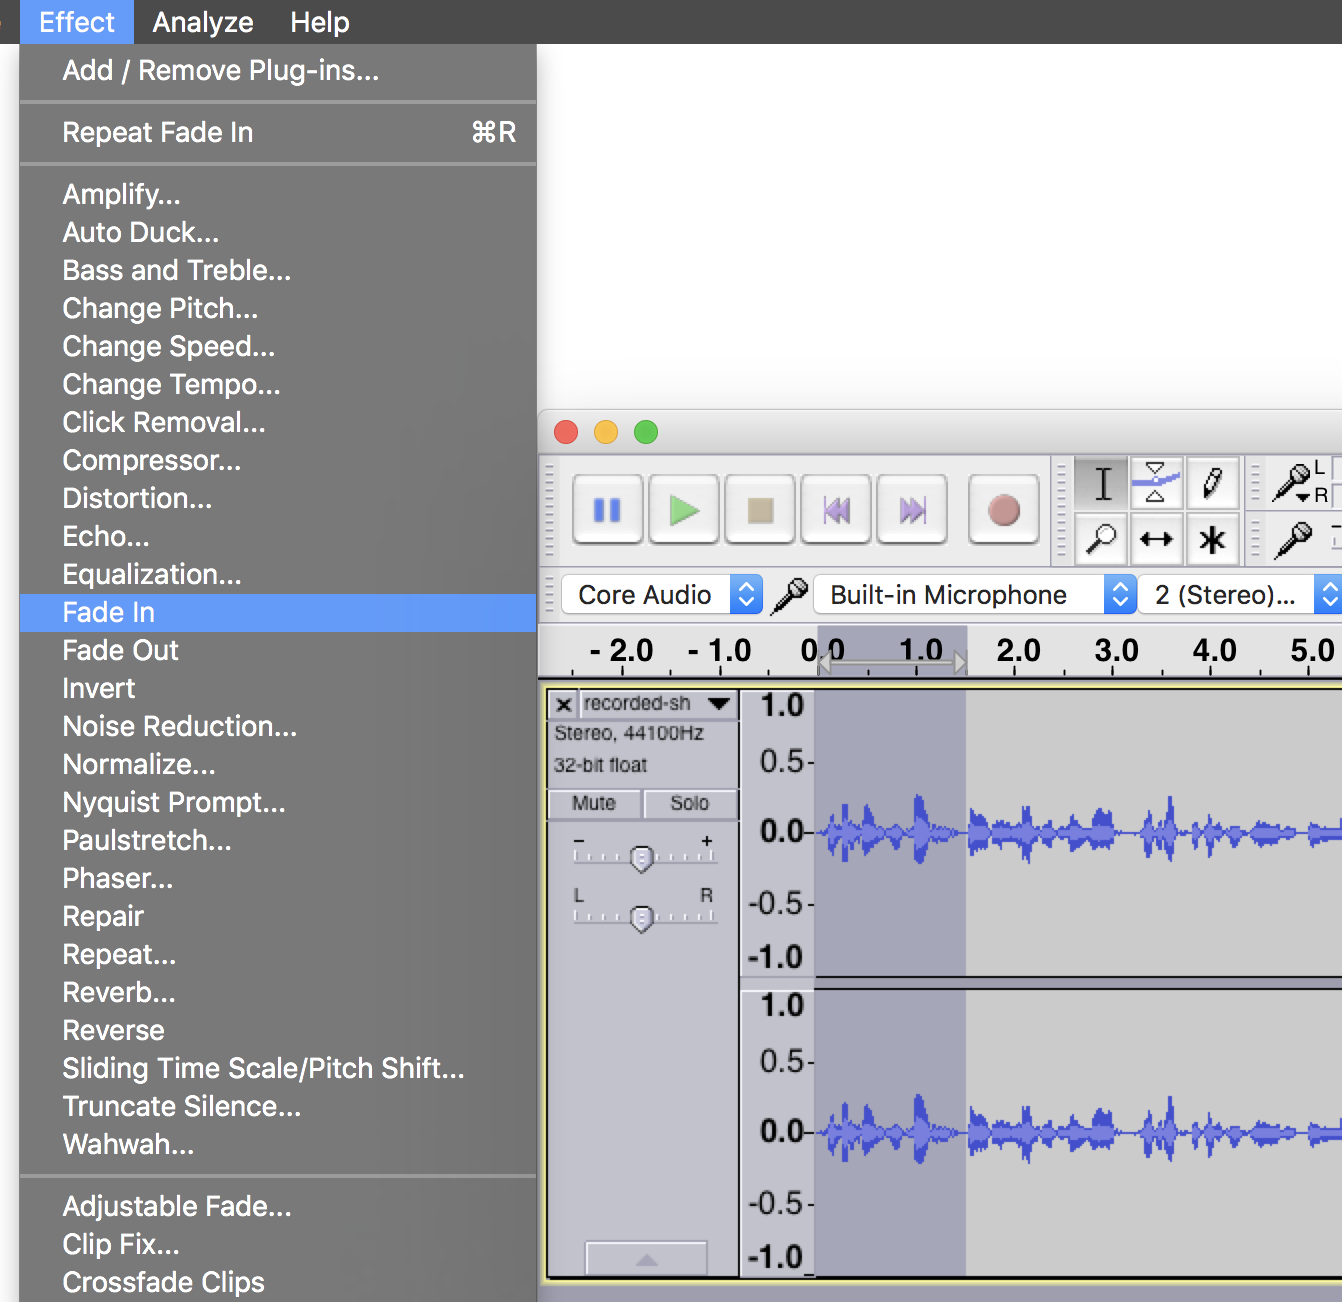
Faders are a nice way to introduce your show and it gives it a bit of a professional feel that others follow in the radio industry. Highlight the start of your show, then go to Effects -> Fade In.
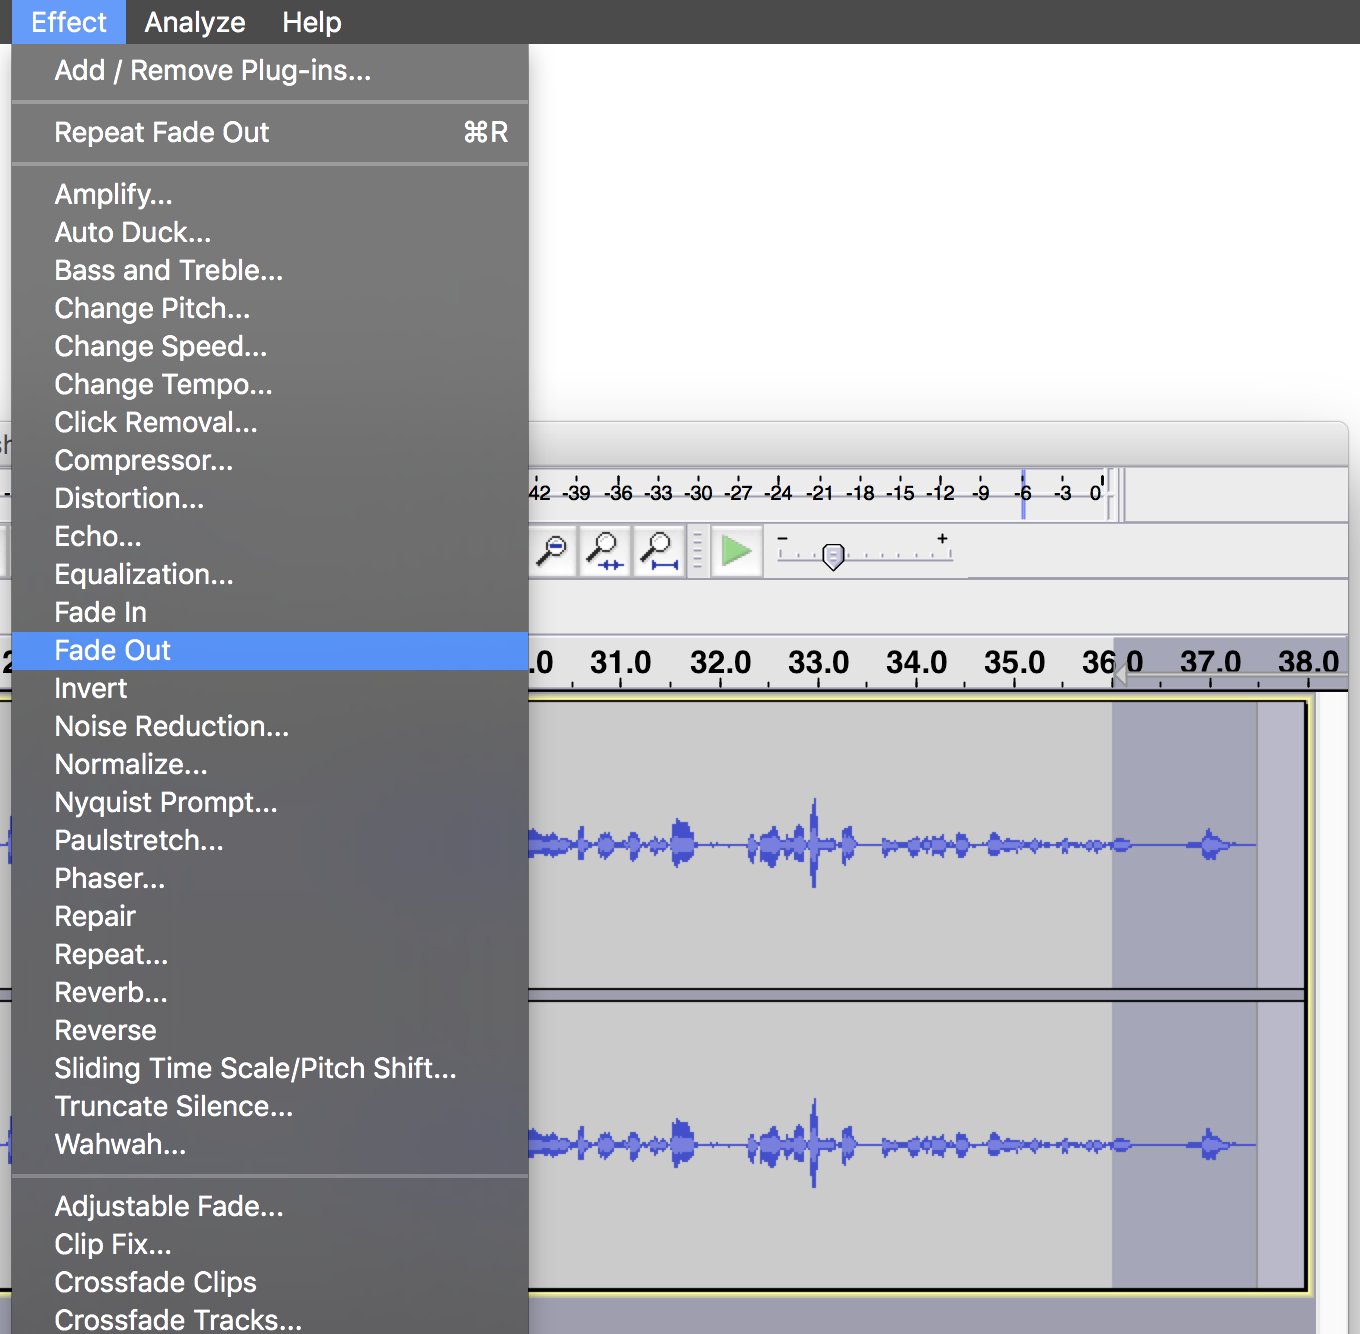
Do the same for the fade out. Highlight the end section of your show, then go to Effects -> Fade Out.
Fades should only last for a few seconds. Short fades are a bit too abrupt and long ones can be irritating, so try and find the right balance for your show.
Truncate Silence
A common problem recordings have are gaps of silence. These can be quite common in voice overs as the presenter may pause for a few seconds, but this doesn't make for interesting listening! You could cut each section of dead air, which is fine for a minute of audio, but not so much for an hour or two.
Remove all silence with just 1 click. Highlight your entire recording, then select Effect -> Truncate Silence. To remove dead silence use these settings:
- Level: -20dB
- Duration: 2
- Truncate to: 0
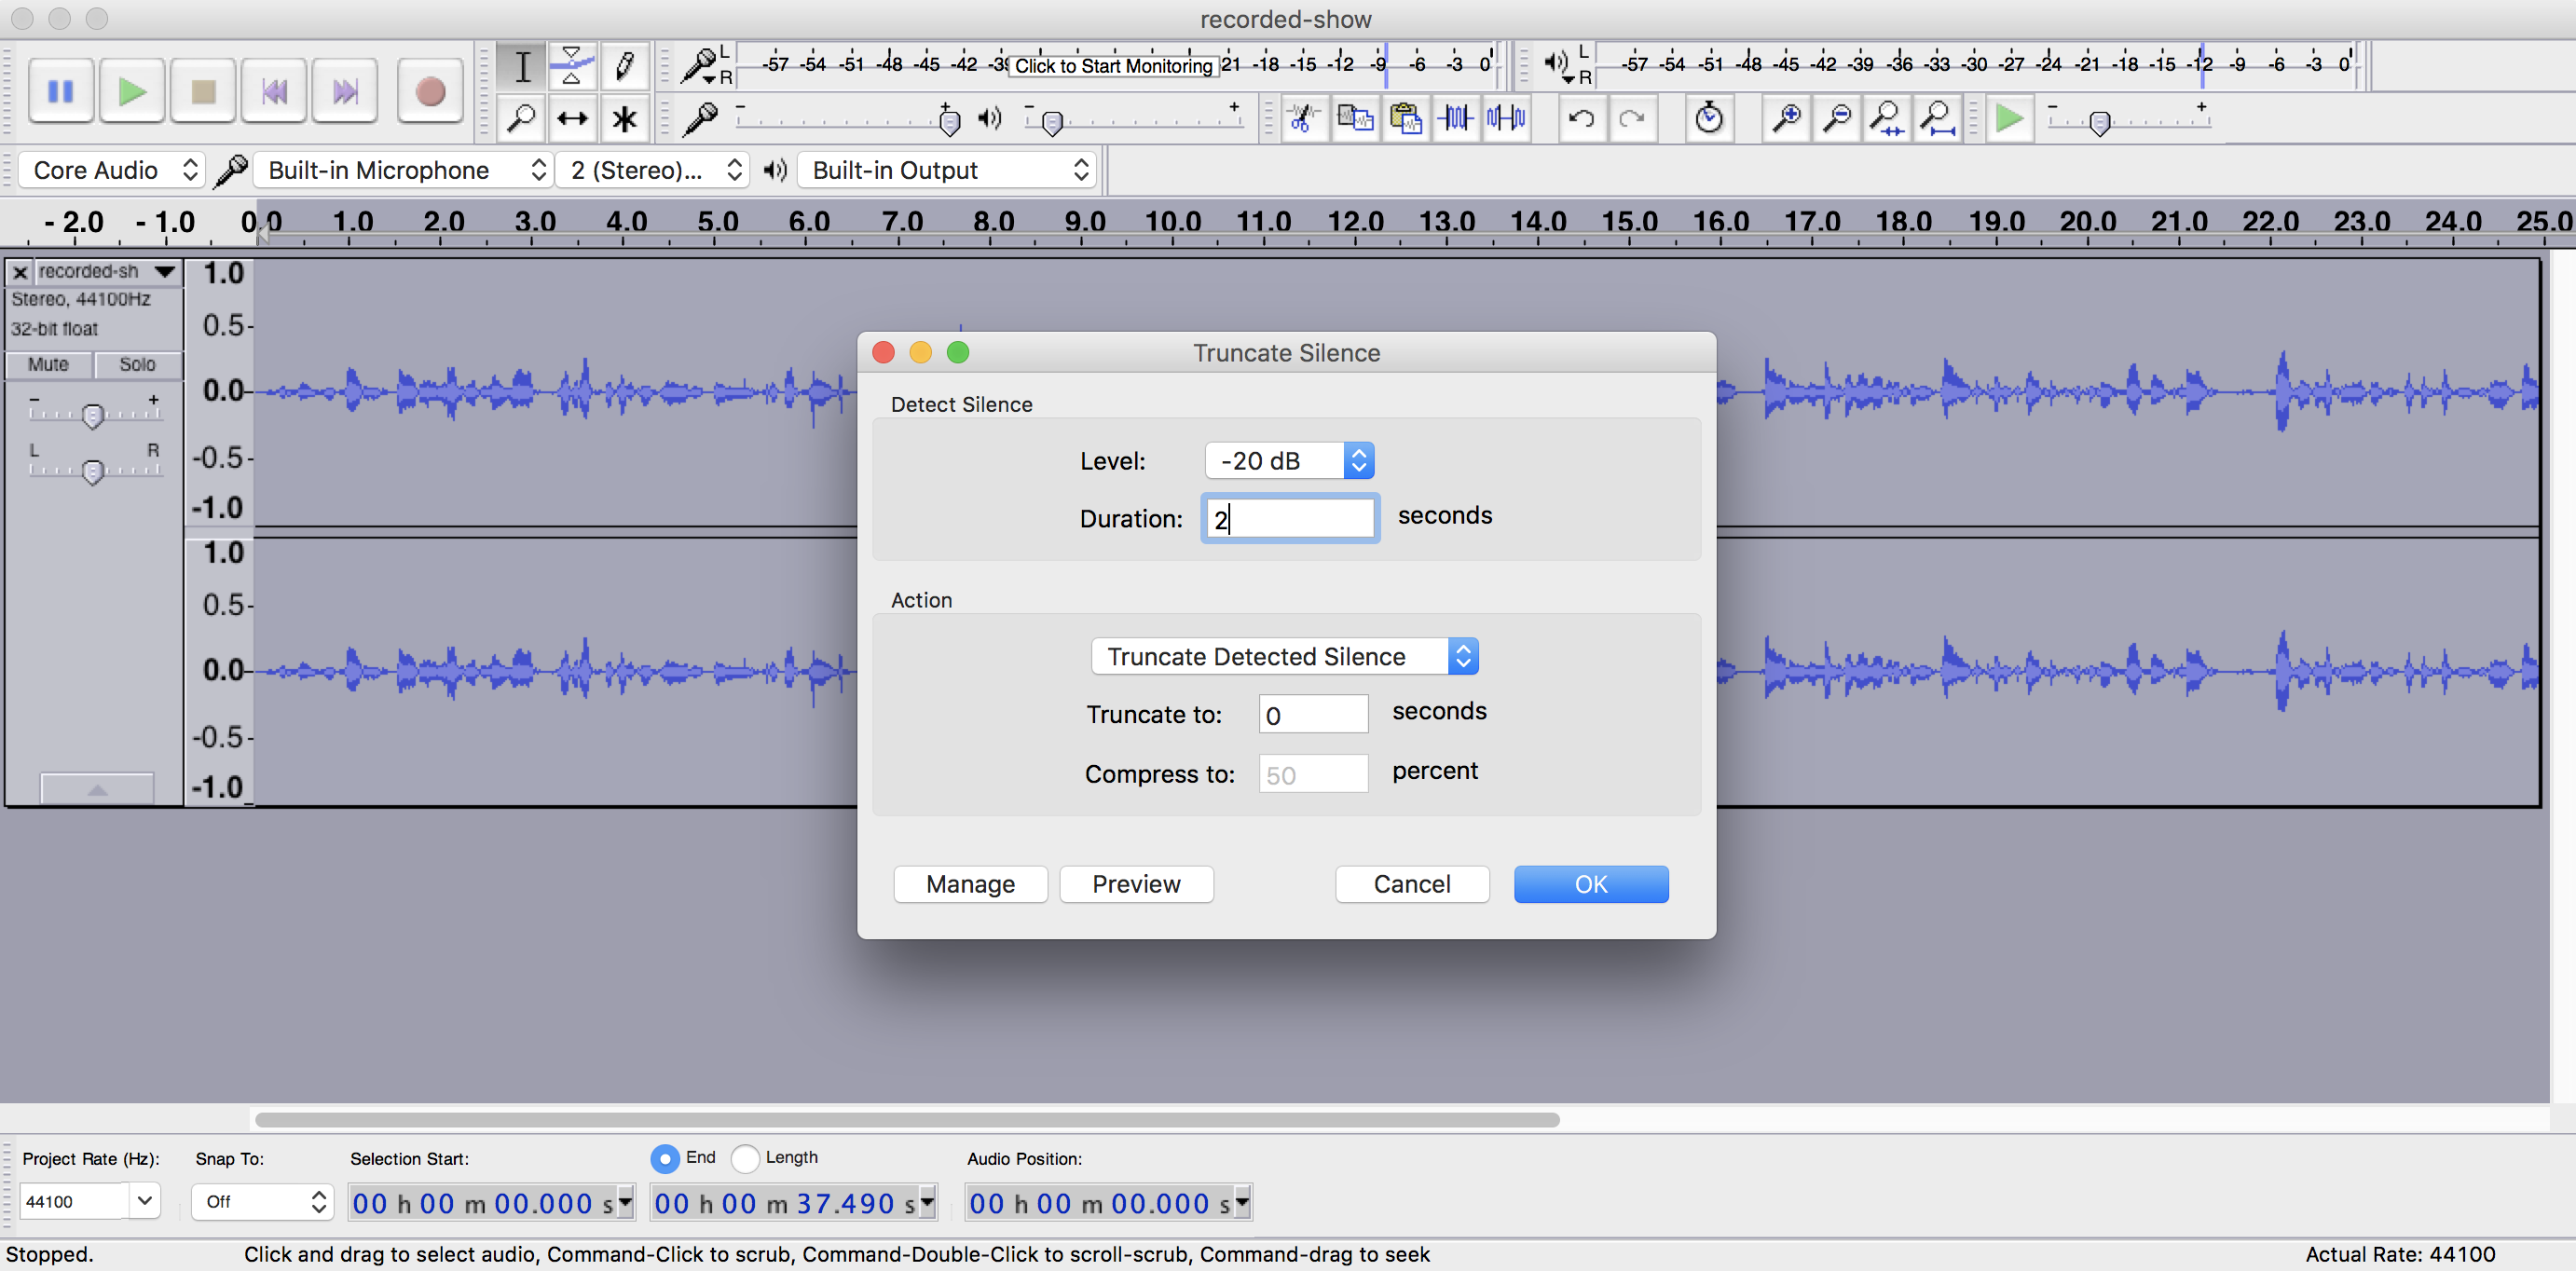
These settings completely remove any silence that's lower than -20dB and 2 seconds or longer. Try modifying these options and previewing the audio to see what works best for your show. Be careful though as you could cut things together to sound abrupt, so you need the odd pause between your audio to give the listener a break.
Amplify or Normalize?
Audio that's too quite or too loud can be either amplified or normalized to balance sound levels. To raise the volume levels select a portion of your track or select all of it. Then go to Effects -> Amplify. Either adjust the slider or enter a dB number - Preview the change, keep modifying the dB level until it's at a level you're comfortable with.
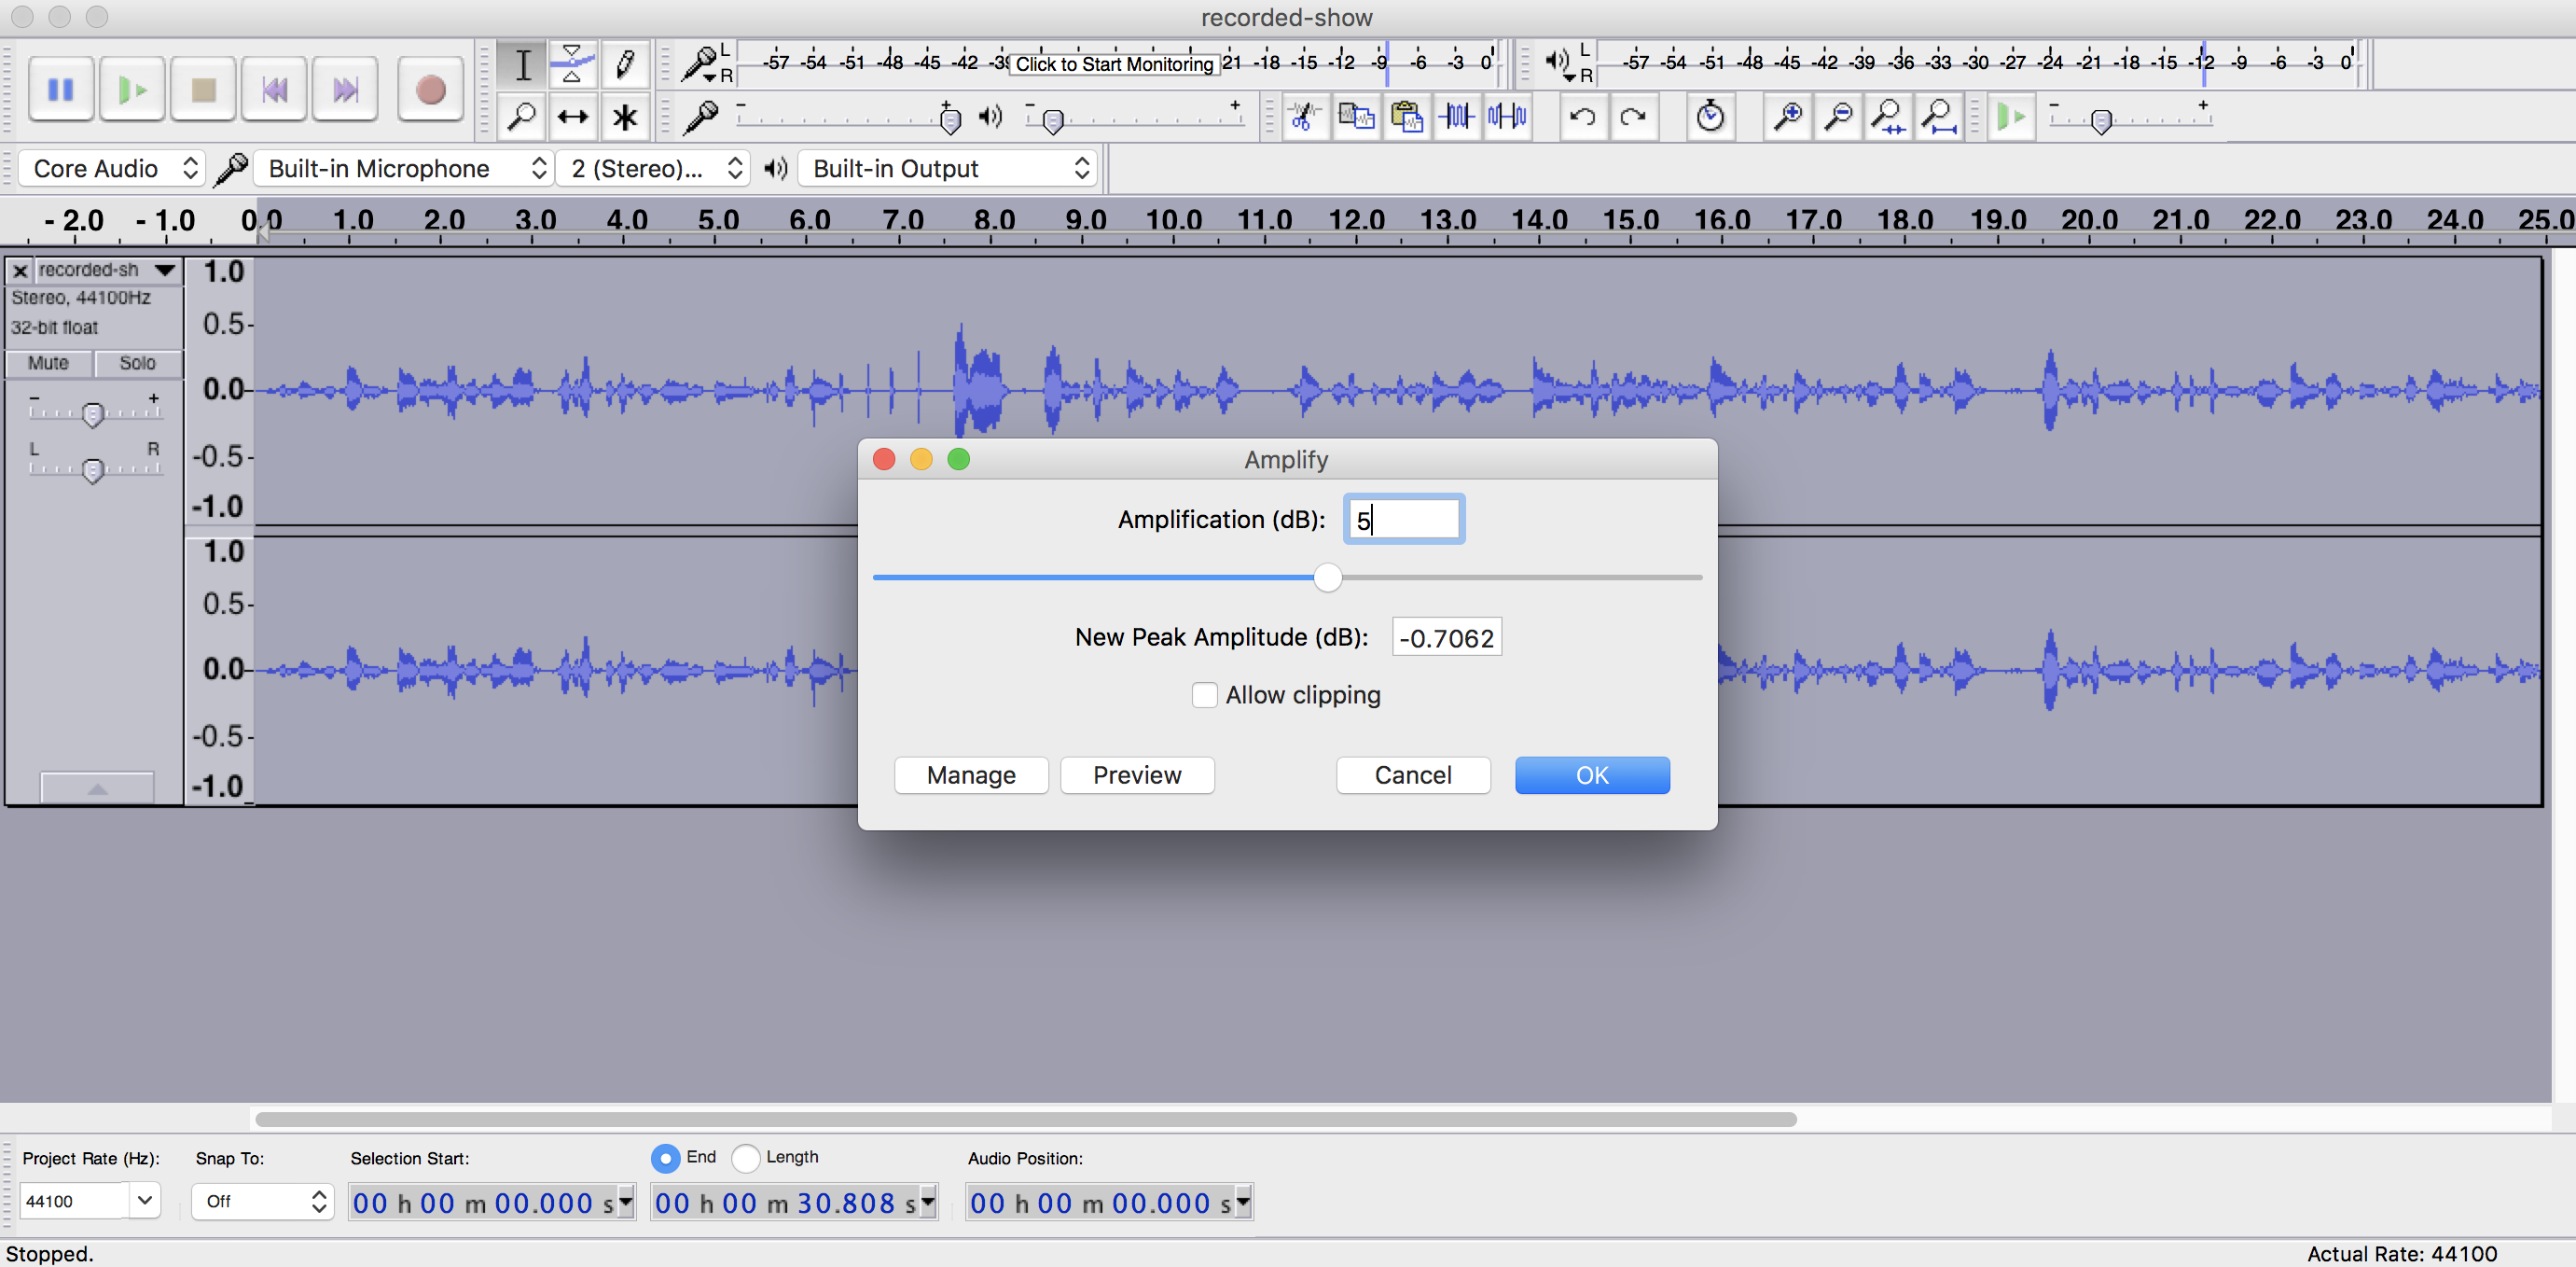
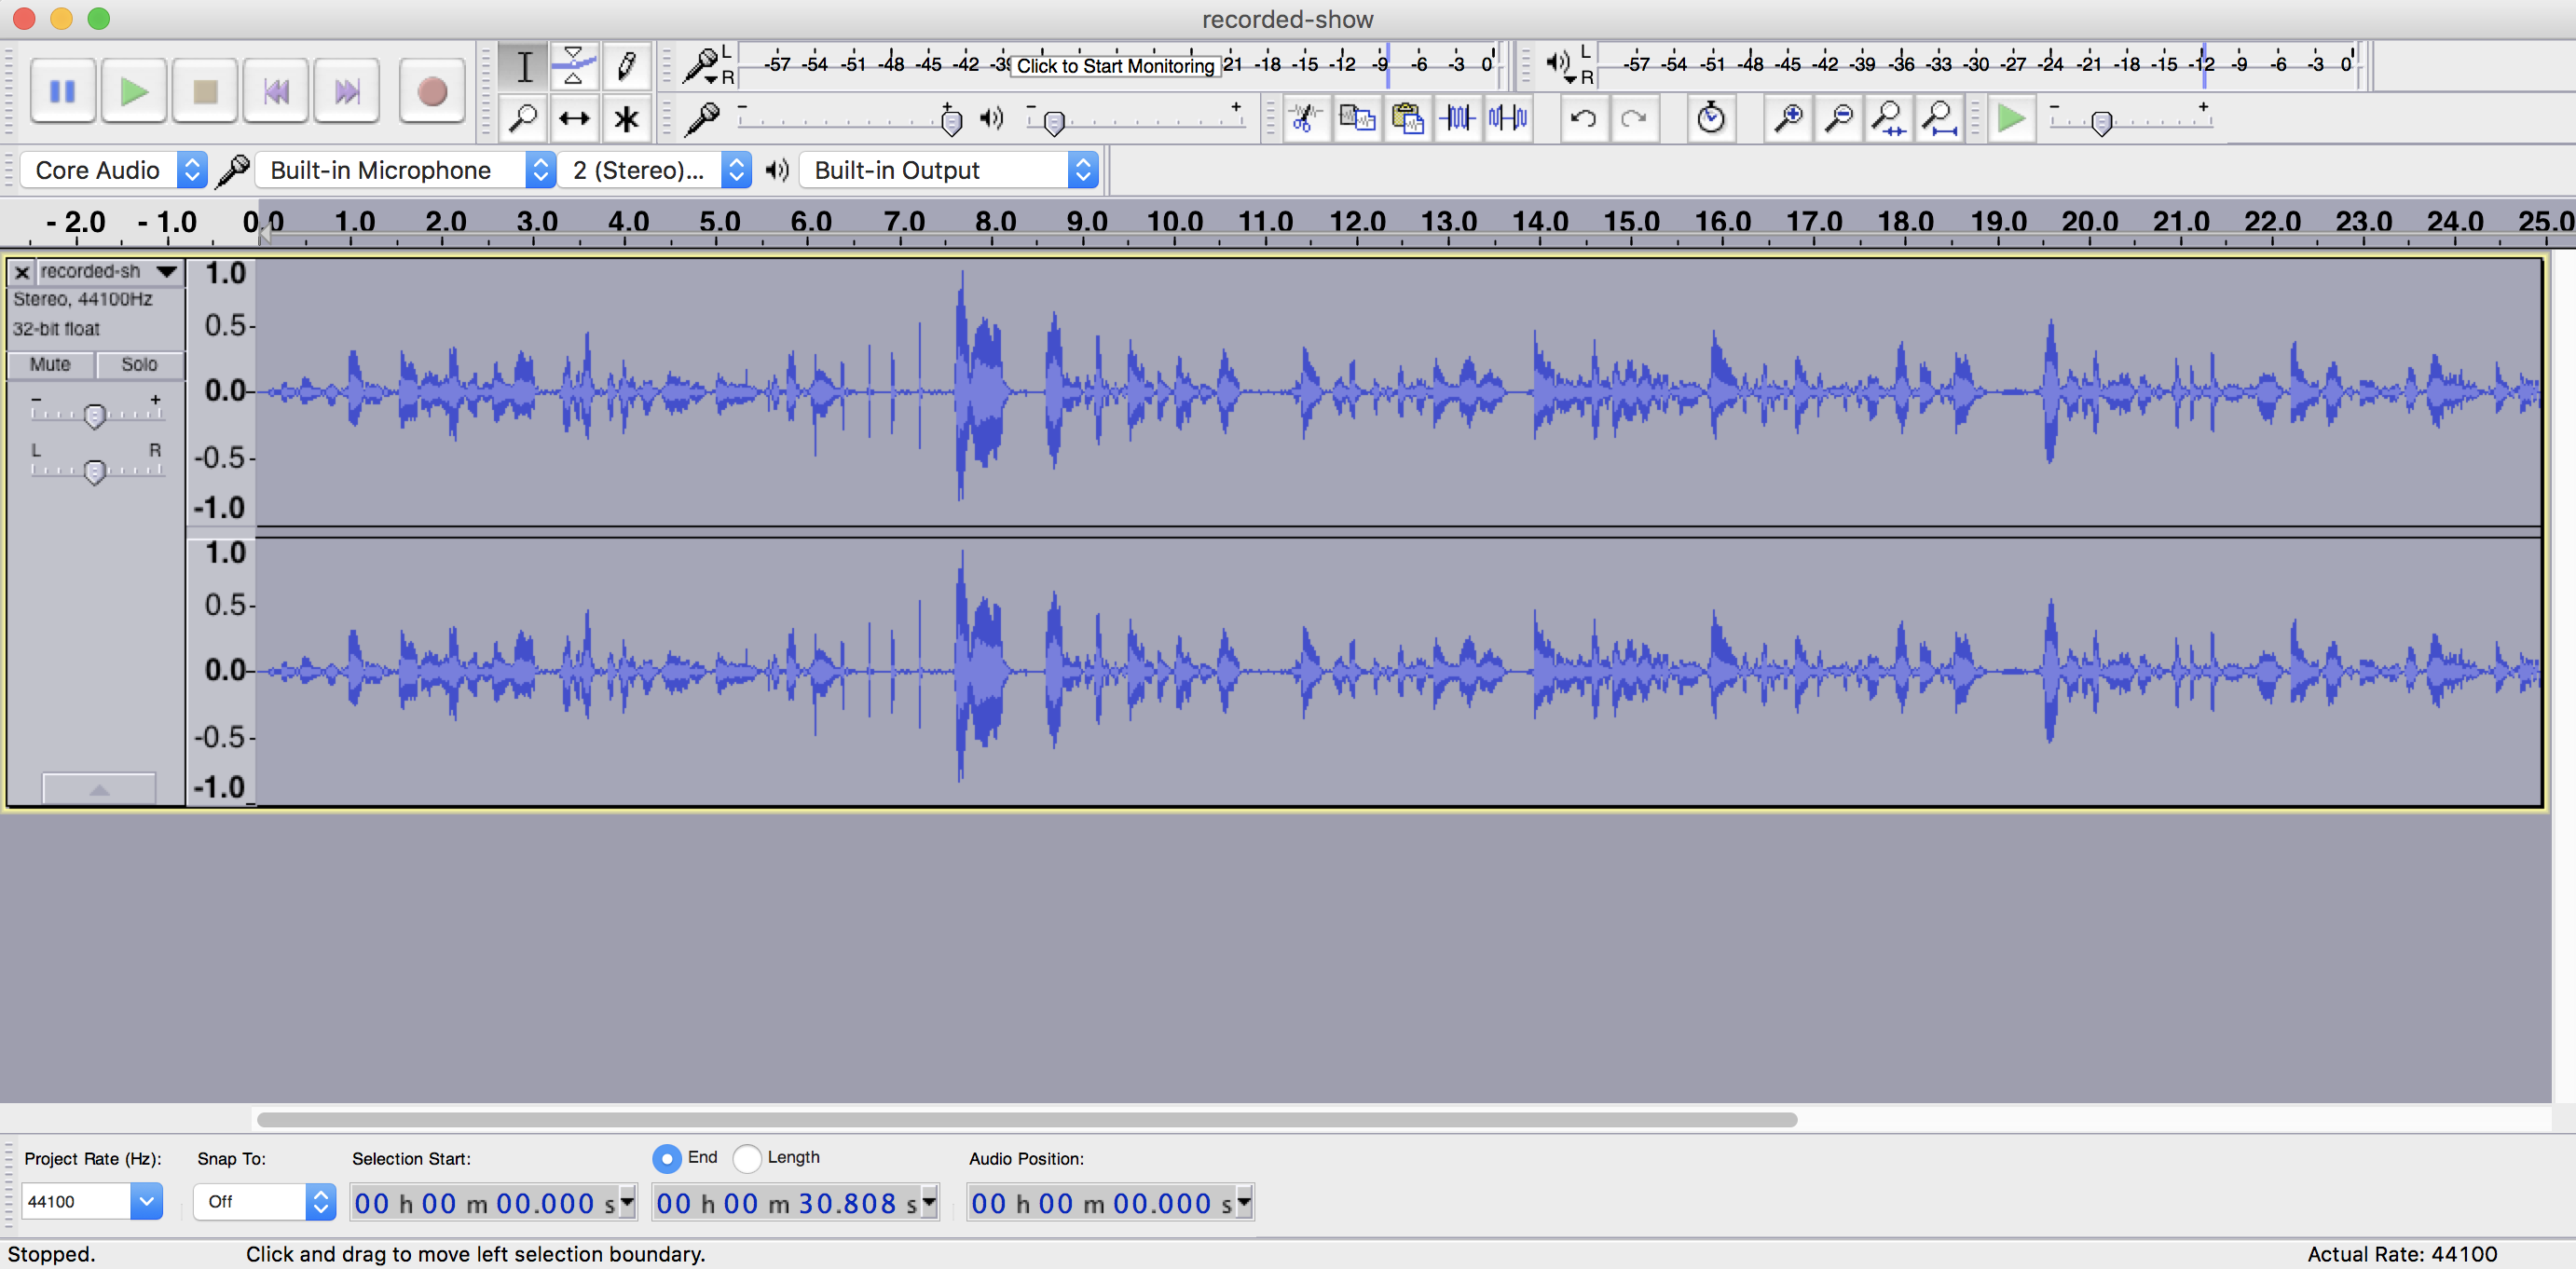
When the changes have been applied you should notice the waveform get bigger.
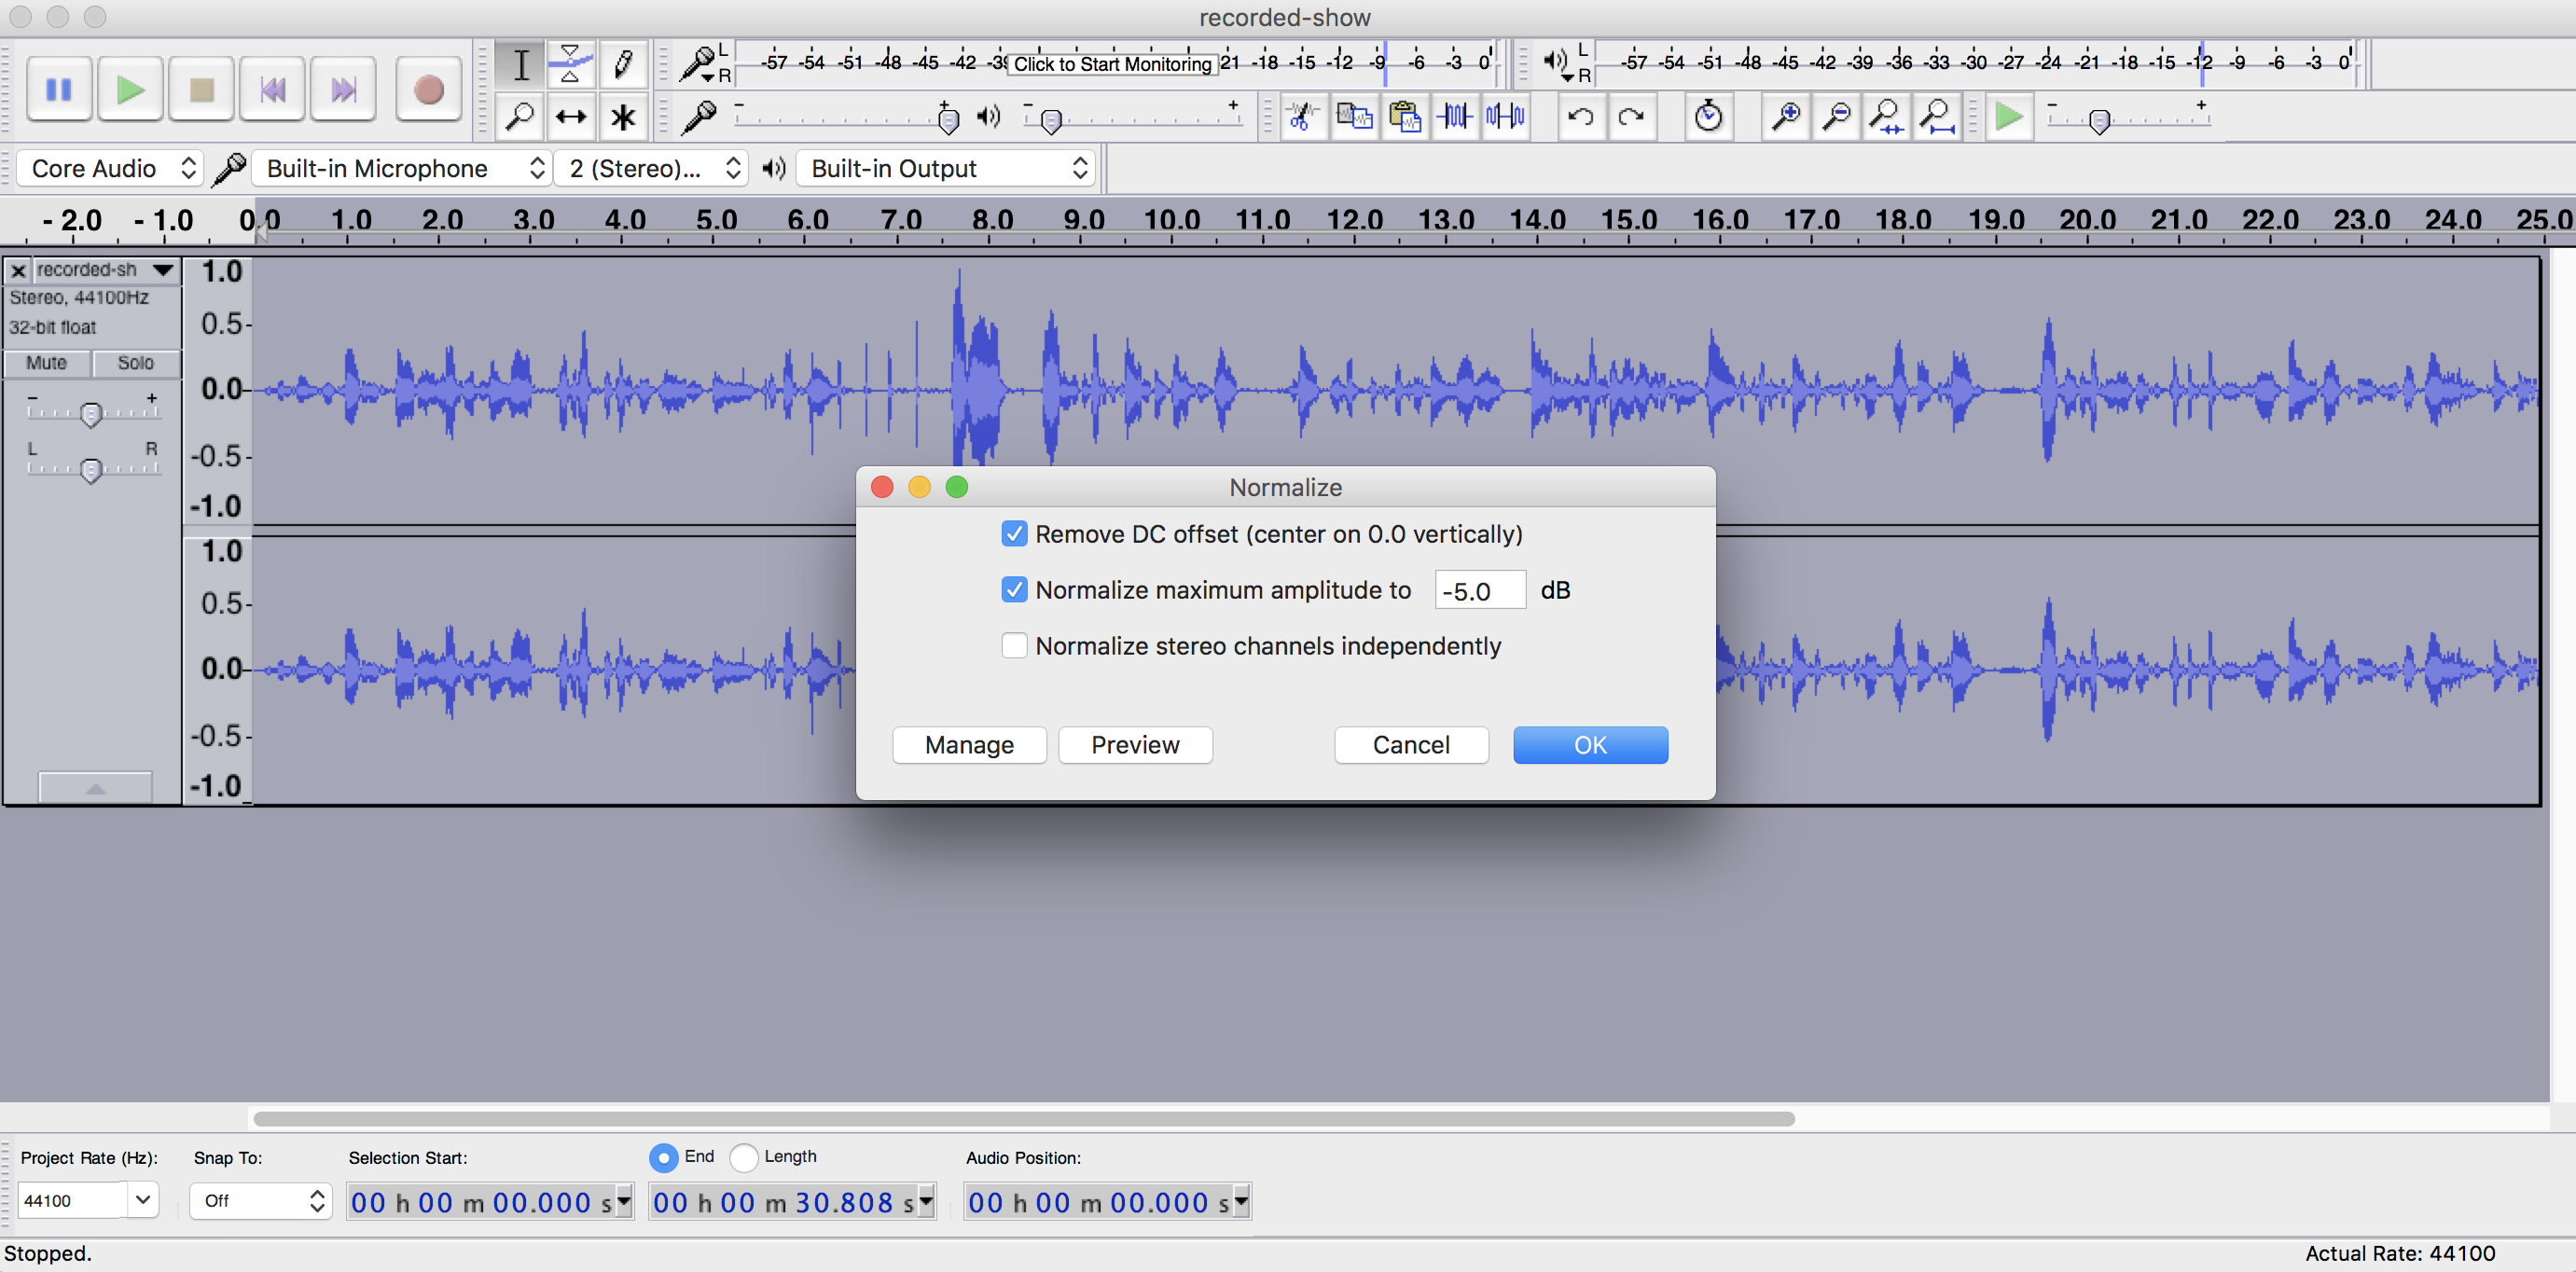
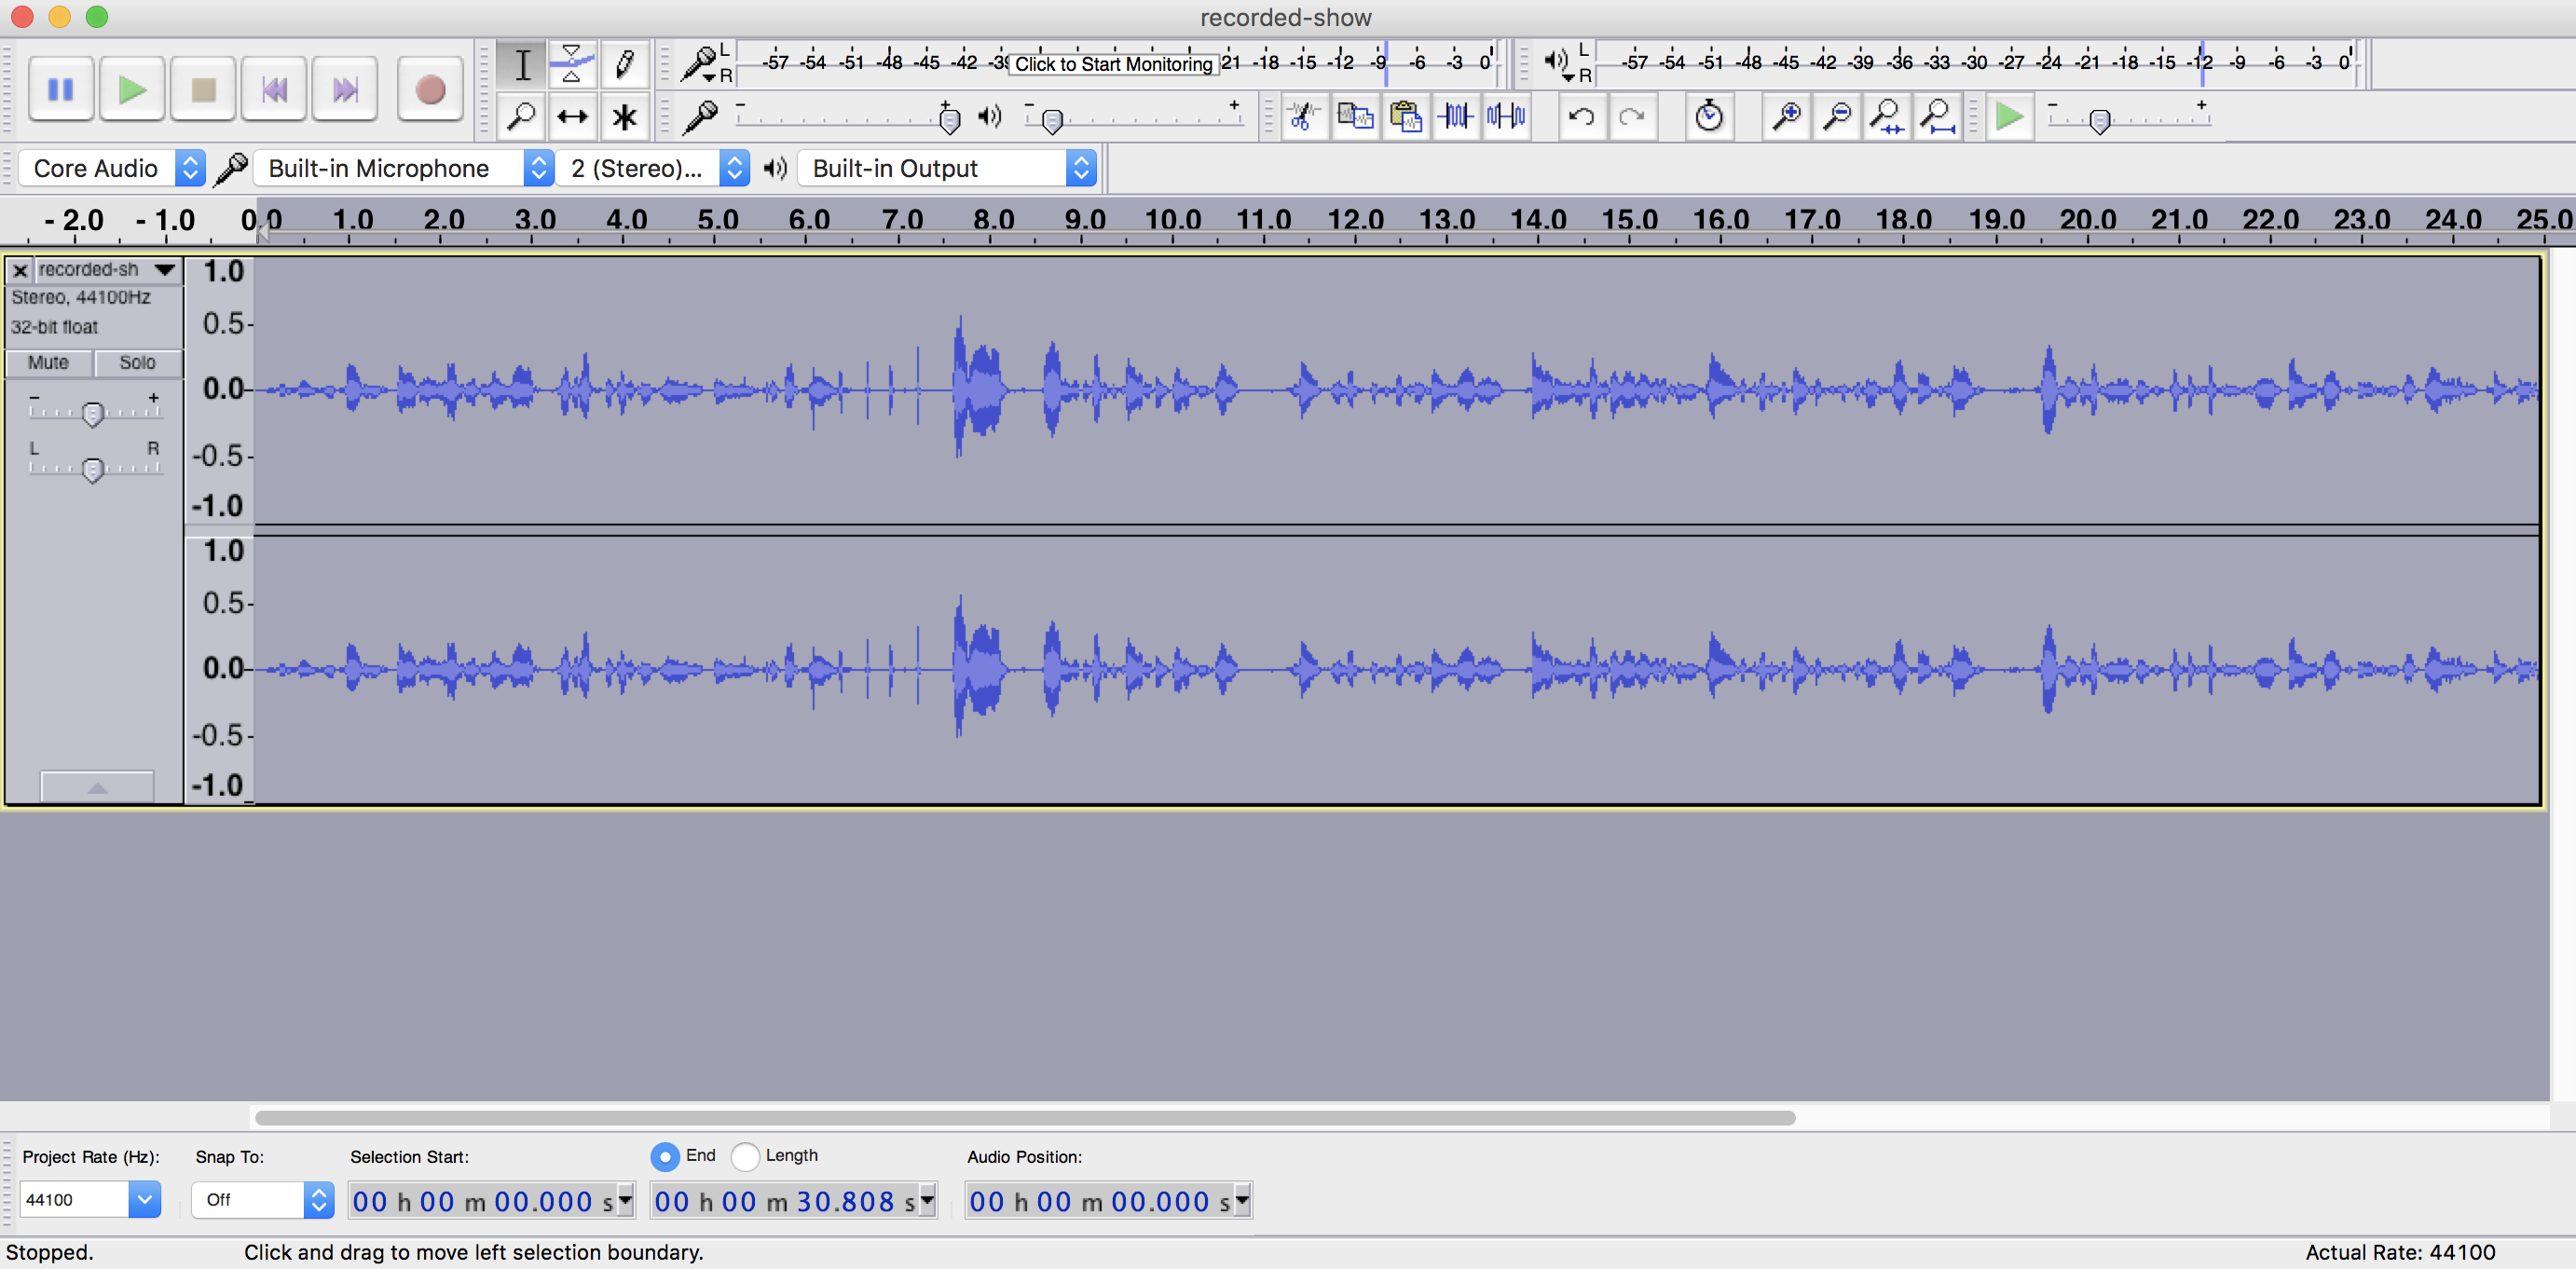
Alternatively you can reduce the volume levels if it's too loud. Select your track, then go to Effects -> Normalize. Enter a dB maximum amplitude you want to set the noise limit at and preview changes.
You should see the waveform get smaller, showing that the volume levels have decreased.
Compress Volume Levels
Tracks have peaks and dips, these are represented in the waveform as sharp lines that go up high and suddenly drop. They often sound harsh on the ears in comparison to the rest of the audio, vice versa it can sound too quite in parts, however you can fix this with compression.
Bring the volume closer together to level it out. Go to Effects -> Compressor - Then adjust the Threshold (-14dB) and Noise Floor (-40dB).
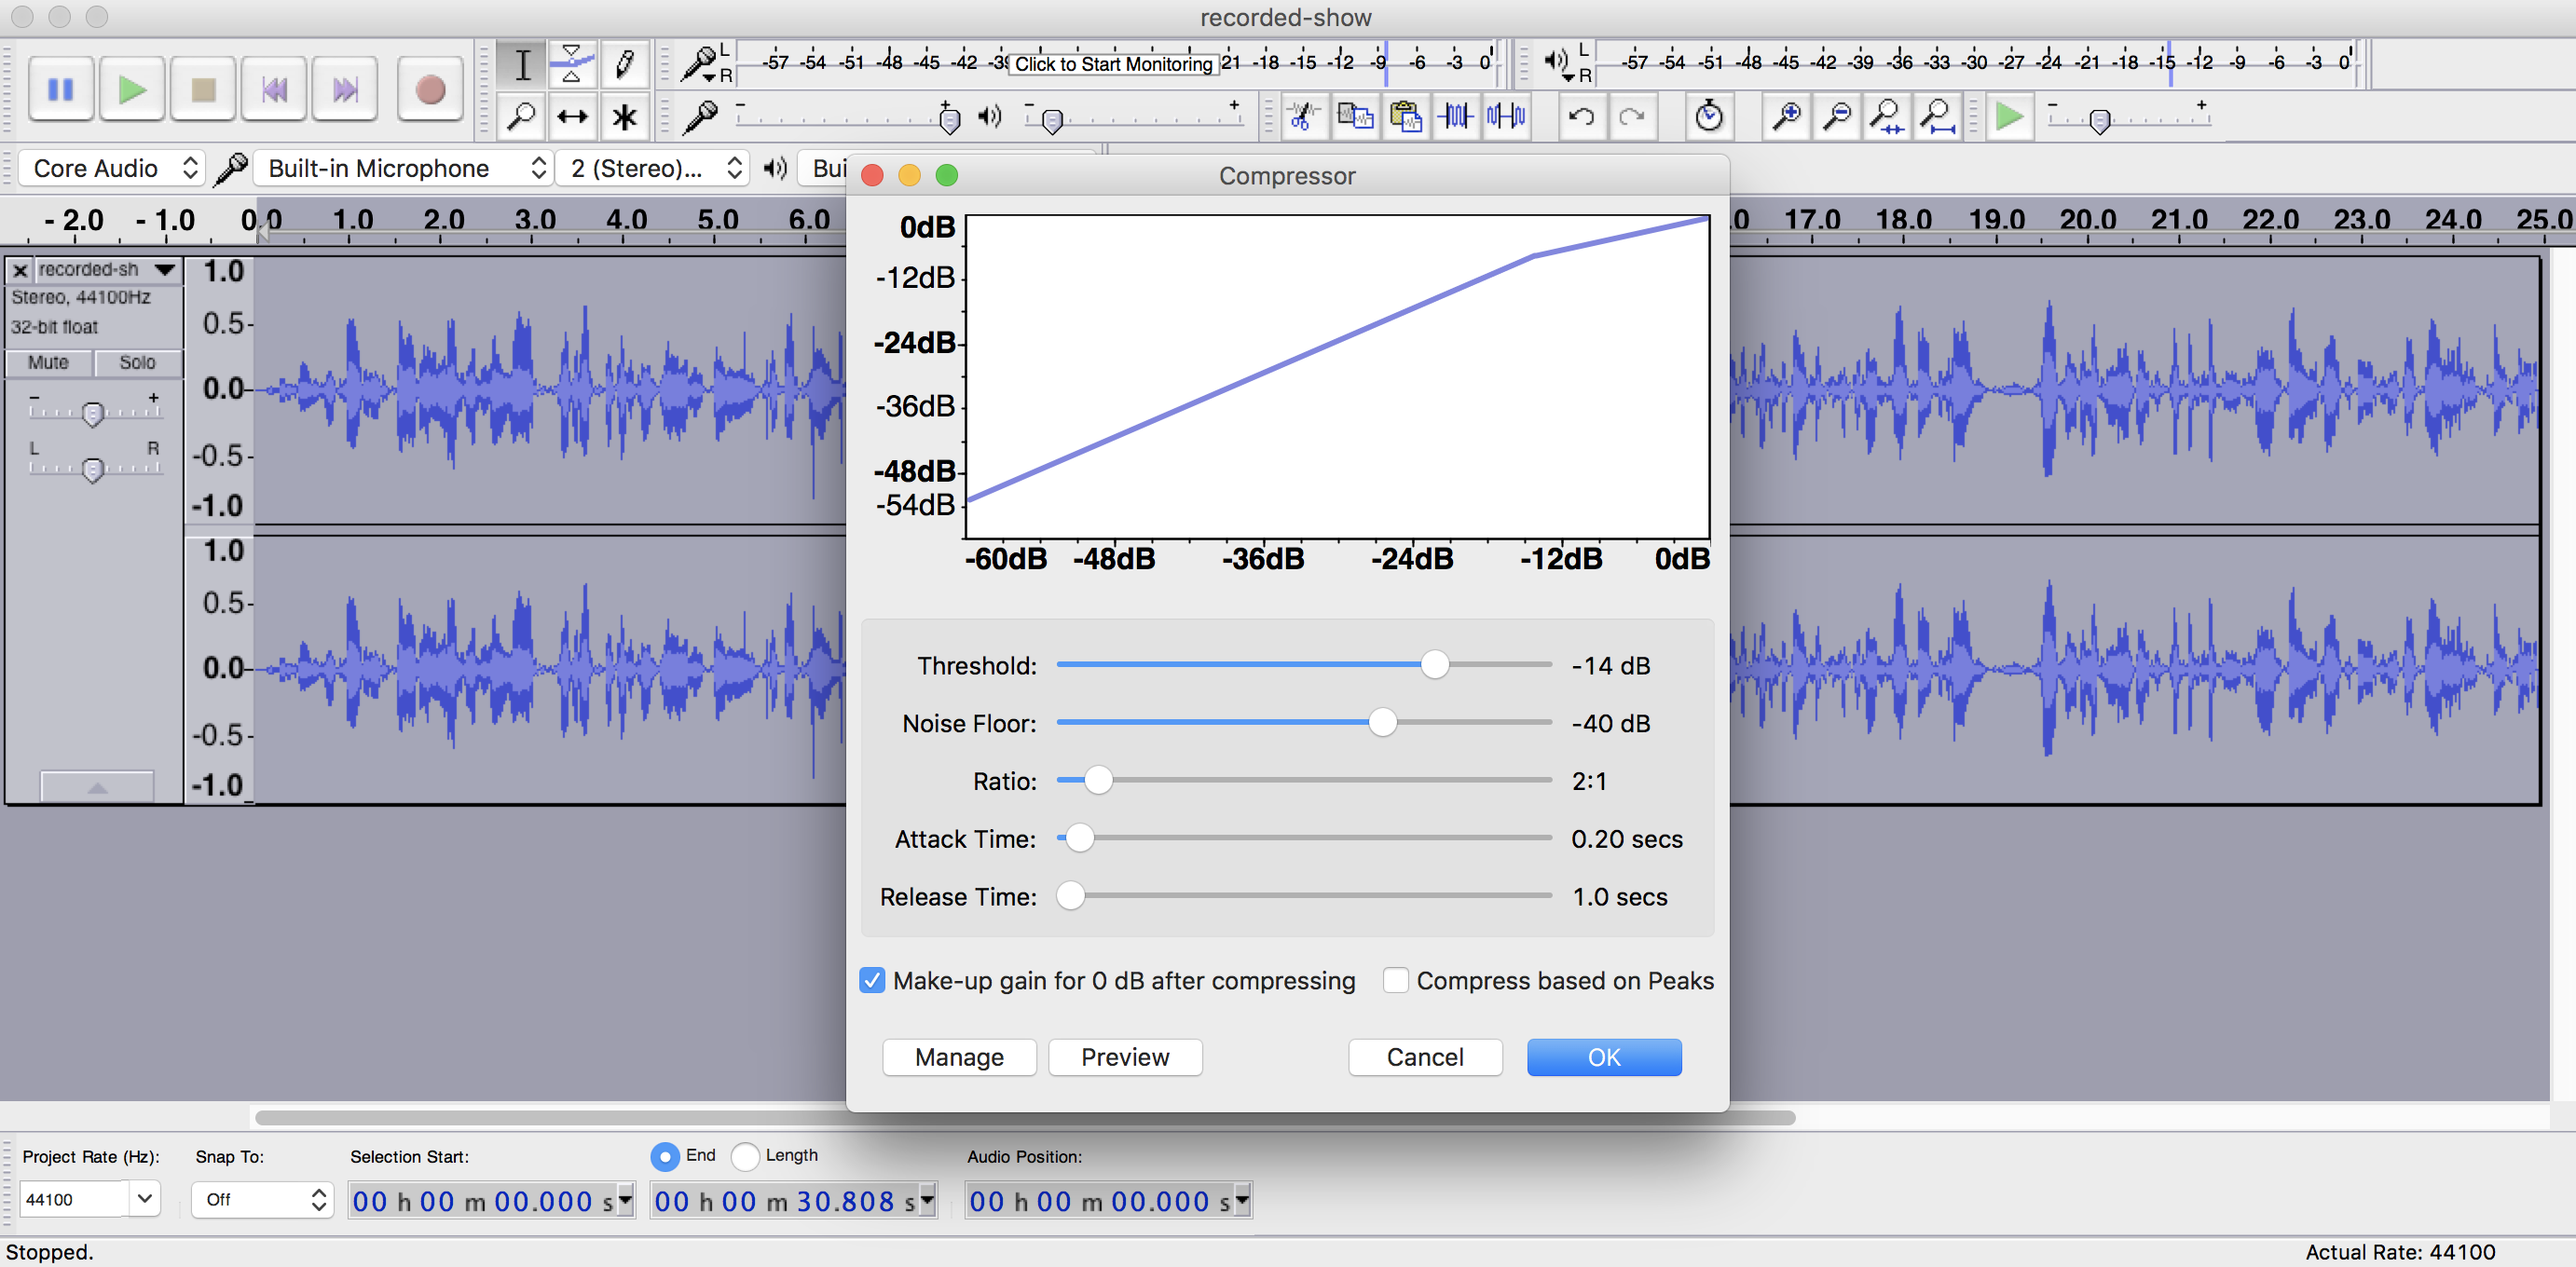
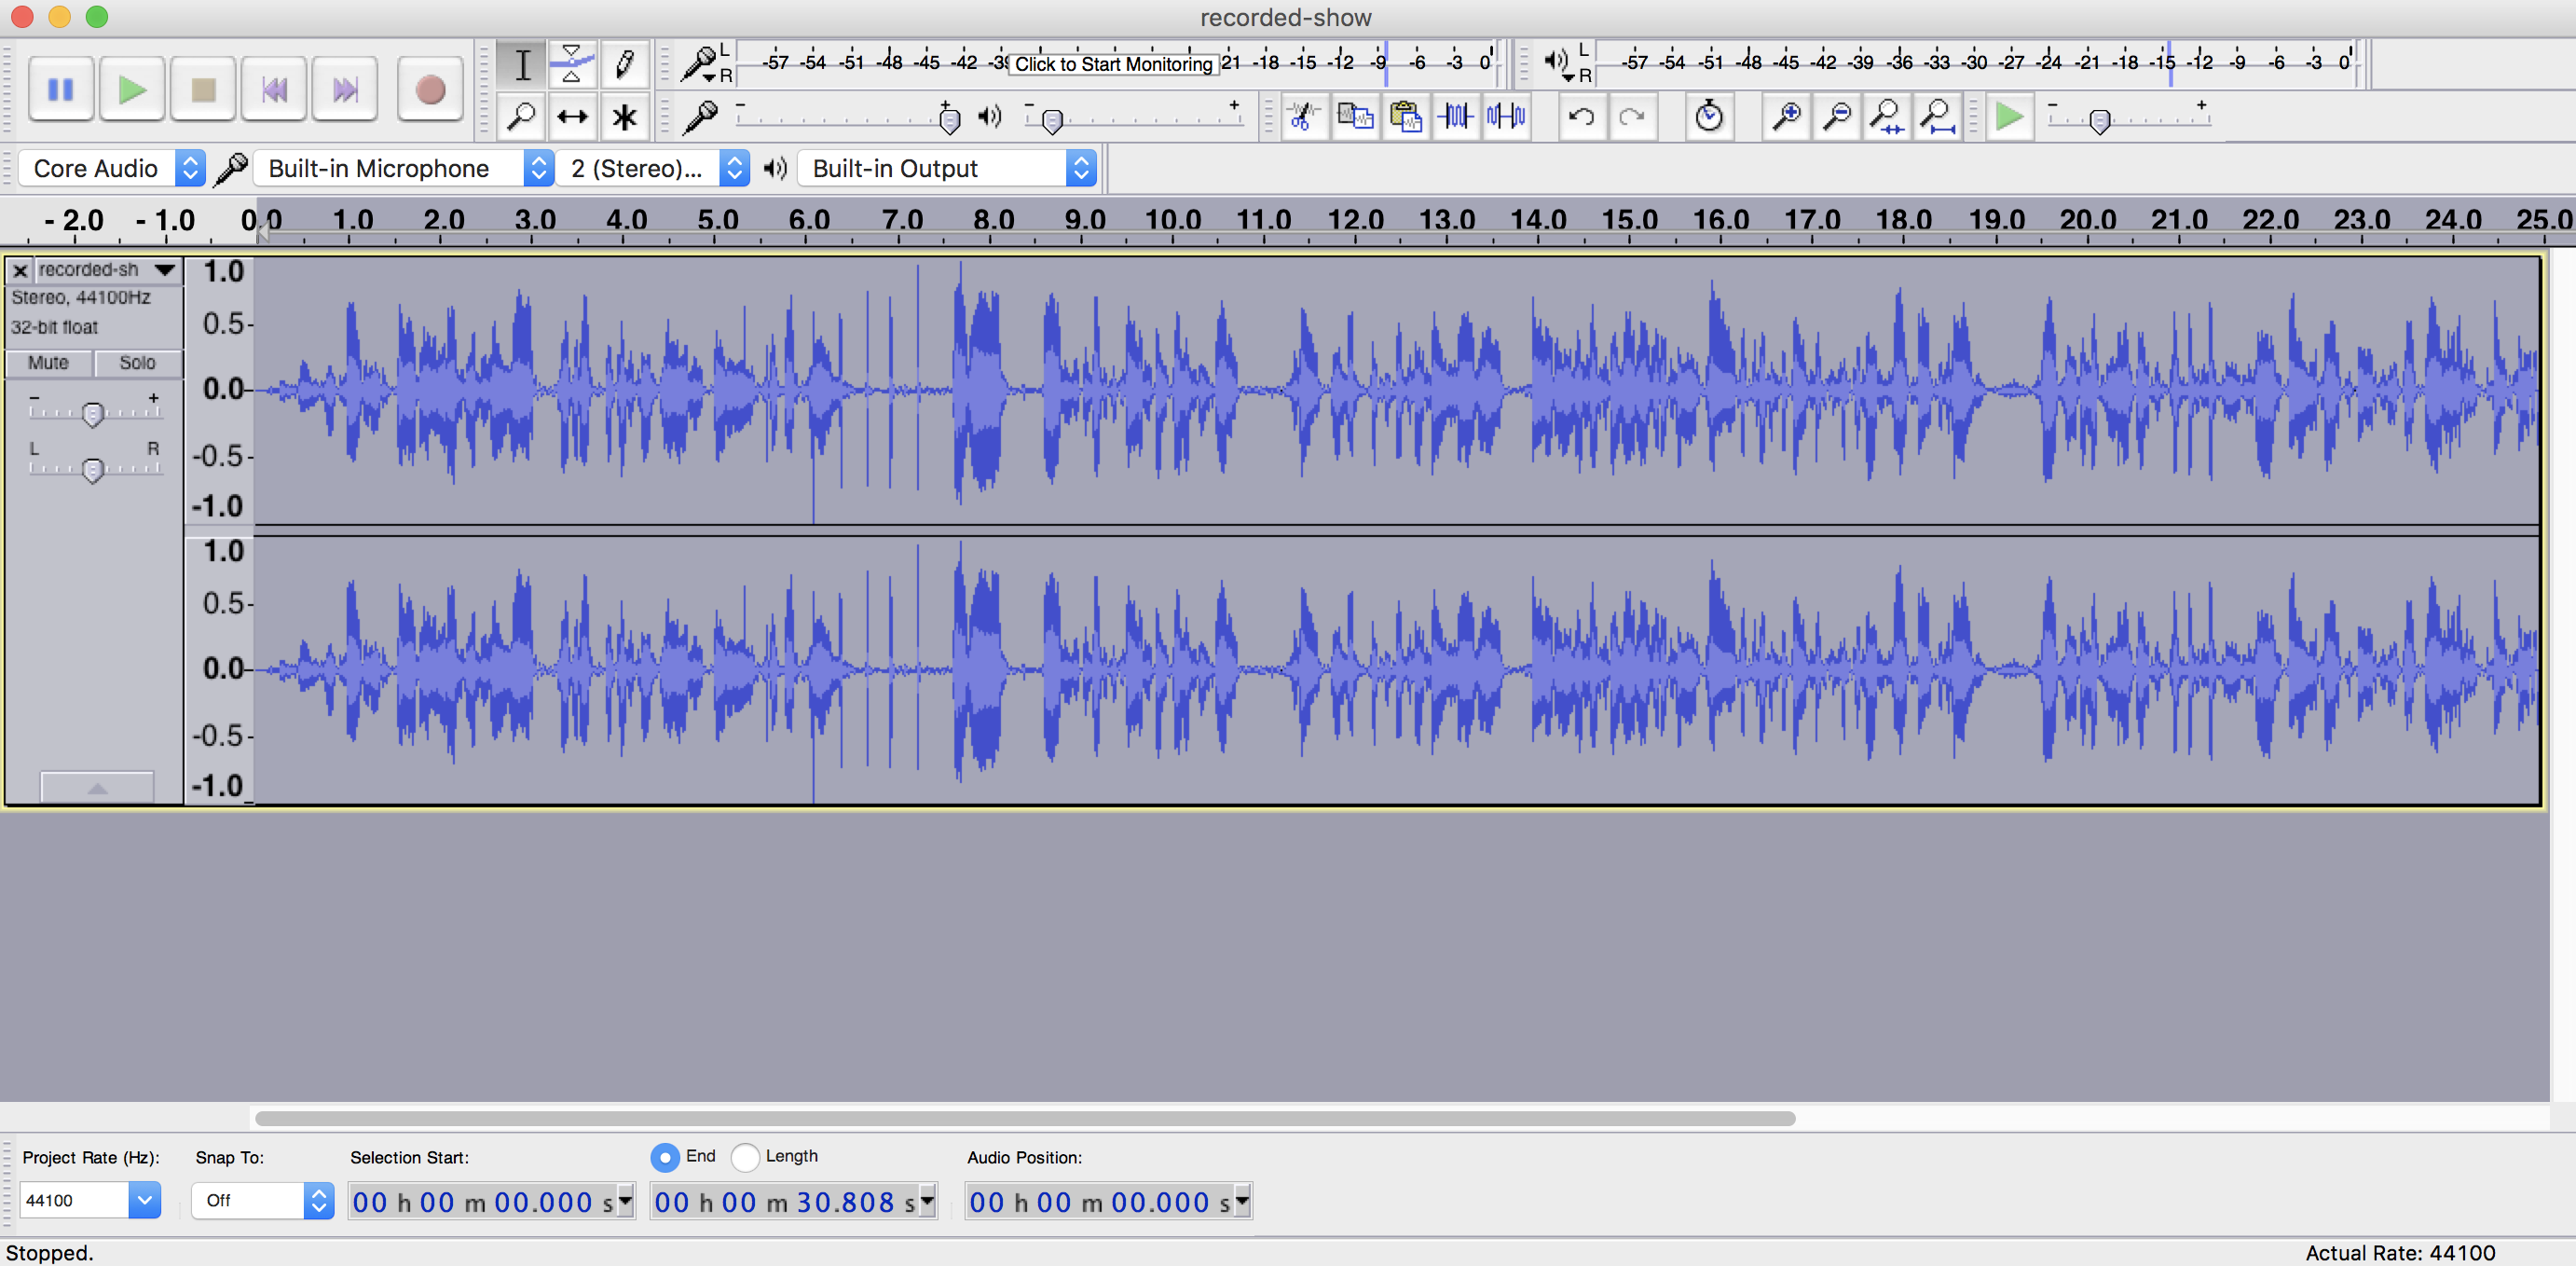
Preview the audio and adjust the sliders to get the best audio possible. When applied the waveform should be closer together and the audio sounds like it's on one level with fewer peaks and dips.
Remove Plosives AKA Harsh Sounds
Plosives are harsh sounding words, for example if you said "Paul Peered at a Pizza Puzzlingly whilst Plucking Pickled Peppers." The P's are plosives - Microphones pick these up quite easily, you can even spot them in a waveform as they are short spikes.
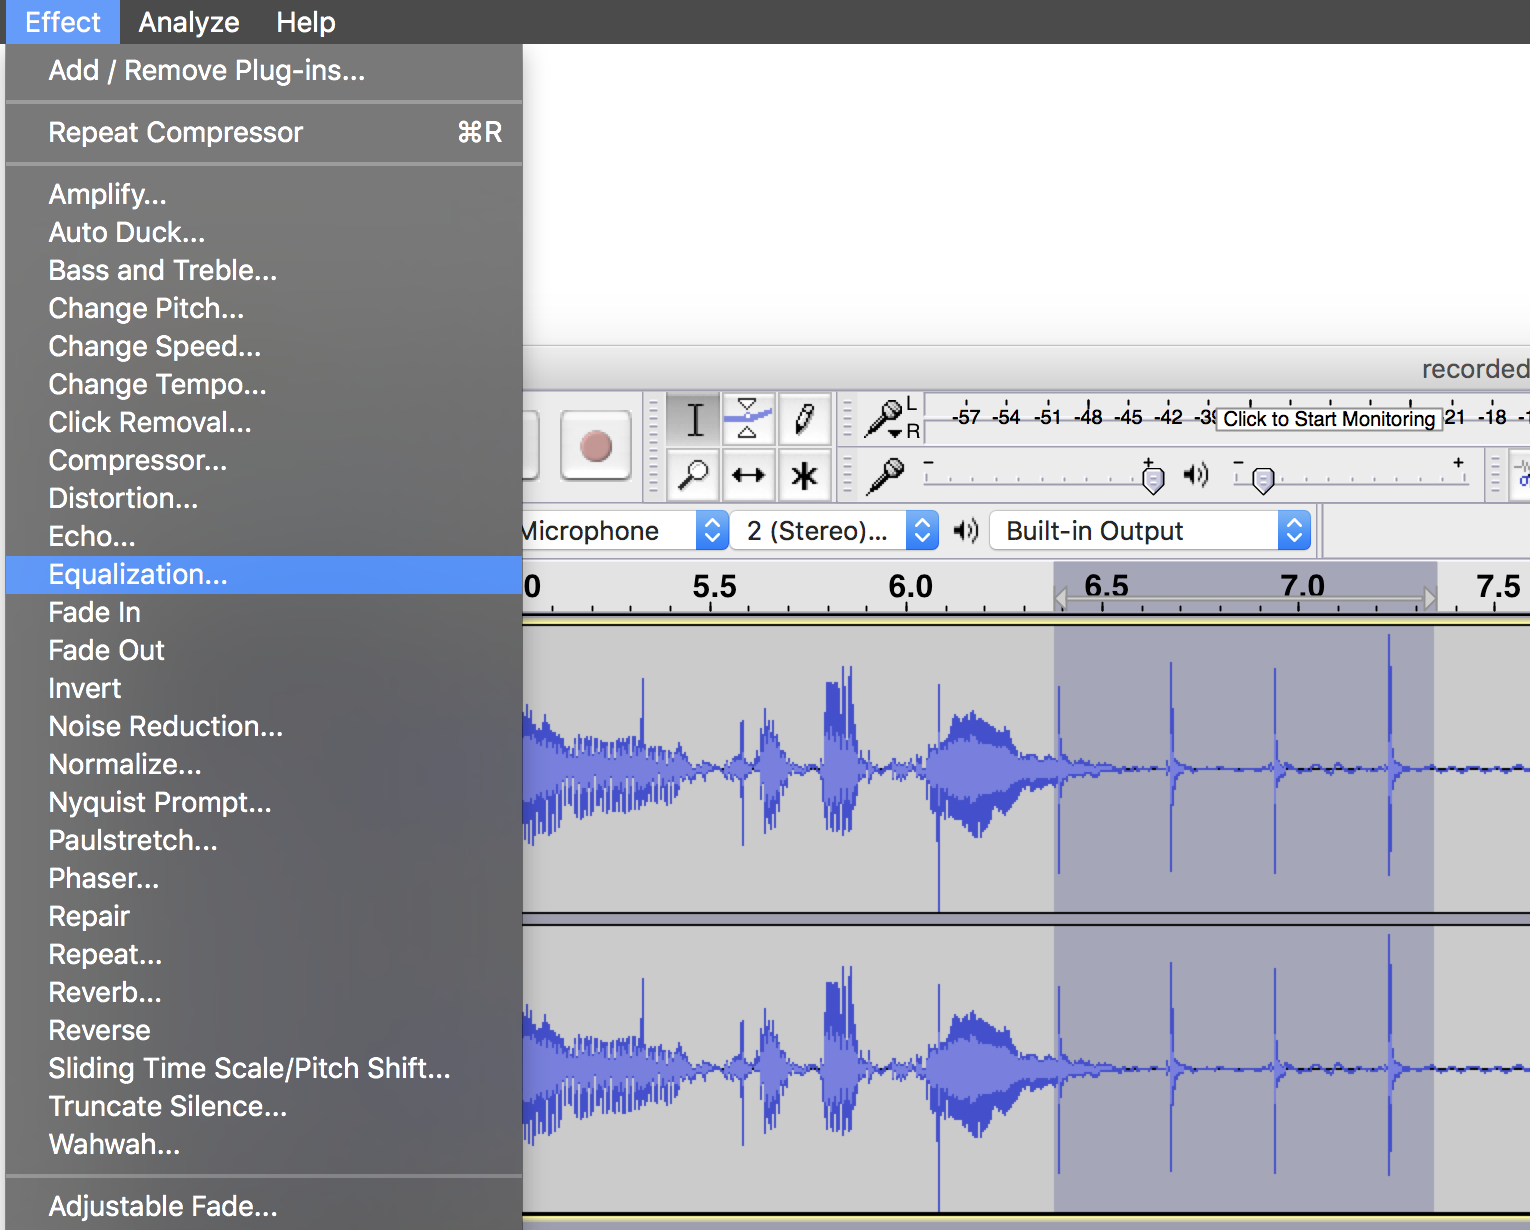
Minimize plosives by highlighting them in your waveform, the go to Effects -> Equalization.
You should see a flat across 0dB, if not then click the Flatten button. Next click Graphic EQ, this brings up sliders for you to adjust the wavelength manually.
Set the first 4 sliders at -20dB, then the next 8 to go up by -2dB until just past 200Hz, then keep them as is.
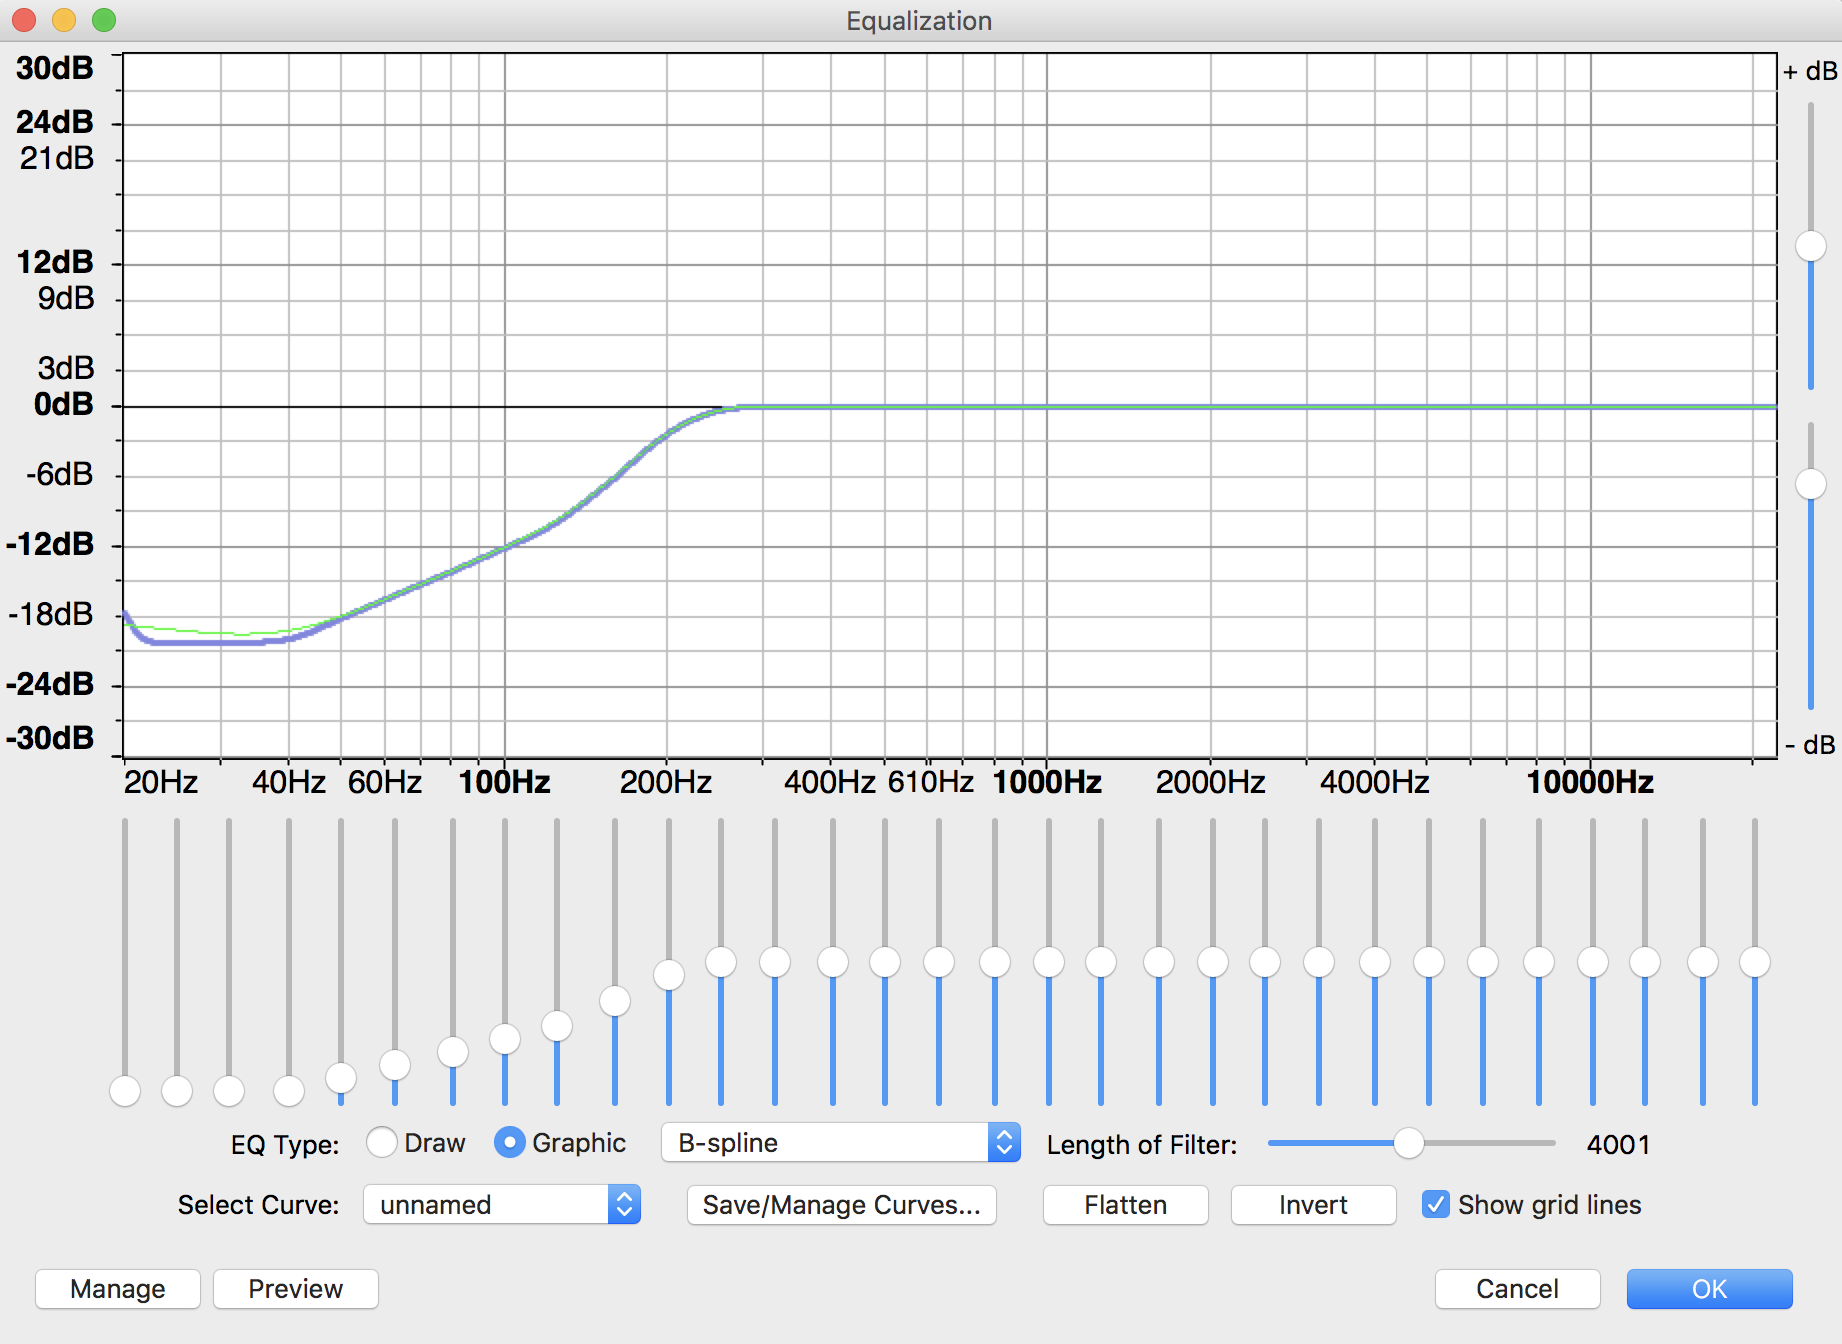
Save the configuration, name it something memorable like Plosive Fixer or Plosive Corrector.
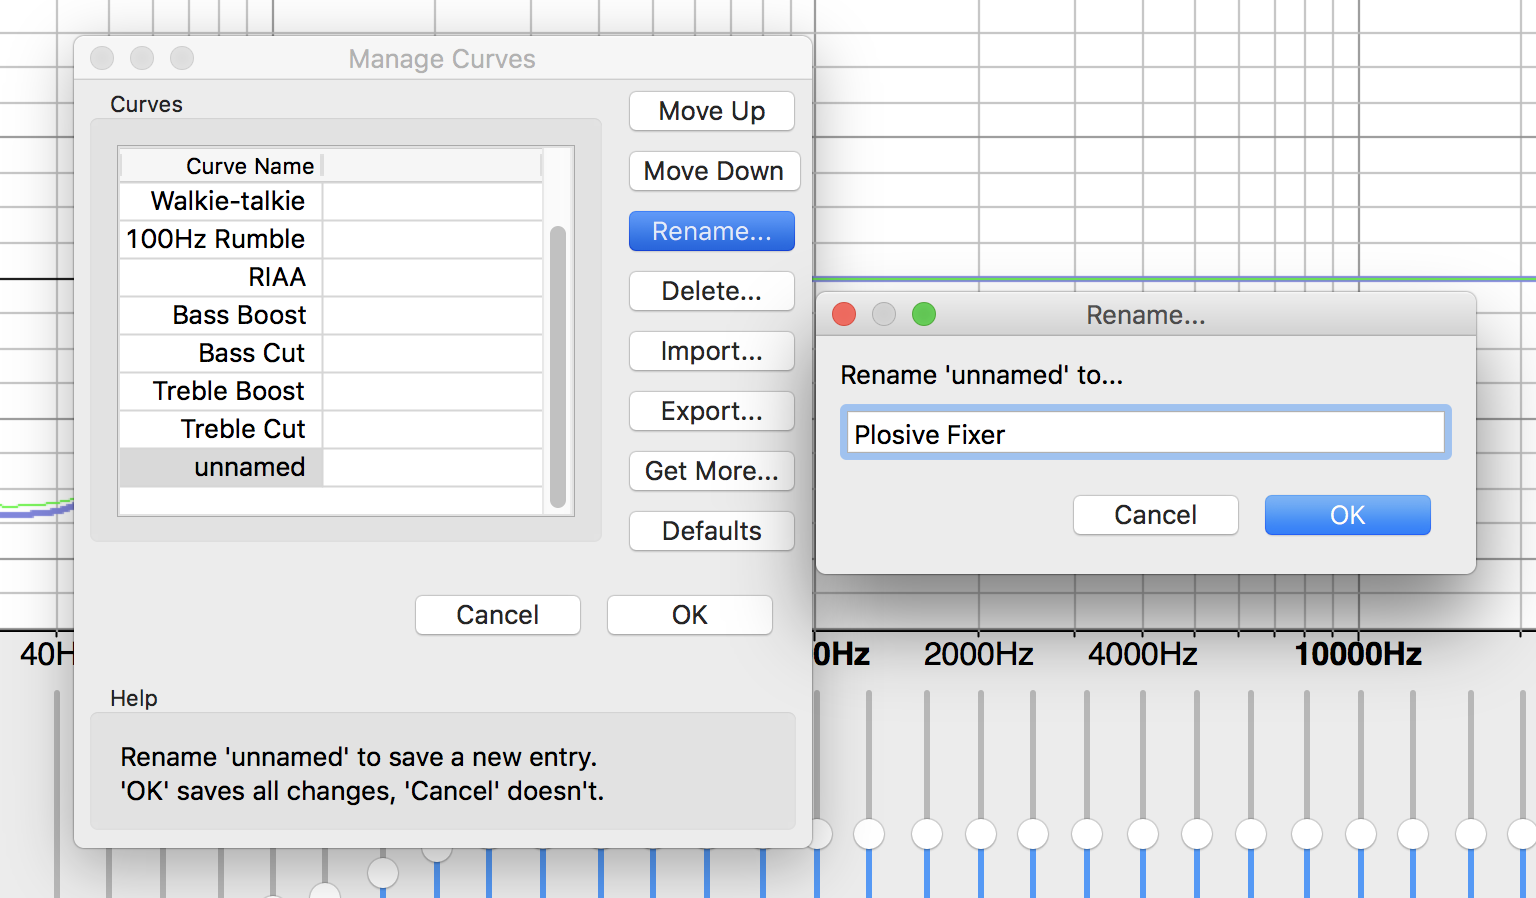
Finally finish by hitting OK and the plosive sections highlighted should fix themselves. You can repeat this by highlighting other sections throughout your waveform and using the equalizer to remove them.
Moderate Audio Editing
It's all well and good using all the tools mentioned to edit your audio, but don't over do it. These powerful features are best used in moderation. When overdone your audio will be left sounding artificial and somewhat fake, so try and use restraint when following this Audacity radio editing guide.
If you're unsure if you've over used these tools, ask a friend or colleague to listen to your edited recordings to get some feedback.
Export Audio
Once you're done editing your recording, export your entire track as an MP3 file. Go to File -> Export Audio.
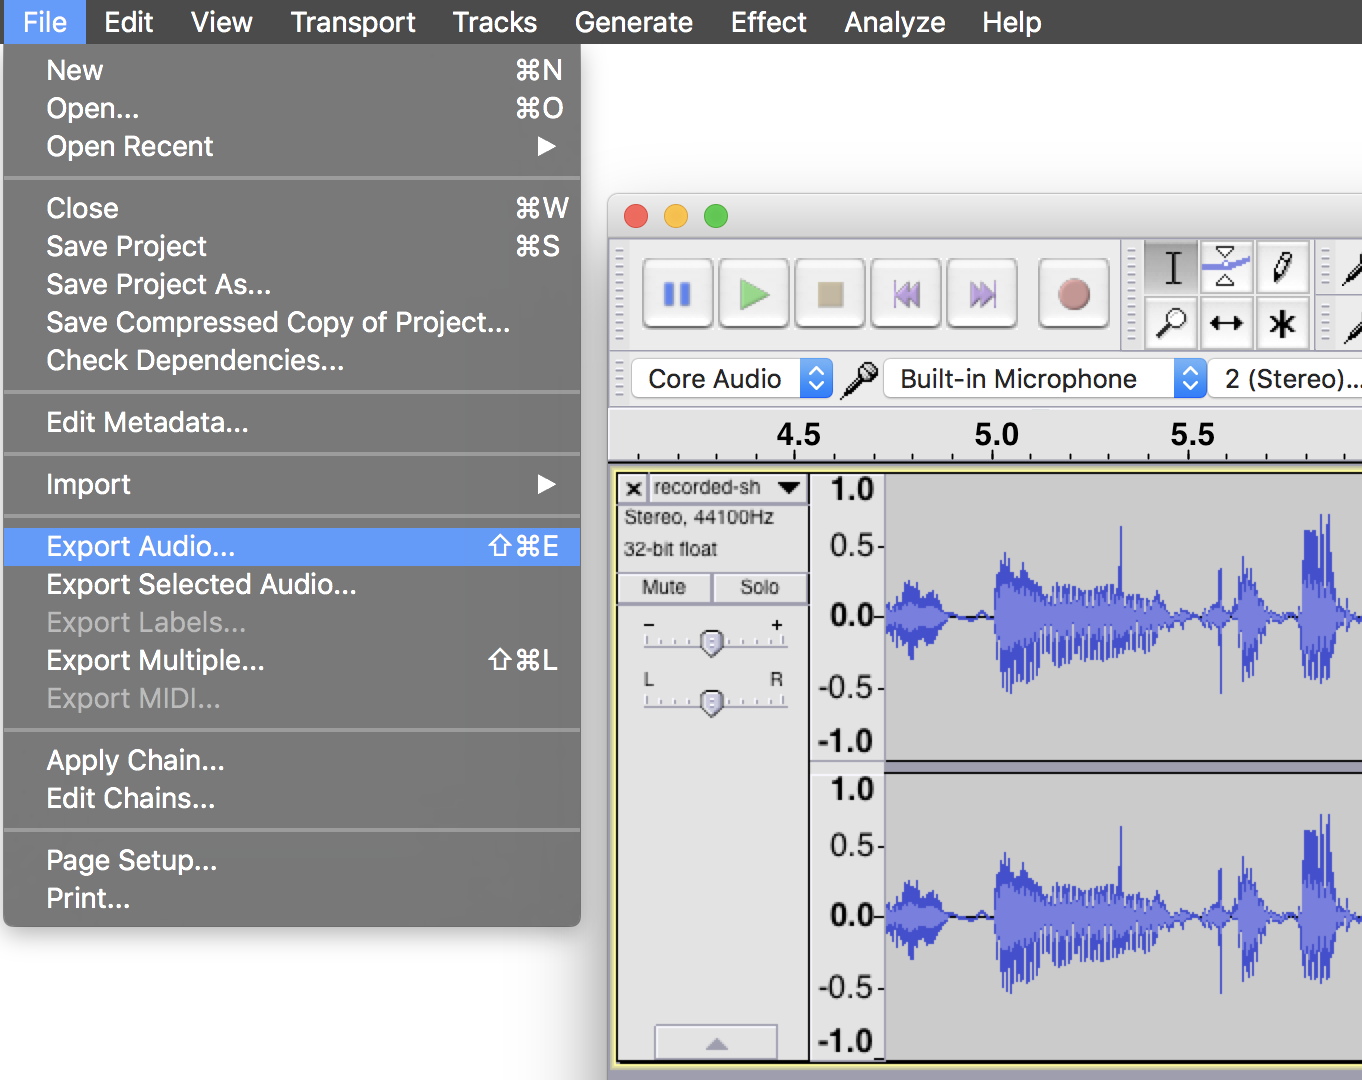
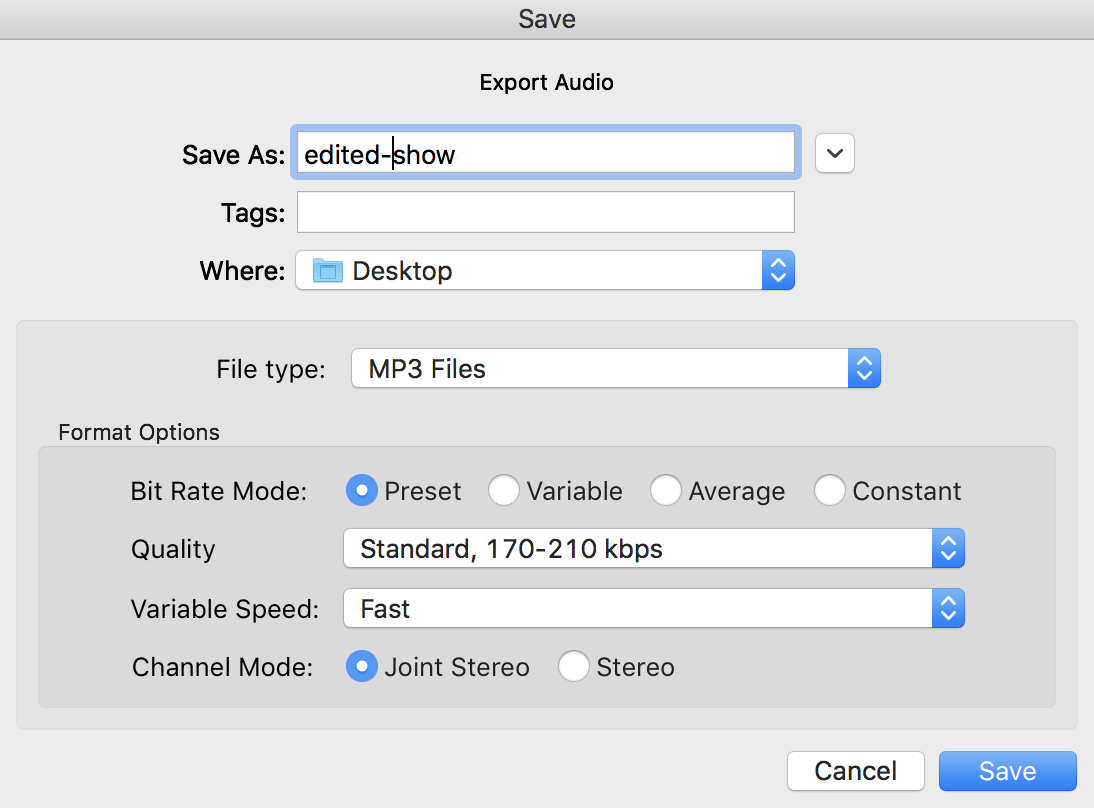
Name your show - Make sure the File Type is MP3, then leave the rest of the settings as is and click save.
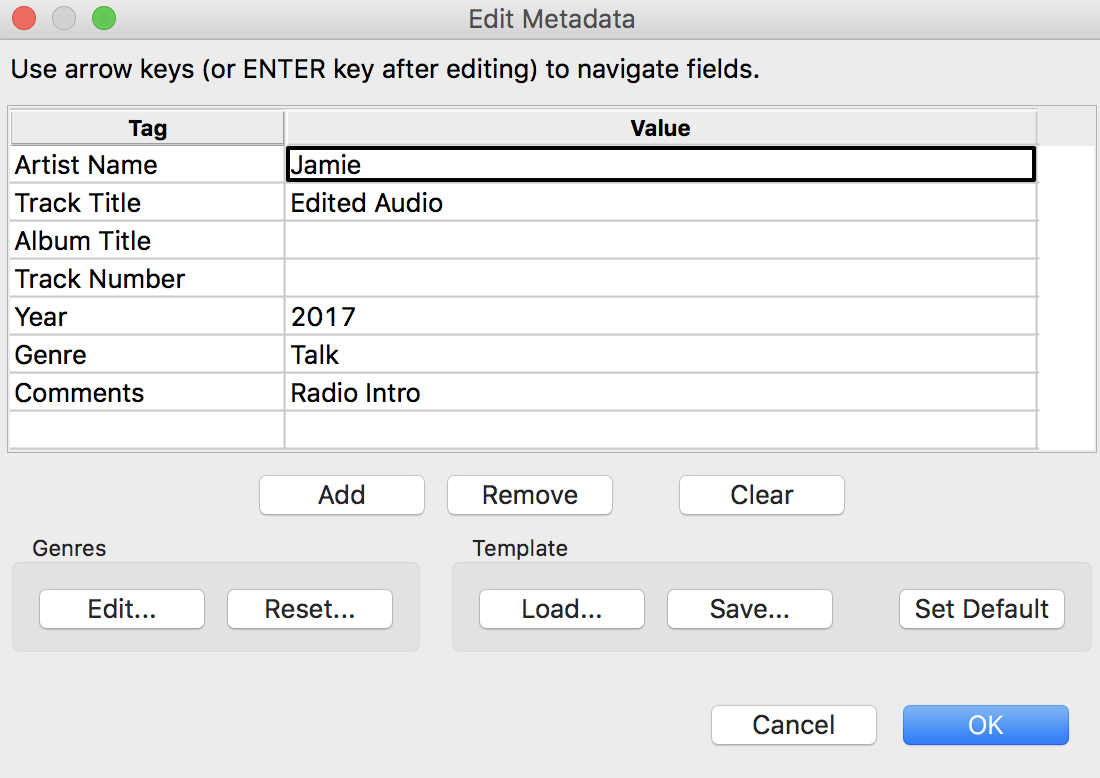
Update your track's metadata like artist name, track title, and so on - Once done click OK.
Your edited file should now be packaged up and ready to play!
The Power of Audacity Radio Editing
Audacity radio editing tools can be very powerful when used properly. Remember to moderate how you use them and try not to over do it too much. That being said, once your shows are packaged up you can upload them to your online radio station with Radio.co.
If you haven't started your station yet then you can today with your 7 day free trial - Click the button below to get up and running in minutes.


