Need advice? Let's talk.
Get straightforward guidance from your broadcasting partner. Schedule a call to chat with the team about your radio station.
Book DemoNoise Reduction Techniques to Sound Better
Audio sound off? Try these essential noise reduction techniques for clearer, more professional recordings. Clean up audio, save time, and sound great on your radio station or podcast.

Most people are at home these days. Gone are professional workplace environments, replaced with ad hoc spare room setups. This newfound freedom may seem good on paper but comes with a boatload of challenges. Mainly, bad audio. Whether you’re a broadcaster, podcaster, or just looking for ways to sound better on video calls, then here are some noise reduction techniques for clearer, more professional audio.
Common Pitfalls for Bad Audio
Good audio goes unnoticed. We’re used to things sounding professional. From watching TV, listening to the radio, or even following Twitch streams, everyone has high-end production values. It’s only when you try things yourself you’ll notice the cracks start to show.
Which brings us onto bad audio. Most places aren’t designed with recording in mind. What may sound fine when chatting in-person, won’t to a microphone. And nothing will put new listeners off like bad audio.

Without getting too technical jargon-y, rooms have acoustic qualities. You’ve probably noticed when moving into a new home with no furniture, your voice will echo and bounce around. Sound treatment and noise reduction techniques dampen a room’s natural sound, clear up your audio and enrich the sound of your voice.
How many of these red flags are you guilty of?
- Parallel Walls: Reflect soundwaves off one another, causing echo and exaggerating certain frequencies. Hallways and narrow spaces are common sound traps for this.
- Large Rooms: Reverberations are noises bouncing around which are commonly found in big spaces. Theatres use reverb to reach audiences, but it doesn’t sound good to mics.
- Corners: Soundwaves get trapped in corners of rooms and bounce around, causing echoes and harsher frequencies to get captured by your microphone.
- Hard Surfaces: Most recording spaces have wooden floors, tables, chairs, and so on. Just like a ping-pong table, your audio gets bounced around, resulting in poor acoustics.
Wardrobe / Closet: DIY Sound Booth
There’s more than just clothes and Narnia that go in a wardrobe. Go full-on hipster by converting your wardrobe into a DIY sound booth!
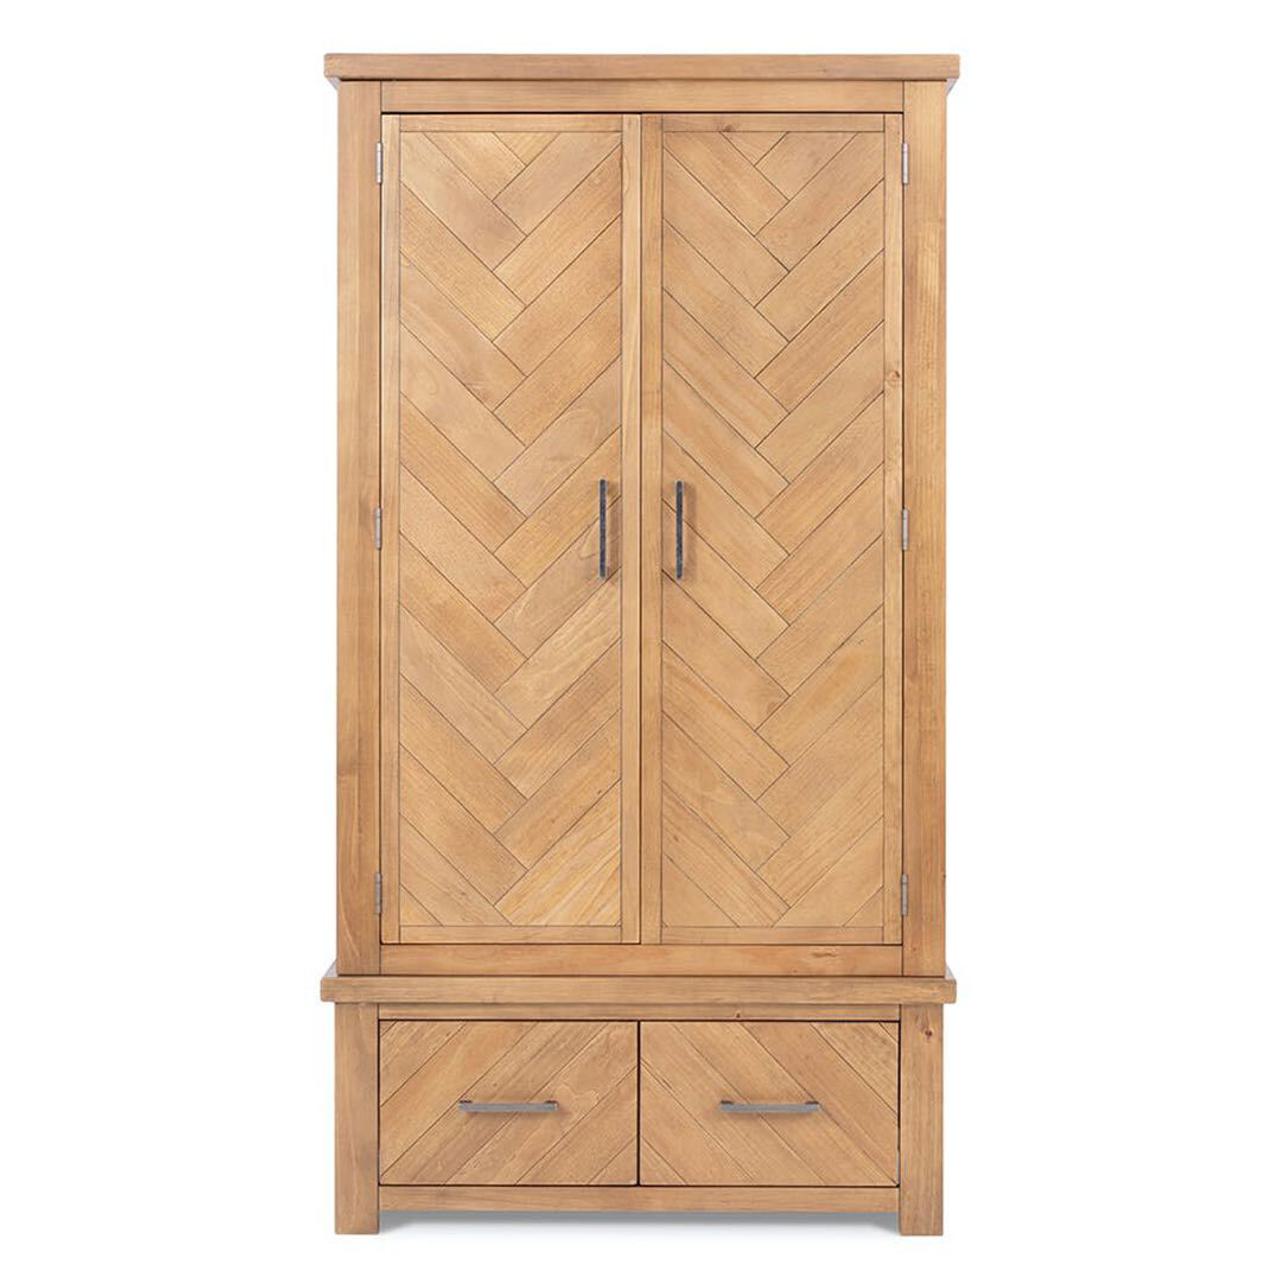
Wardrobe’s compact space means that soundwaves don't have much room to bounce around, although the hard wooden surfaces can still create an echo, so lay a thick carpet on the floor to solve that. Adding some thick blankets on the walls will complete the transformation. It may not be Abbey Road, but it’s a cheap solution for a one-man show.
This can be a good option if you don’t have many viable recording spaces available or a suitable room in your home already. However, the cost of buying one specifically for broadcasting is probably going to be more than acquiring a portable sound booth. This is an option only really for people with a wardrobe they don’t use, or who don’t mind the hassle of emptying it out every time they broadcast.
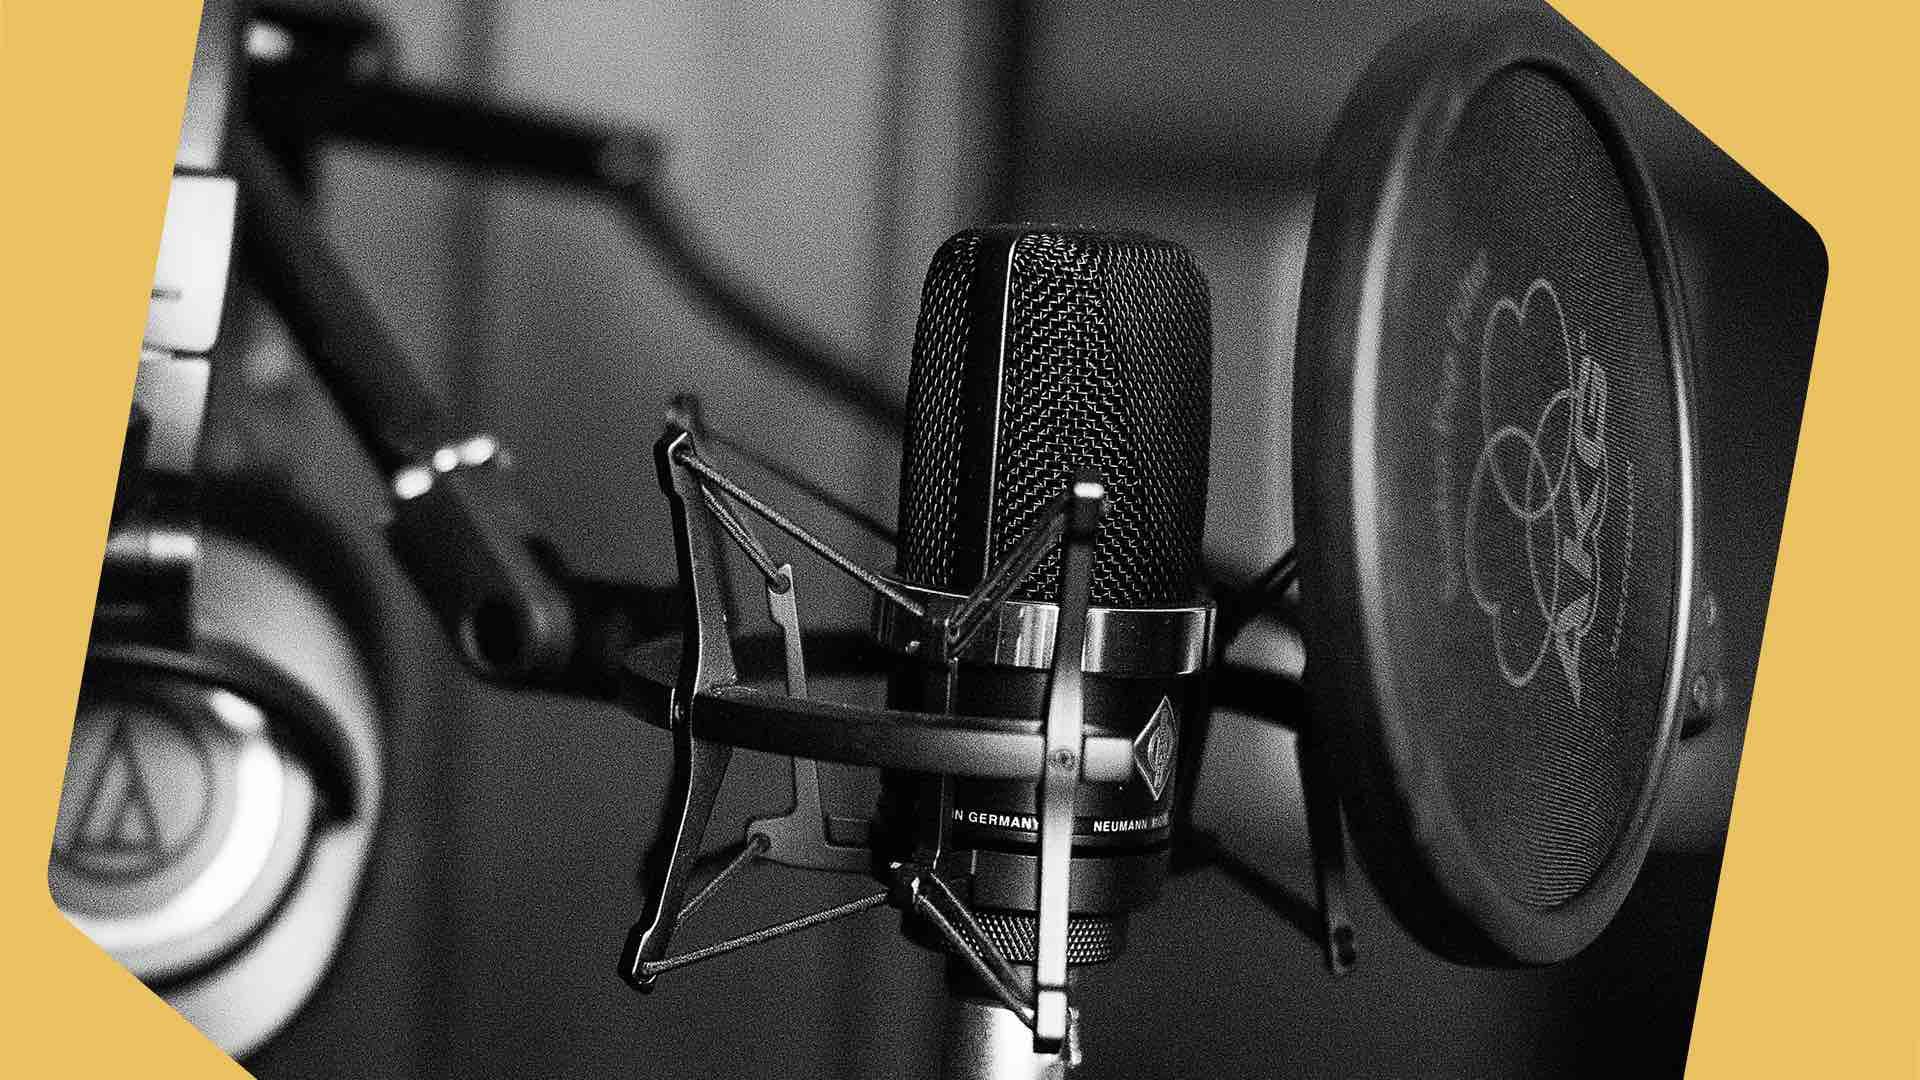
Pop Filter: Stopping Snap, Crackles, and Pops
One of the most common noise reduction techniques, mic shields/pop filters, are a staple of everything from professional studios to bedroom broadcasters. They create a barrier between you and your microphone, reducing the impact of harsh sibilance and plosives by blocking sharp air that hits the mic when you’re speaking, which is great if any guests have a bad habit of breathing loudly into the mic. They’re pretty simple to set up, just clip them to a mic stand and you’re set.
Because of their simplicity and cheap price, mic shields should be part of any self-respecting broadcasters set up. For some great kit, look no further than the Aston Shield GN pop filter. It has a sturdy metallic build which really helps to block those pesky plosives. It fits easily onto any mic stand with the crocodile clip. $50 may be a bit more expensive than some other mic shields but Aston makes up for that with its impressive build quality and performance. Besides, compared to the cost of other noise reduction techniques, this won't leave too much of a dent in your wallet.
Mattresses / Pillows: Cheap Makeshift Studio
You don’t need to spend megabucks to equip your studio with effective noise reduction techniques. For anyone looking to truly push boundaries and invest in the future, you could think of buying a state-of-the-art mattress. The soft, thick material they’re made from make them great at absorbing sound and stopping reverberations. They aren’t designed to target frequencies or soundproof a room effectively, but they can make a good start if you’ve got one spare.
Like wardrobes, the big downside is if you don’t already have a spare mattress, buying one just for sound treatment is probably going to be more expensive than other noise reduction techniques. If you’re willing to haul one from your bed to your studio/bedroom setup whenever you’re broadcasting, though, they can make a great compromise if you’re saving up for a more traditional setup.
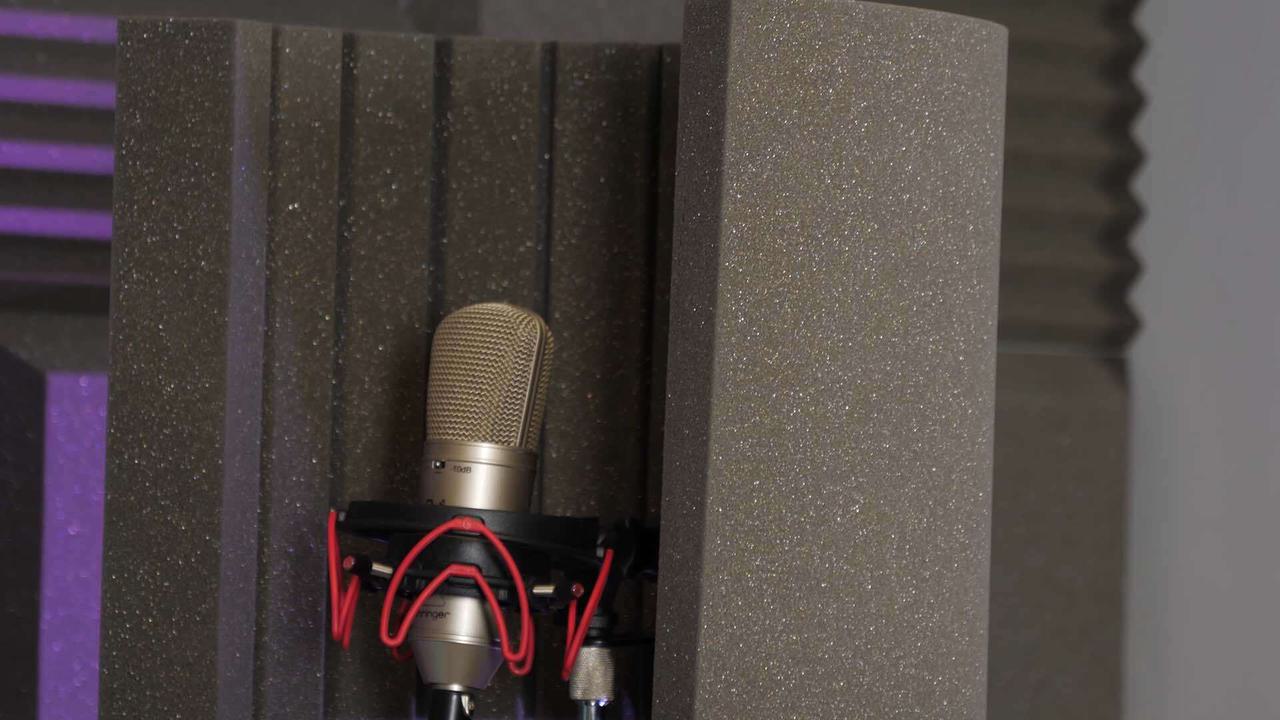
Foam Tiles: Convert Backrooms into Recording Studios
Foam tiles are the indispensable tool of any studio producing professional-level audio. This noise reduction technique alters the shape of a room and absorbs pesky sounds and rogue frequencies. This both reduces reverb and absorbs frequencies, meaning your mic won’t end up exaggerating harsh or distracting frequencies, so your voice sounds it’s best.
You don’t need to spend a fortune on foam tiles that cover your room ceiling to floor, instead, target problem areas like parallel walls and corners for maximum effect. Installing foam tiles is a breeze; just spray some adhesive on the back and you’re good to go.
Foam tiles lightweight construction, portability, affordability, and ease of use should tell you why they’re such a mainstay in modern studios.
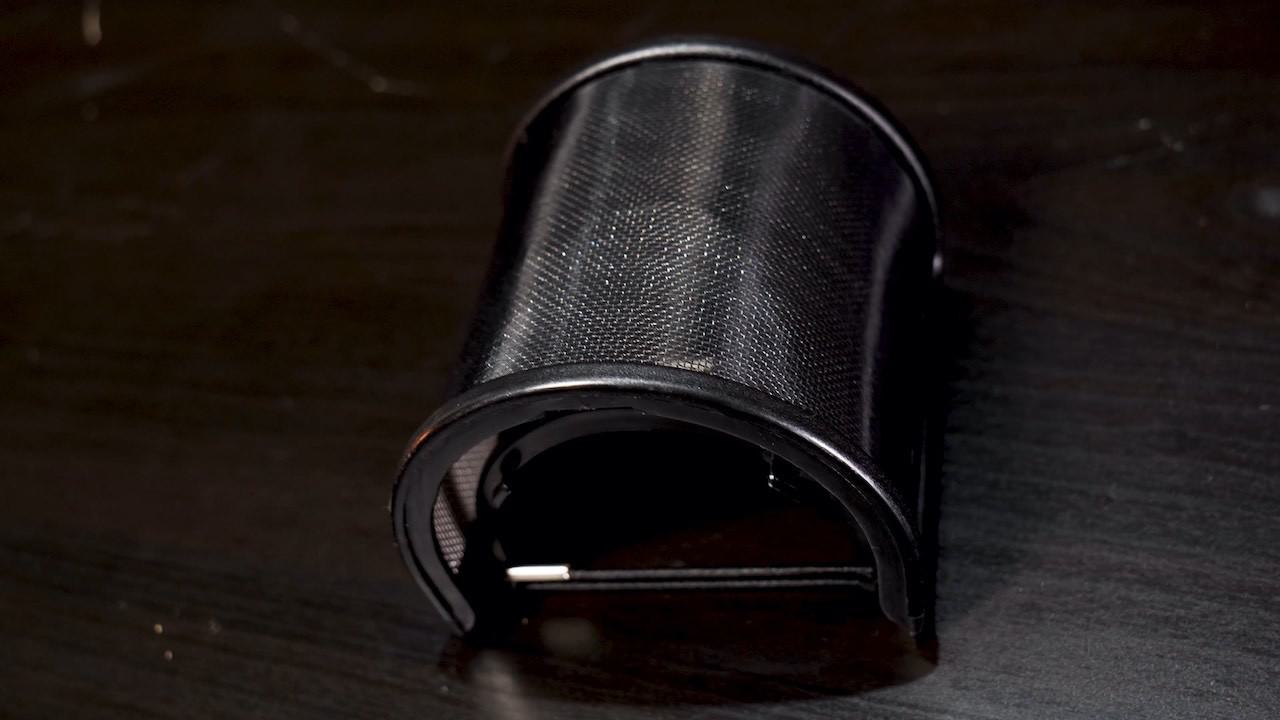
Portable Sound Booth: Pro Audio Anywhere
Sound booths isolate you from the outside and are designed for producing clear, clean audio. They come in all shapes and sizes but tend to be filled with foam tiles and sound treatment to reduce reverberations and trap certain frequencies, so they don’t muddy your audio.
A portable sound booth is a great tool for getting clean audio wherever you are. Many use soft acoustic blankets and nylon to produce a folding, portable booth and some are more like portable foam tiles you can attach to a mic stand.
The only real downside of these portable sound booths is that due to their size they won’t be able to completely isolate you from every outside noise. So there may be situations where you can’t avoid picking up some background hum or buzz. Despite this, they still present an excellent noise reduction technique for the broadcaster on the go.
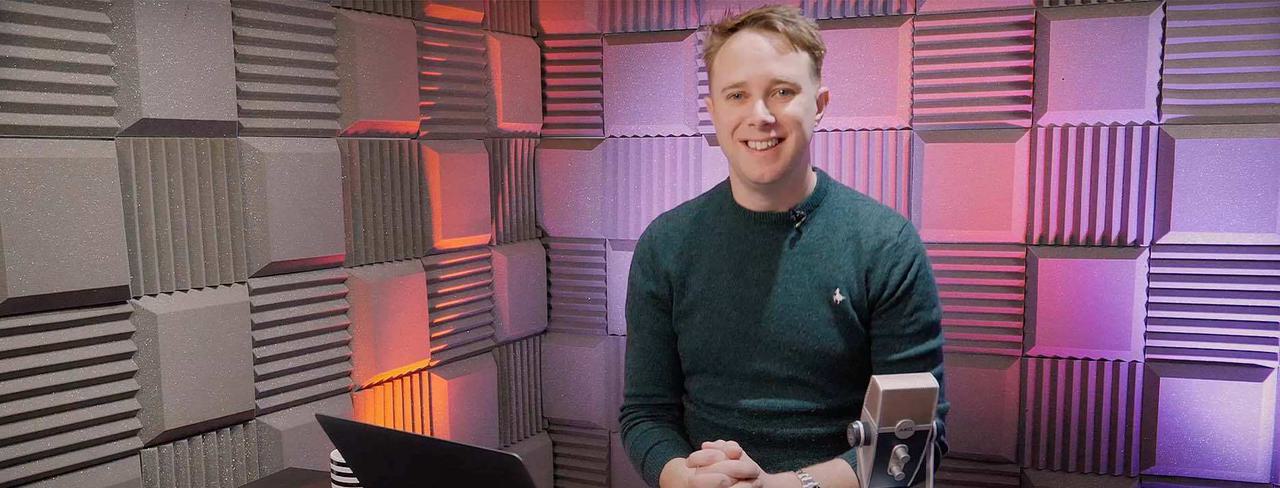
Professional Sound Booth: Ultimate Recording Studio
As well as their portable counterparts, you can get professional-grade sound booths, constructed not just to give you a perfect sonic space to record in, but also to act as your studio, workstation and home away from home. We even have one in our offices at Radio.co!
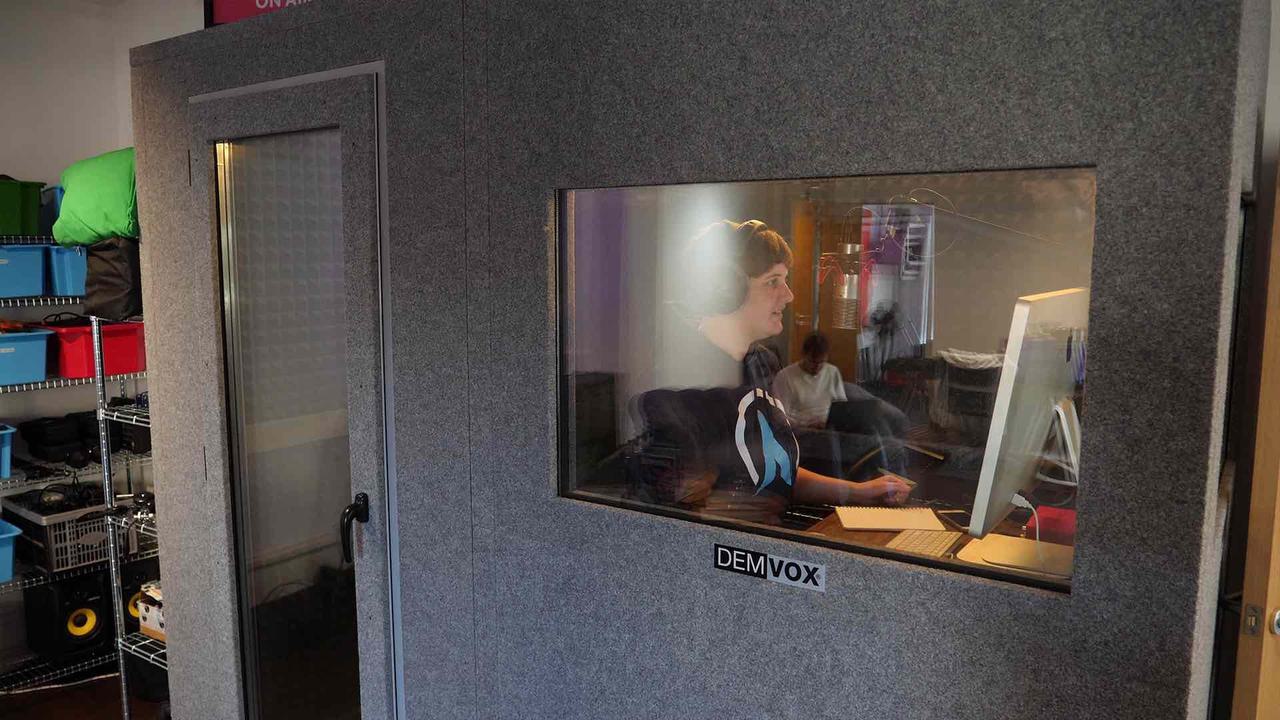
As you can see, our sound booth comes equipped with a wealth of features that make it the perfect space for broadcasting. The desk lets you set up shop easily, place down your computer, mic and mixer/interface and you’re good to go. They’re not just for broadcasting too, the acoustic treatment in sound booths makes them great for recording vocals, voiceovers and instruments too.
As you can imagine, a piece of kit like this isn’t going to come cheap. A good professional Soundbooth is going to set you back a pretty penny, so take some time to weigh up whether you need something like this in your studio right now, or if you can get by with some more affordable noise reduction techniques.
Choose Best Noise Reduction Techniques
Bad audio continues to be a problem, even in modern times when practically everyone has a mic on their phone. No matter what noise reduction techniques you choose, take the time to setup a good recording environment to either sound better when broadcasting live or reduce post-production editing.
Take your improved audio and share it with the world. Broadcast online in minutes with your own online radio station. The best bit? It’s free for 7 days.


