Need advice? Let's talk.
Get straightforward guidance from your broadcasting partner. Schedule a call to chat with the team about your radio station.
Book DemoVoicemeeter: Audio Mixer Software For PCs
Need to save space in your studio? Produce professional radio all from your PC by using audio mixing software, Voicemeeter.
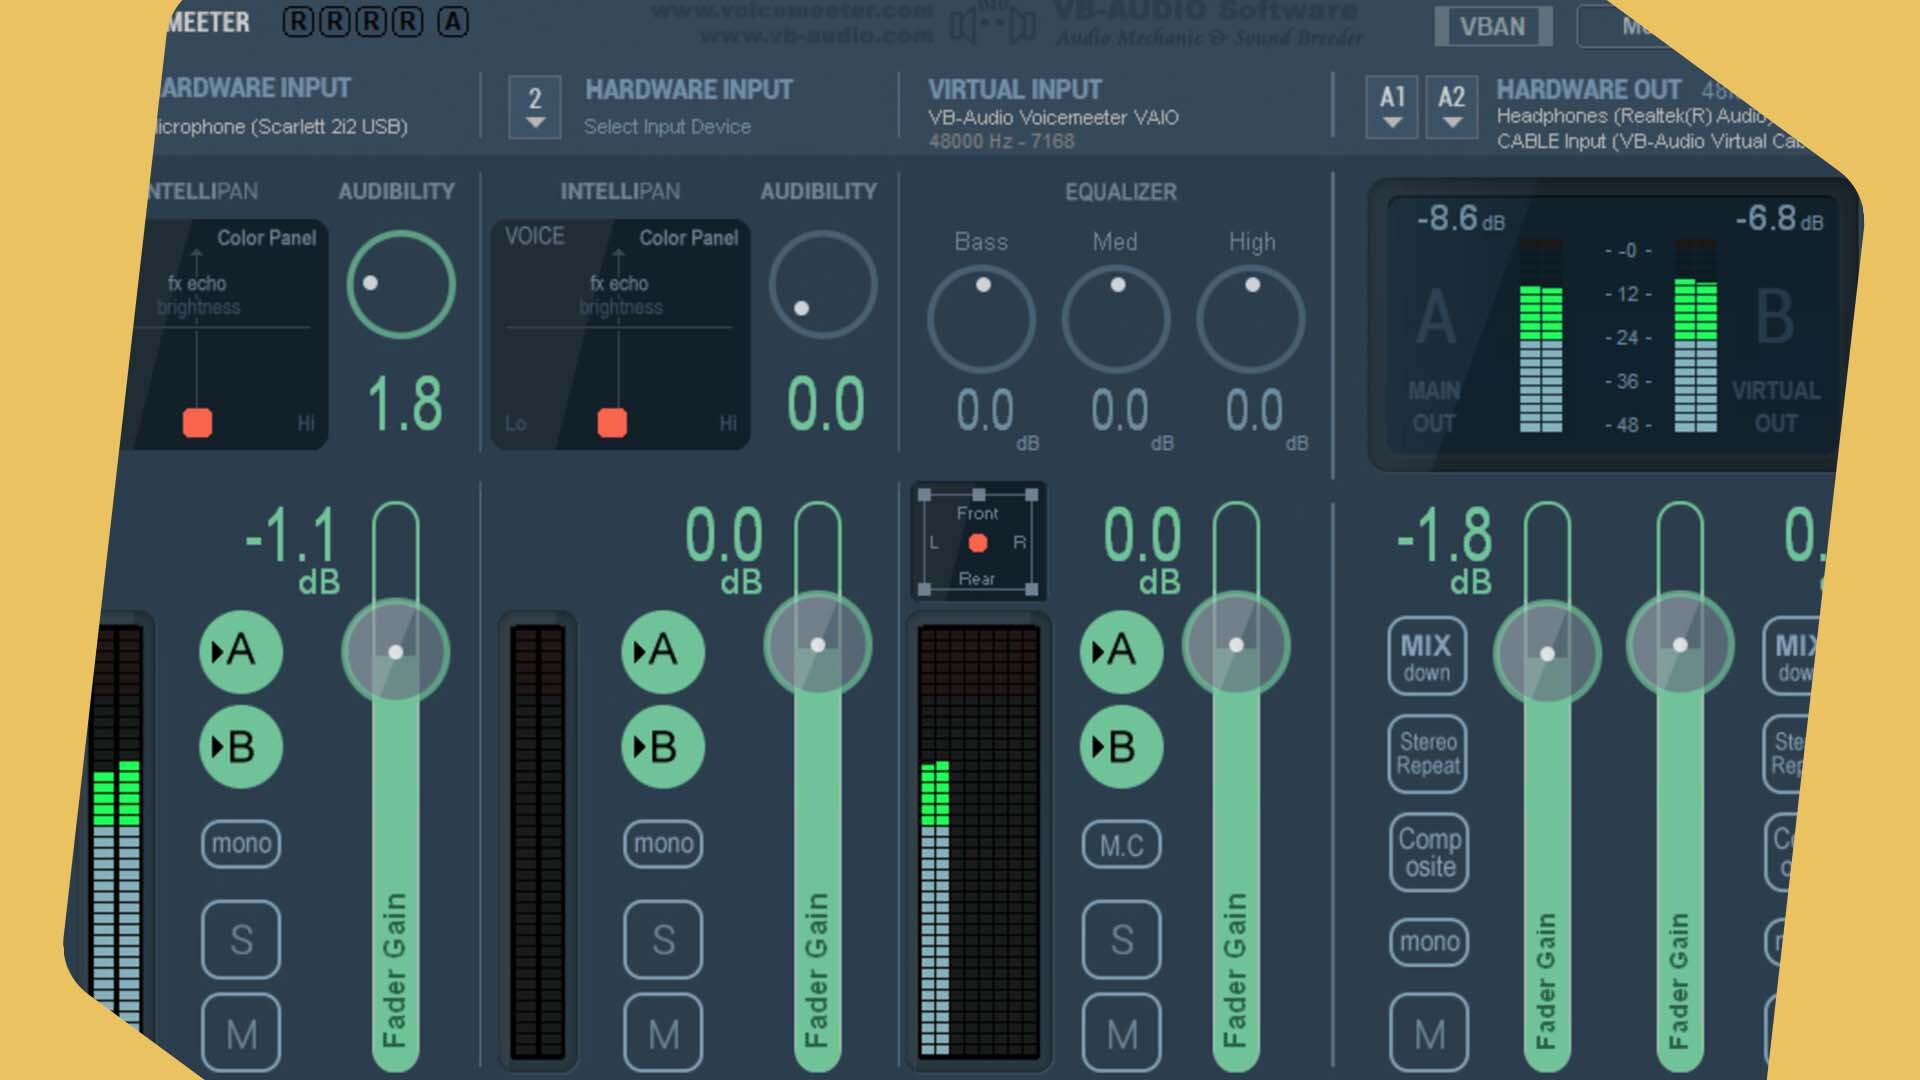
Mixing desks are excellent for weaving different audio sources together to produce radio. But if you don't have the space (or money) for a physical desk, your computer can do the job. For Windows users, Voicemeeter is low-cost audio mixer software you can use to produce professional radio.
What Voicemeeter Is
Voicemeeter is audio mixer software for Windows operating systems. It’s made by the company VB-Audio, who also make some high quality and low-cost virtual audio cables.
Voicemeeter is a low-cost DAW (Digital Audio Workspace) that allows you to route, mix and send out audio - all from your PC. It has virtual faders, so for broadcasters it can work as an on-screen, virtual mixing desk.
Voicemeeter helps you to create professional radio shows, without the fancy equipment.
Voicemeeter Cost
Voicemeeter is donationware. This means it can be downloaded and trialled free of charge. If you decide to keep using it, you should make a donation based on your usage.
How Voicemeeter Works
- Audio sources can be routed into Voicemeeter. This could involve hardware, such as a USB microphone, or audio from a computer application, like Zoom.
- Audio effects and processing can be applied to these sources, and they can be mixed together.
- The combined audio can then be transmitted to your radio station using a virtual audio cable.
- This virtual audio cable links Voicemeeter with your broadcasting software, such as BUTT.
Voicemeeter has three versions:
- Voicemeeter Standard
- Voicemeeter Banana
- Voicemeeter Potato
Each variation has different features. But the main thing to consider is that Voicemeeter Standard has the fewest channels, Voicemeeter Banana has more and Voicemeeter Potato has the most.
How to Set Up Voicemeeter
Here’s a simple guide on how to set up Voicemeeter Standard with your radio station. In order to use your PC as a virtual audio mixer.
What You Need
A virtual audio cable (donationware again)
Step 1. Route Your Audio Sources Into Voicemeeter
Route Your Physical Audio Sources (Hardware)
Firstly, connect any hardware you have to your PC. Now, route each of your hardware sources to their own hardware channels. Do this by clicking on the drop down under a hardware channel, then selecting your device from the list.
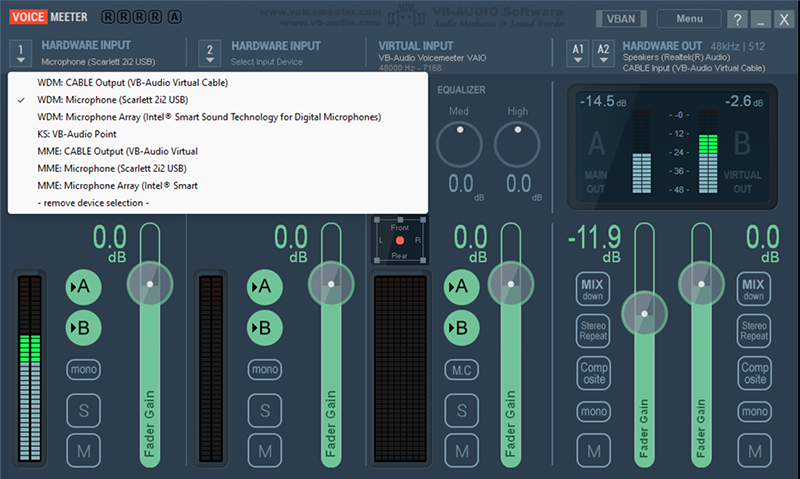
In the list, your devices will have some letters which refer to the audio driver that will be used e.g. MME or WDM. Generally speaking, WDM has improved latency than MME. So it’s worth starting off with this.
If you have more than 2 bits of hardware you want to use for broadcast, you’ll need to use Voicemeeter Banana or Potato.
Route Your Virtual Audio Sources to Voicemeeter (Applications).
Now route your virtual audio sources, like Zoom or Chrome, to your virtual fader(s) in Voicemeeter.
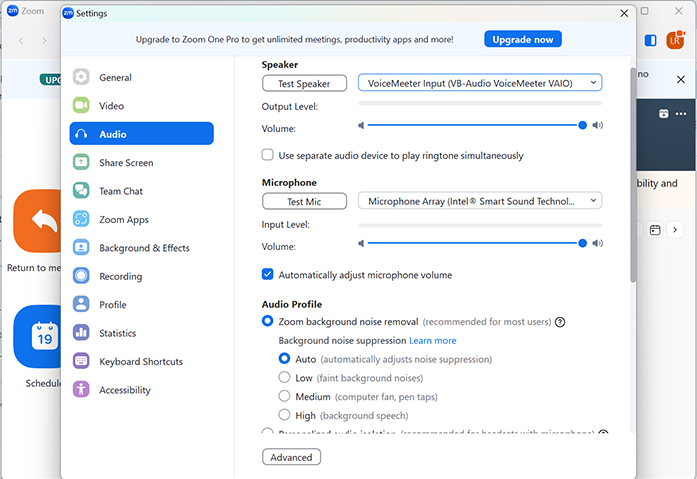
In Voicemeeter Standard, the virtual channel is already mapped to the VB-Audio Voicemeeter VAIO. So, all we have to do is go to the audio settings within our app, and change the output to the VB-Audio Voicemeeter VAIO input. This will take audio from the application and route it to the virtual channel in Voicemeeter.
Here’s an example of sending your audio from zoom to Voicemeeter, for live radio interviews. (Note you’ll be able to hear your audio through Voicemeeter, and not Zoom).
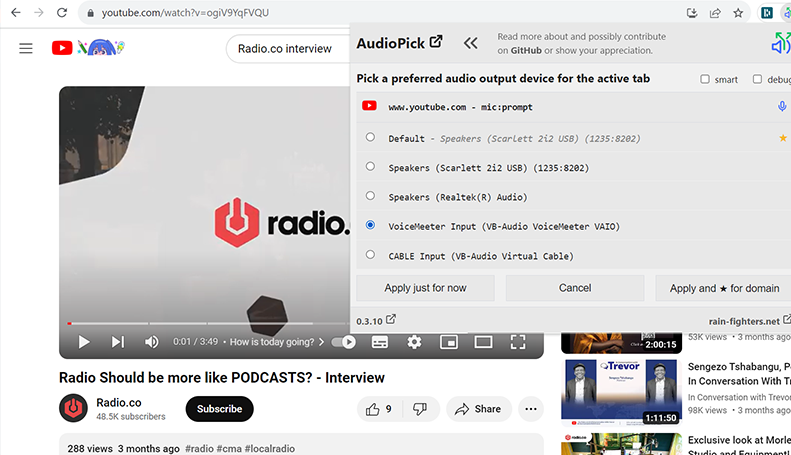
If you want to route audio from Chrome - (ensure you have the correct permissions and copyright), we recommend using the Chrome extension, Audio Pick, to send your audio from Chrome to Voicemeeter.
Step 2. Set Your Outputs
In order to send your mix to your radio station, and just as importantly, hear it - you need to set the outputs. Voicemeeter has two outputs, labelled as A1 and A2 under ‘HARDWARE OUT’.
Set one output as your headphones by selecting them from the A1 dropdown.
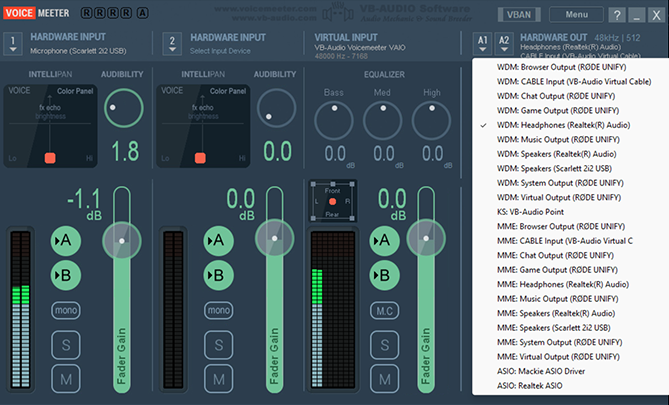
The other output needs to be set as a virtual cable, in order to connect Voicemeeter with your radio station. So from the A2 dropdown, select your virtual cable input i.e. 'CABLE INPUT (VB-Audio Virtual Cable)'
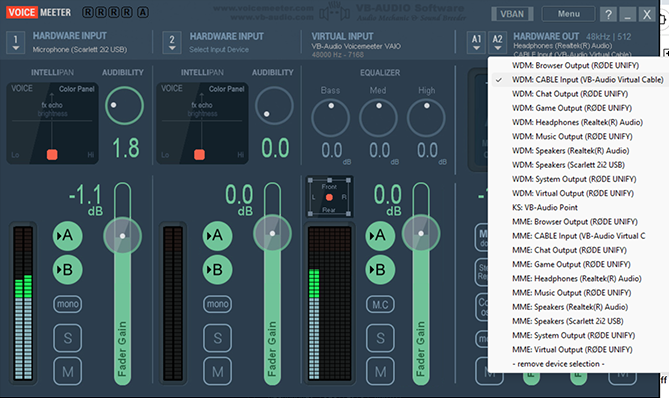
You should now be able to hear your audio sources (providing there is a signal of course).
Set 4. Connect Voicemeeter to BUTT
Once you’ve routed your audio sources into Voicemeeter and are comfortable using this audio mixer software, then you need to connect it to BUTT. This will allow you to broadcast your mix live to your radio station.
Open BUTT, and navigate to settings.
If you haven’t done so already, connect BUTT to your Radio.co account. Here's a quick video guide if you're not sure how.
In BUTT’s settings again, go to the audio tab.
Under ‘Primary Audio Device’ click the drop down. Now select the output version of the virtual audio cable you used in Voicemeeter i.e. 'CABLE OUTPUT (VB-Audio Virtual Cable)'
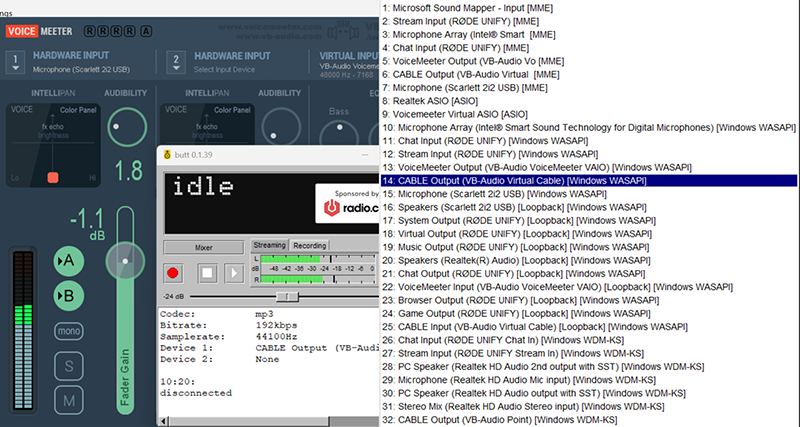
Now you’re ready to broadcast live from your PC using Voicemeeter as your audio mixing software!
To go live, simply hit the play button in BUTT and you’ll see the ‘On Air’ message appear.
Other Audio Mixer Software Alternatives
There isn’t heaps of free fader-based audio mixing software for Windows. But RODE’s UNIFY is an option for those who find Voicemeeter too complex. As for Mac users, then check out Sounddesk or Audio Hijack. And if you know of good alternatives, be sure to let us know over on Facebook, X, Instagram or TikTok.
Want to Explore Voicemeeter More?
That was our quick(ish) guide on how broadcasters can use Voicemeeter, the audio mixer software for PC. But we’ve only just scratched the surface on what this powerful software can do. If you want to explore it in more detail, then head over to VB-Audio to check out its full capabilities!


