Need advice? Let's talk.
Get straightforward guidance from your broadcasting partner. Schedule a call to chat with the team about your radio station.
Book DemoHow to Broadcast Live Radio with the Rodecaster Pro
Struggling to get your shows off the ground? Broadcast live radio with the Rodecaster Pro for a streamlined streaming solution.

All broadcasters crave a flexible live streaming solution. You don’t want to be fiddling around with labyrinthine interfaces and poorly labelled knobs and dials when you could be focused on your audience.
Back in 2018, Rode released the Rodecaster Pro, which gives you premium features along with an accessible interface. If you’re just getting your hands on one, you’re probably unfamiliar with how to broadcast live radio with the Rodecaster Pro.
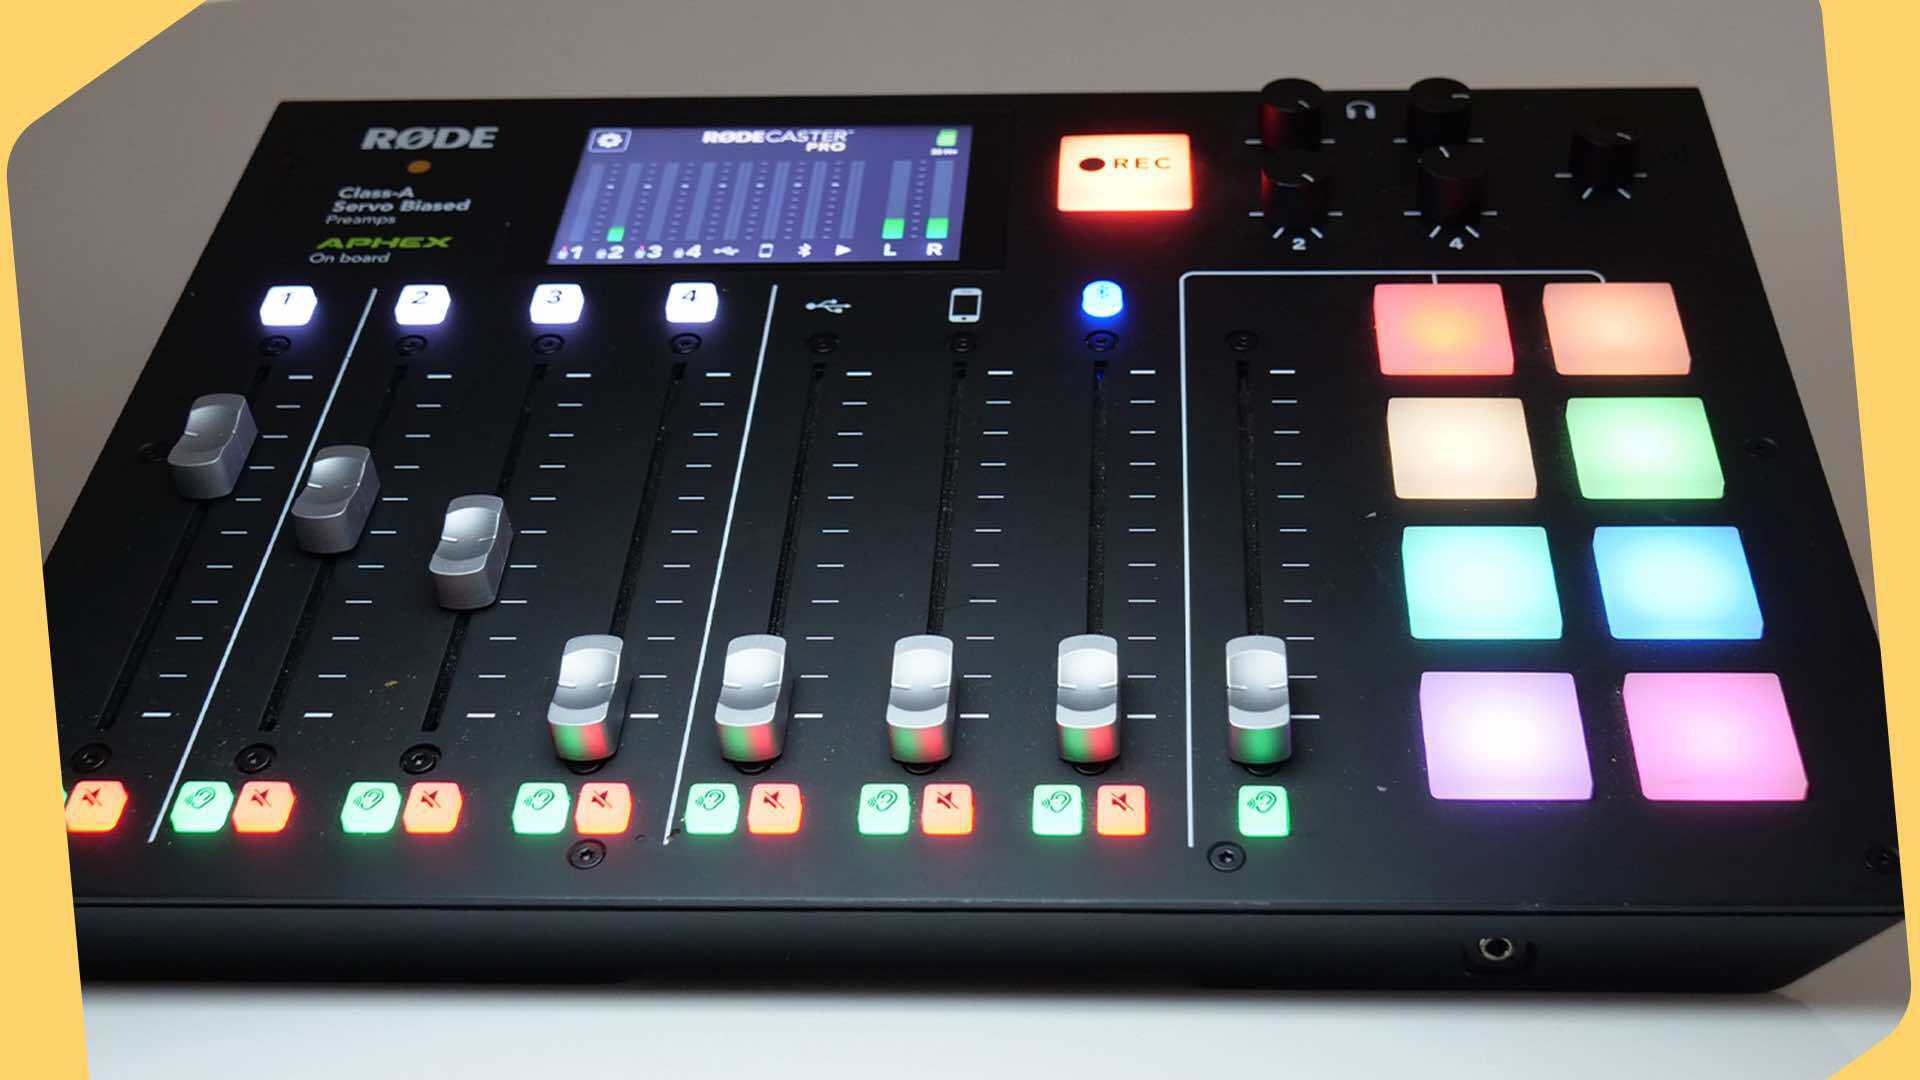
Rodecaster Pro: For the Everyday Broadcaster
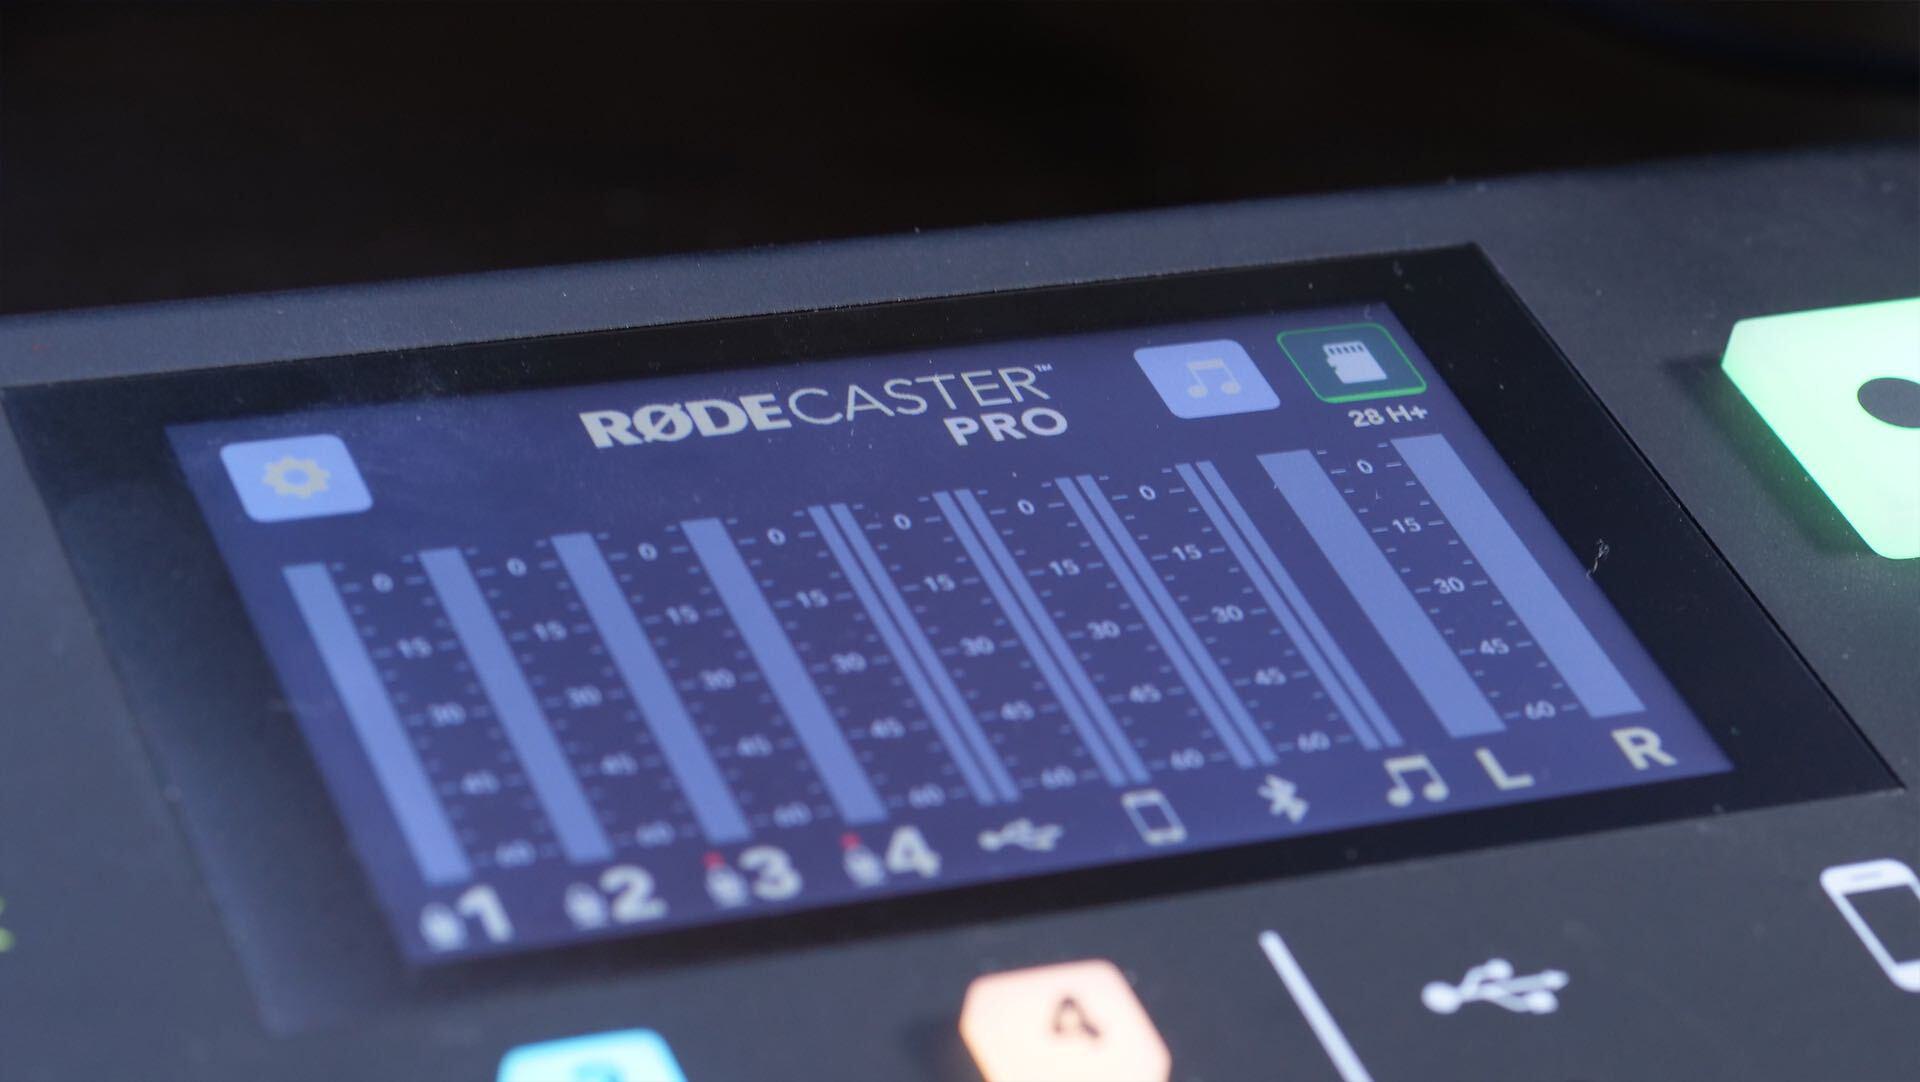
Rode designed this desk to be picked up by any broadcaster, no matter their experience. It packs a touch screen interface which makes navigating settings and features easy and onboard SD card recording so you have backups of your shows.
The built-in button bank lets you pre-load your mixer with samples, jingles and effects. Download and open the Rodecaster Pro desktop app. While your mixer is plugged in it will show a display of the button bank. Selecting any button lets you load a file onto that button, which will fire off whenever pressed, so you have an unlimited choice with what jingles and effects you play and when.
Recently, Rode has updated the firmware to improve the functionality of the Rodecaster. Make sure your desk has the latest firmware before setting up.
Rodecaster Pro:
Gear You Need and Setting it Up
Alongside the Rodecaster you’ll need some equipment to get this set up working. Including:
- Laptop/Computer.
- USB dock (only necessary if your computer doesn’t have USB inputs).
- Software (In this setup we’ll be using Virtual DJ and BUTT).
- Headphones or a monitoring speaker.
- XLR and ¼” jack cables.
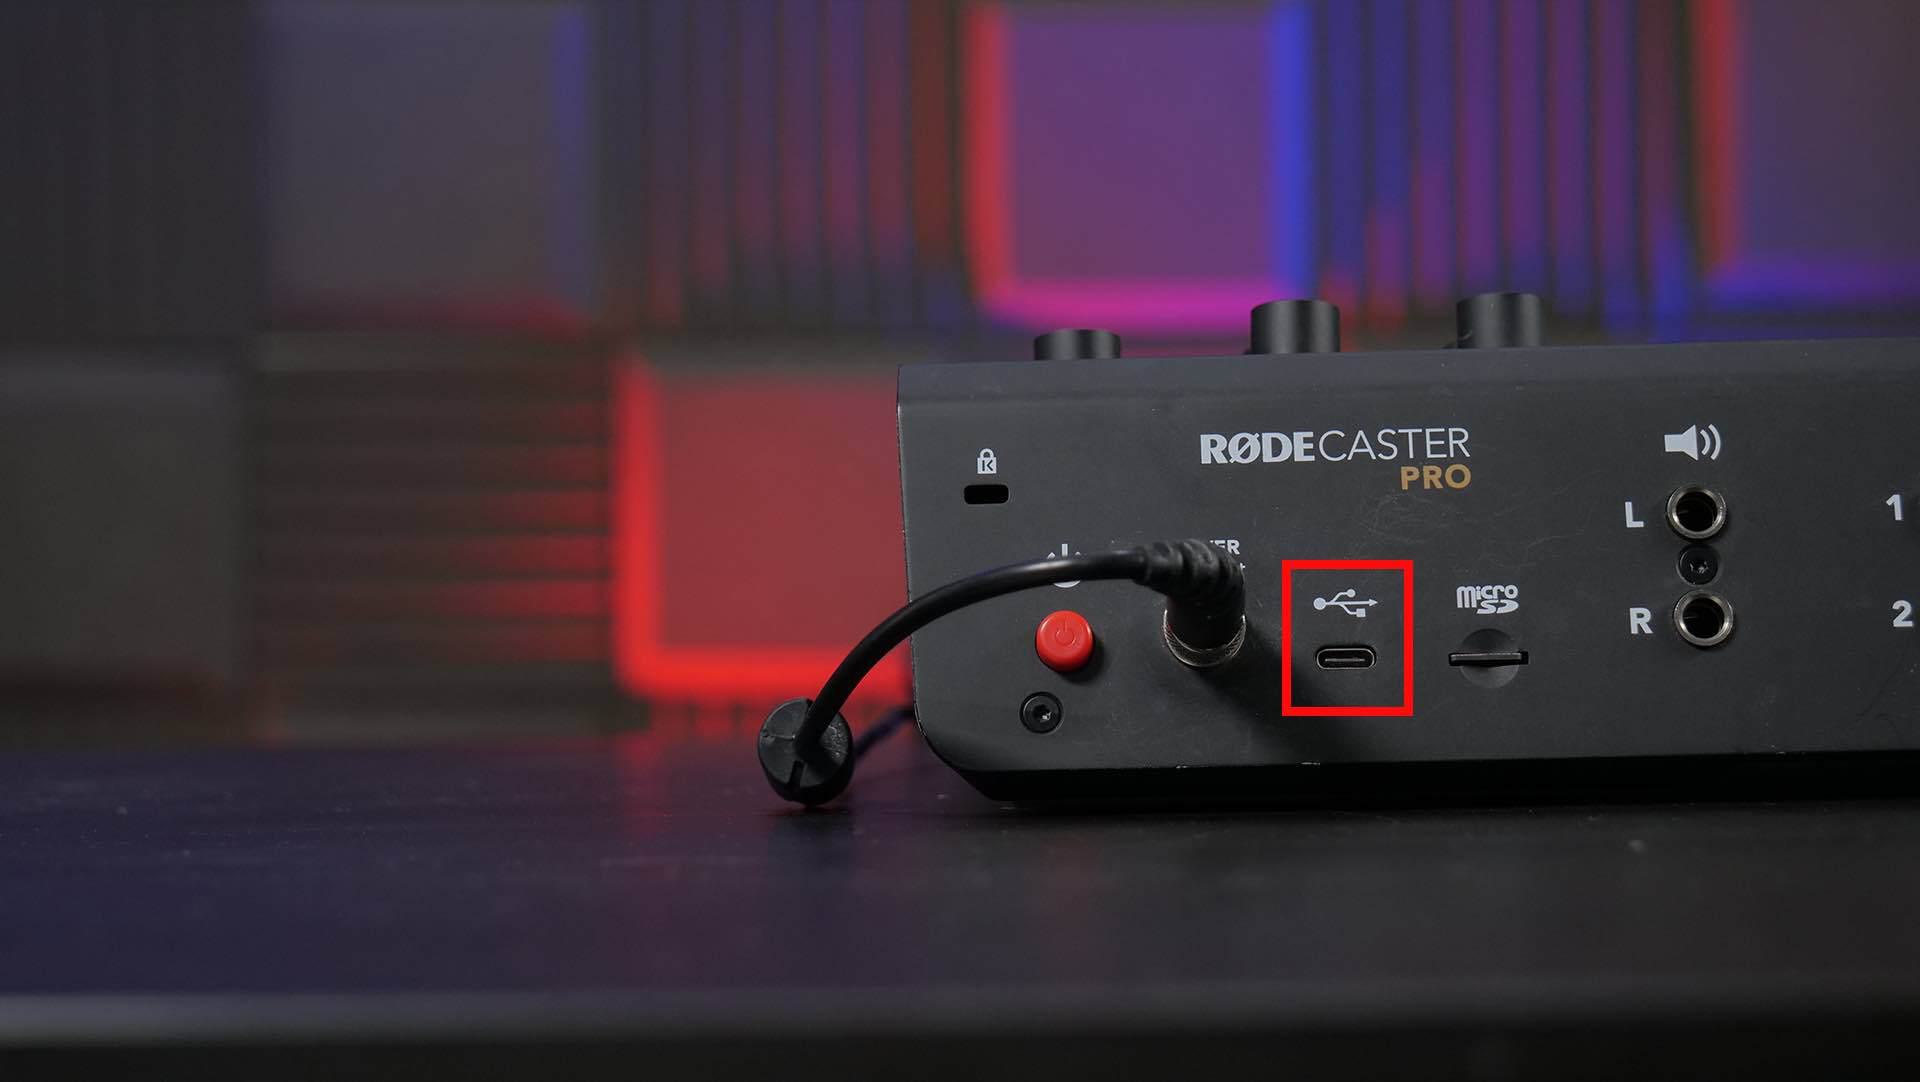
Before you can start broadcasting live, you’ll need to connect everything. Start by hooking up your Rodecaster to the computer via the USB port. This lets you adjust your computers audio using the USB fader.
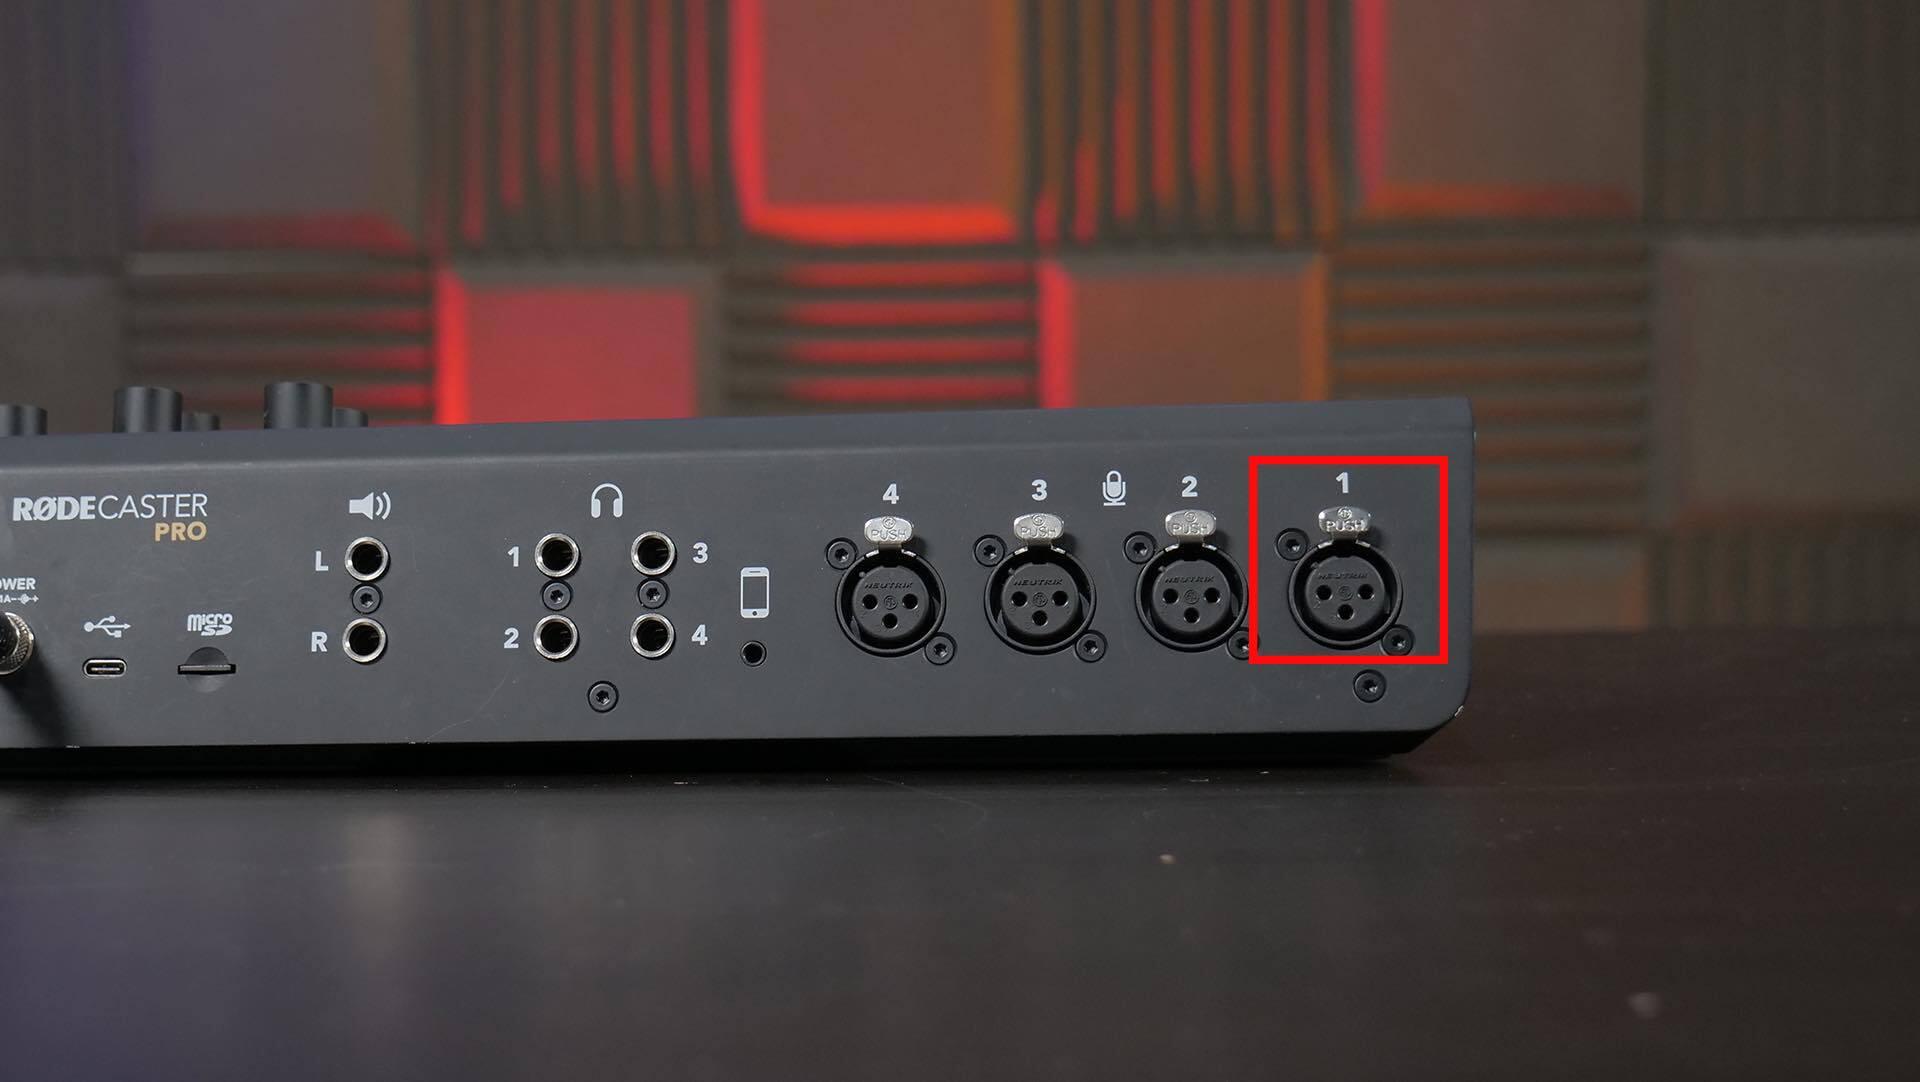
Connect your microphone to XLR input 1. Now your mic levels will be adjustable through fader 1.
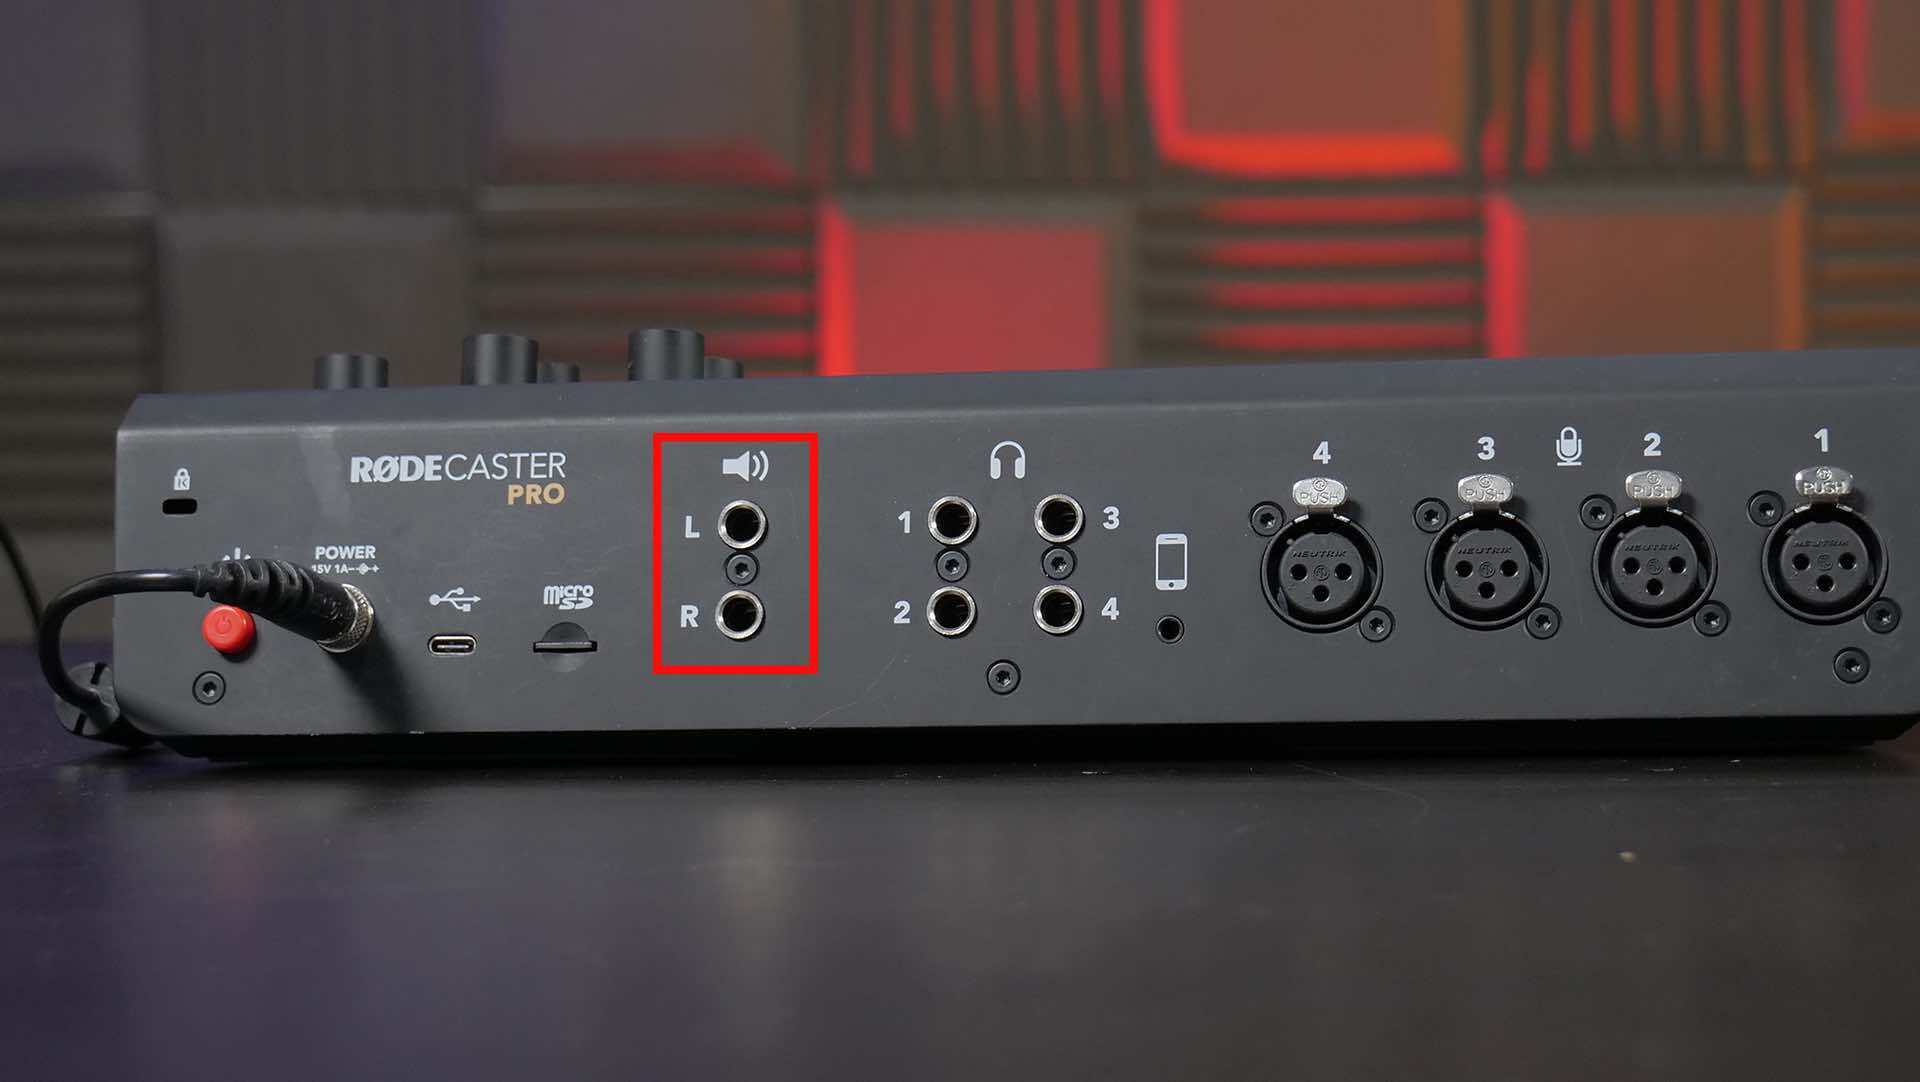
If you’re using a speaker to monitor your audio, use a ¼’ jack cable to plug into the L/R inputs on your Rodecaster. If you have two speakers you can use both inputs for stereo sound.
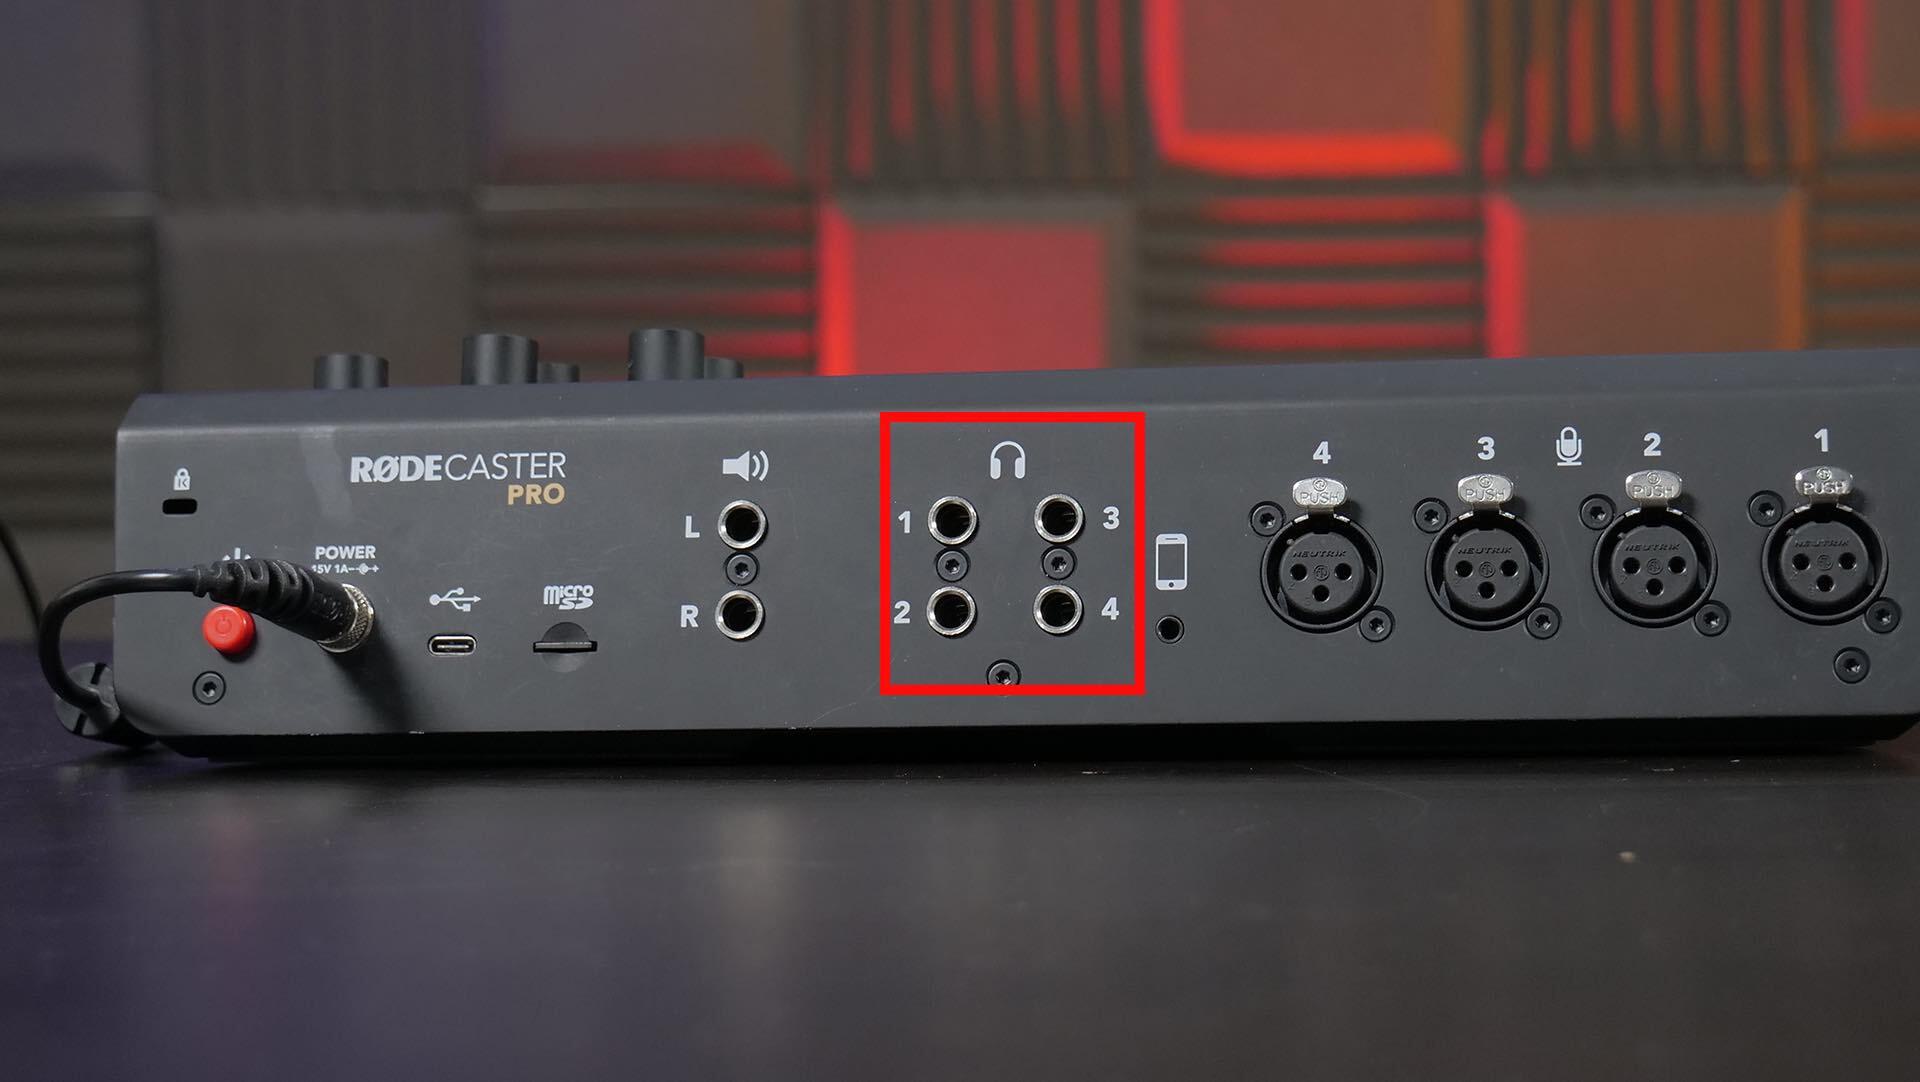
For headphones, plug into the headphone jack input 1. There are 4 headphone inputs you can use for multiple presenters.
Go into the settings of your mixer into Advanced>Studio>Operations. Enable Automatically Mute Outputs. This will disable your speaker whenever you move your microphone faders up so they don’t feedback.
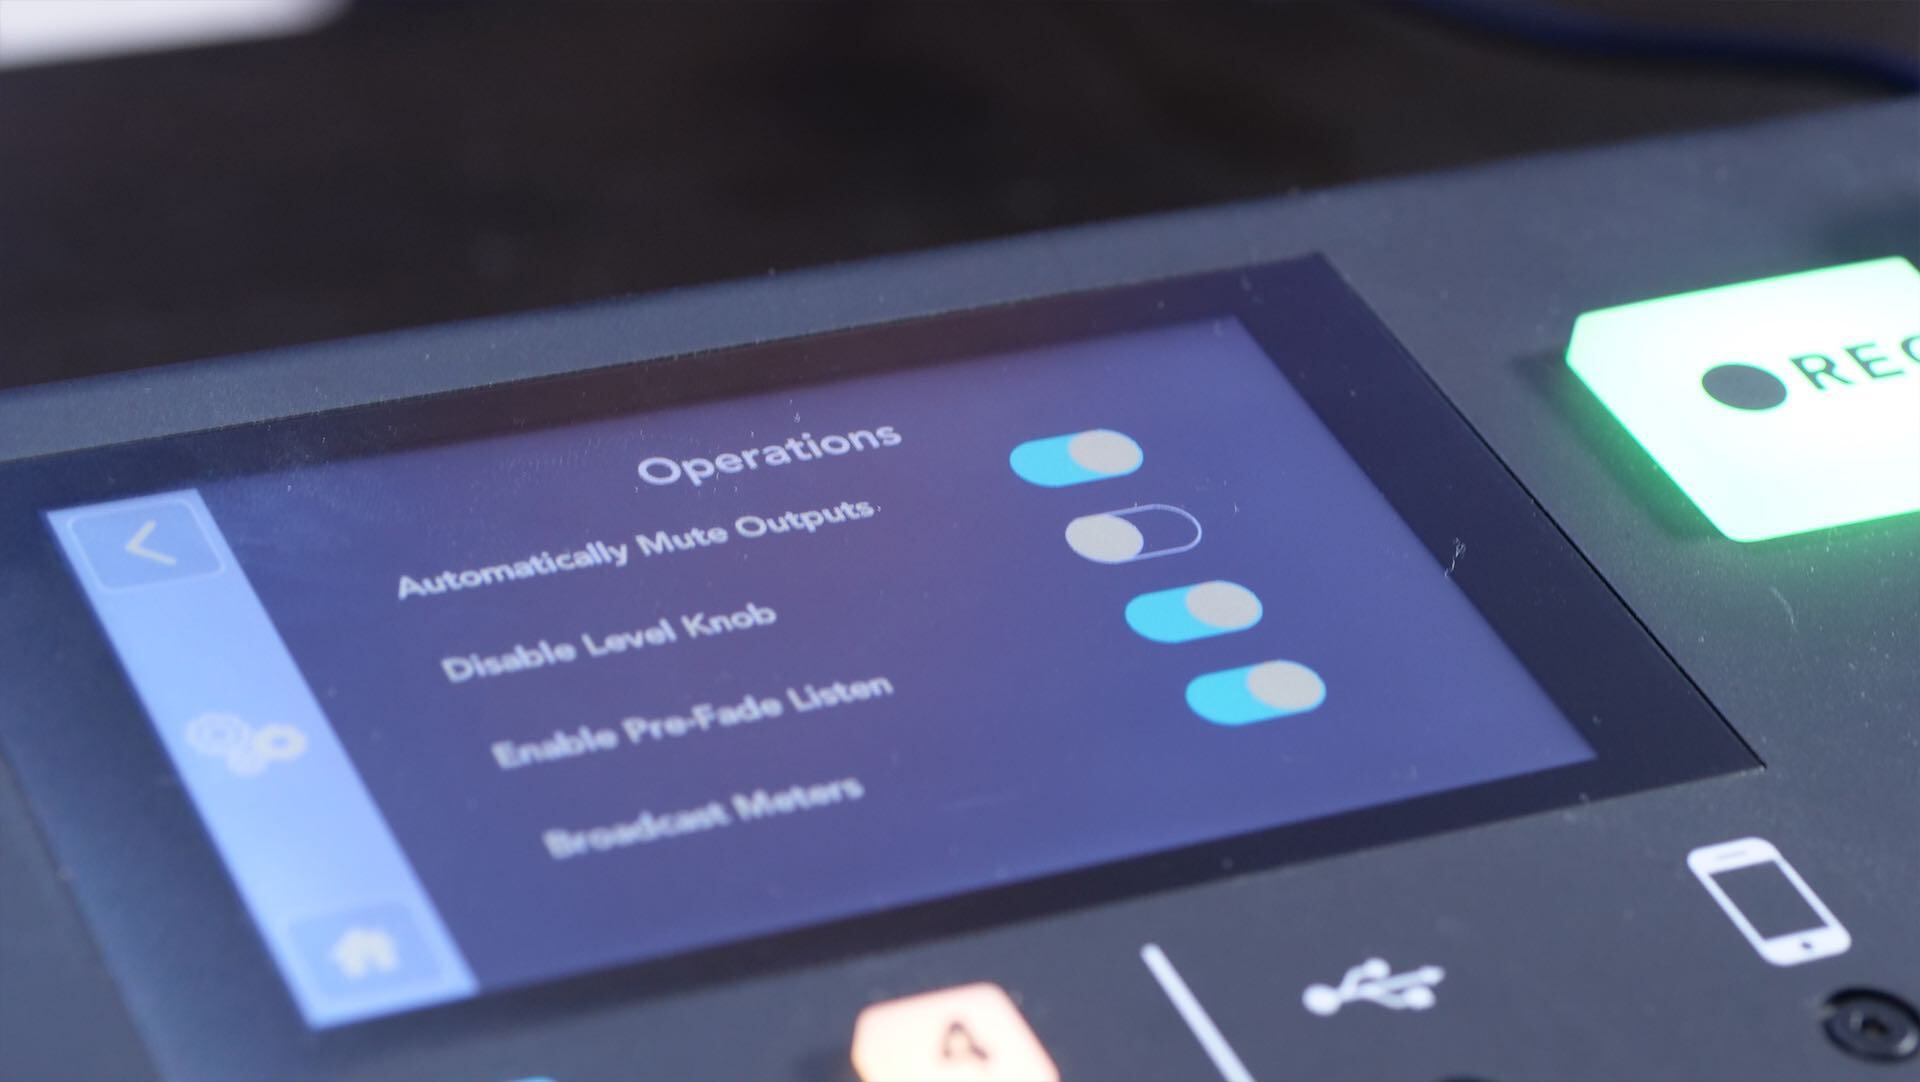
Enable Pre-fade Listen, which lets you monitor audio through your headphones before the faders are turned up when you press the green button on the channel.

Enable Broadcast Meters, which adjusts all audio so it meets broadcast levels.
Once you’ve got everything hooked up, test out your faders and microphone to make sure the speaker muting function is working.
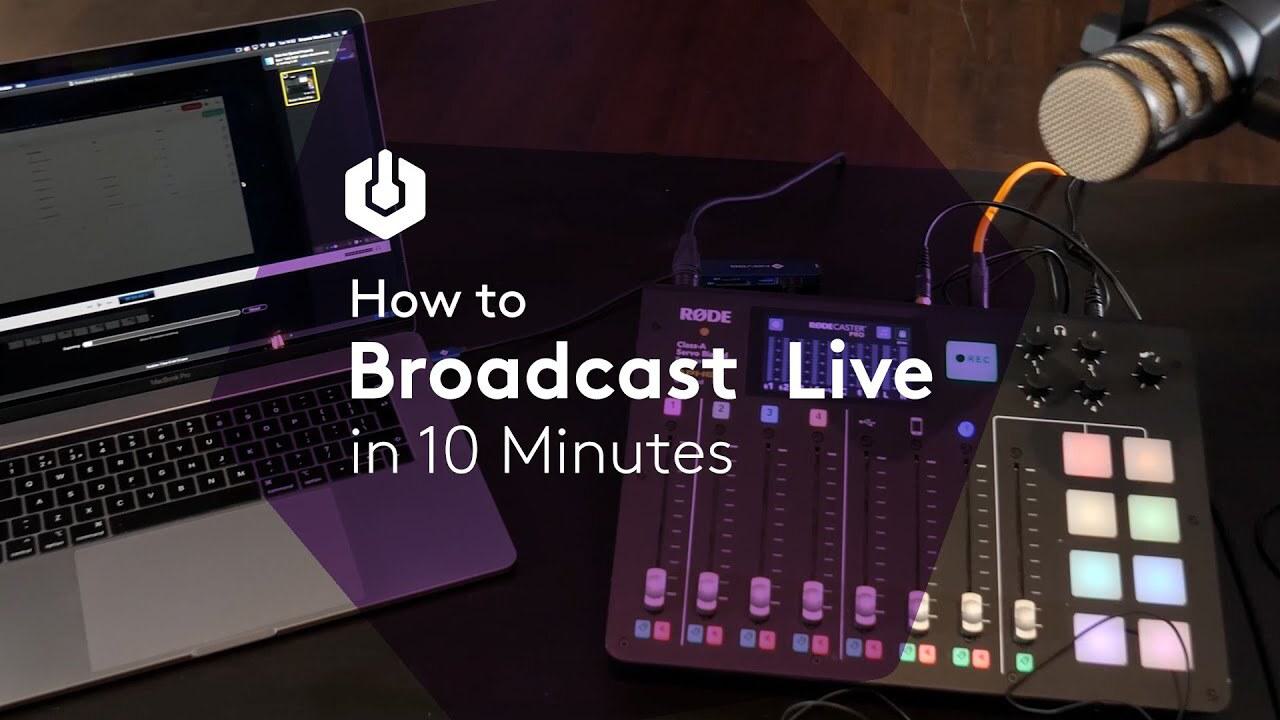
Going Live
Once your Rodecaster is ready to broadcast, your software needs to be set up so you can go live.
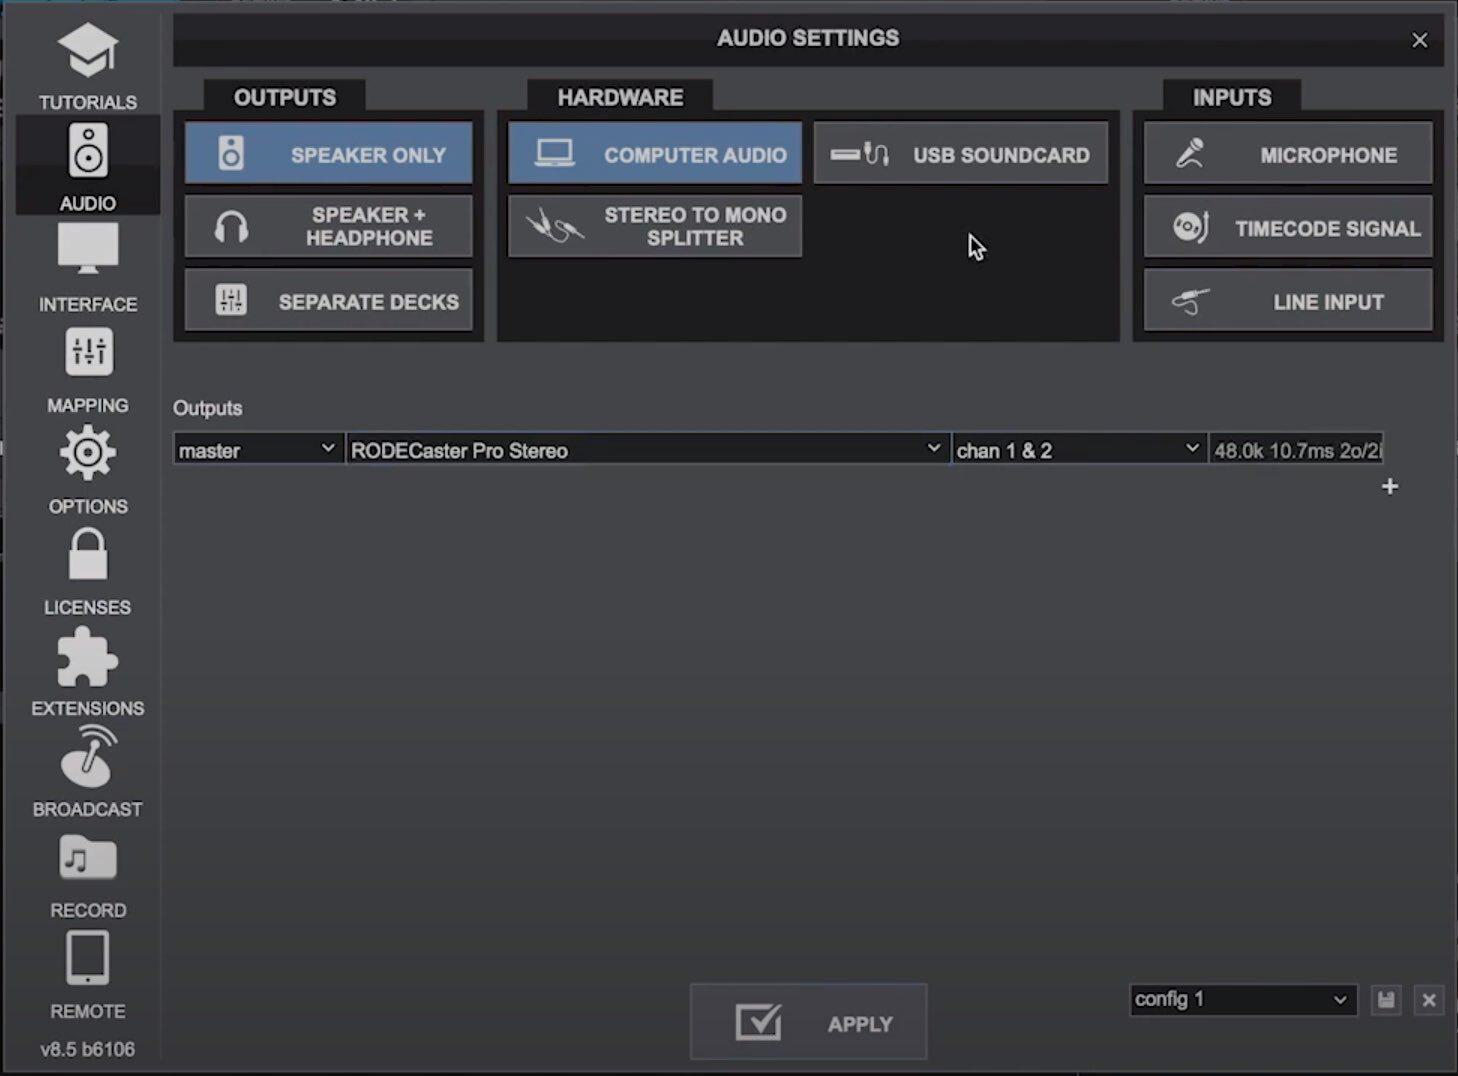
Go into the Settings of Virtual DJ and set the Inputs and Outputs as Rodecaster Pro. The audio from Virtual DJ will now play through your Rodecaster speakers when the fader is turned up.
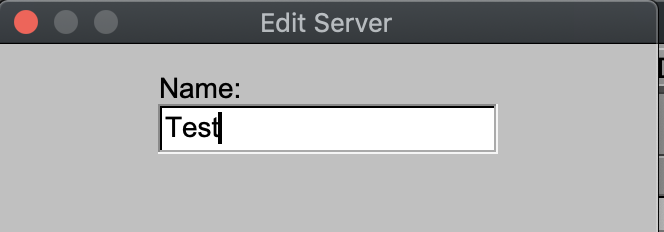
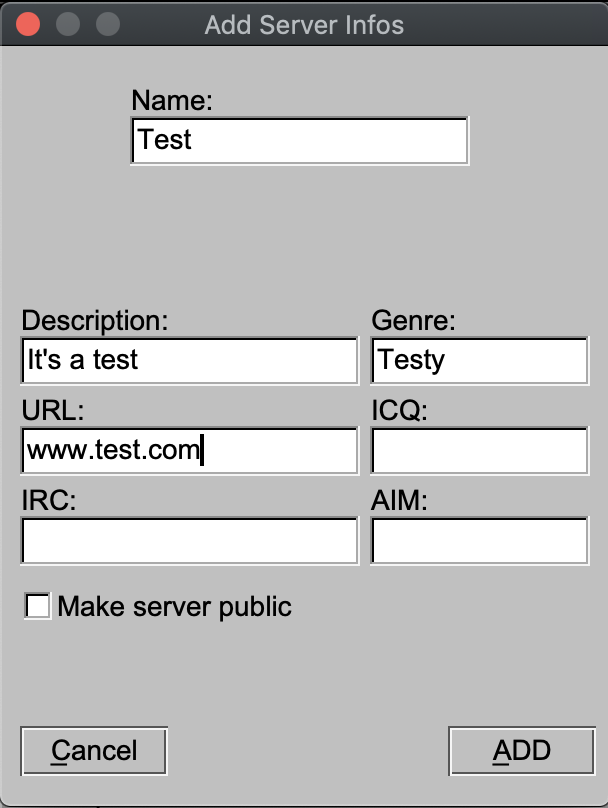
In BUTT, go into Settings>Main. Under Server, hit Add and choose a name for your server.
Copy in the Host, Port and Password from your Radio.co Dashboard into your BUTT server. Clicking Add will save these settings for the future.
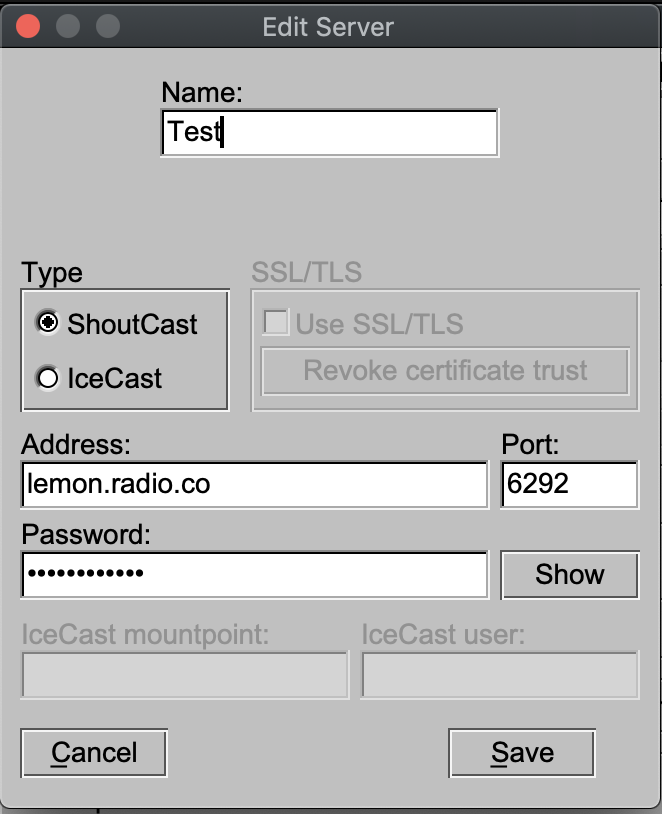
Go into Stream Infos and add a Description and URL, although this is optional.
Finally, enter the Audio settings and under Audio Device, select Rodecaster Pro. This will now take any audio from your Rodecaster and broadcast it to your radio station.
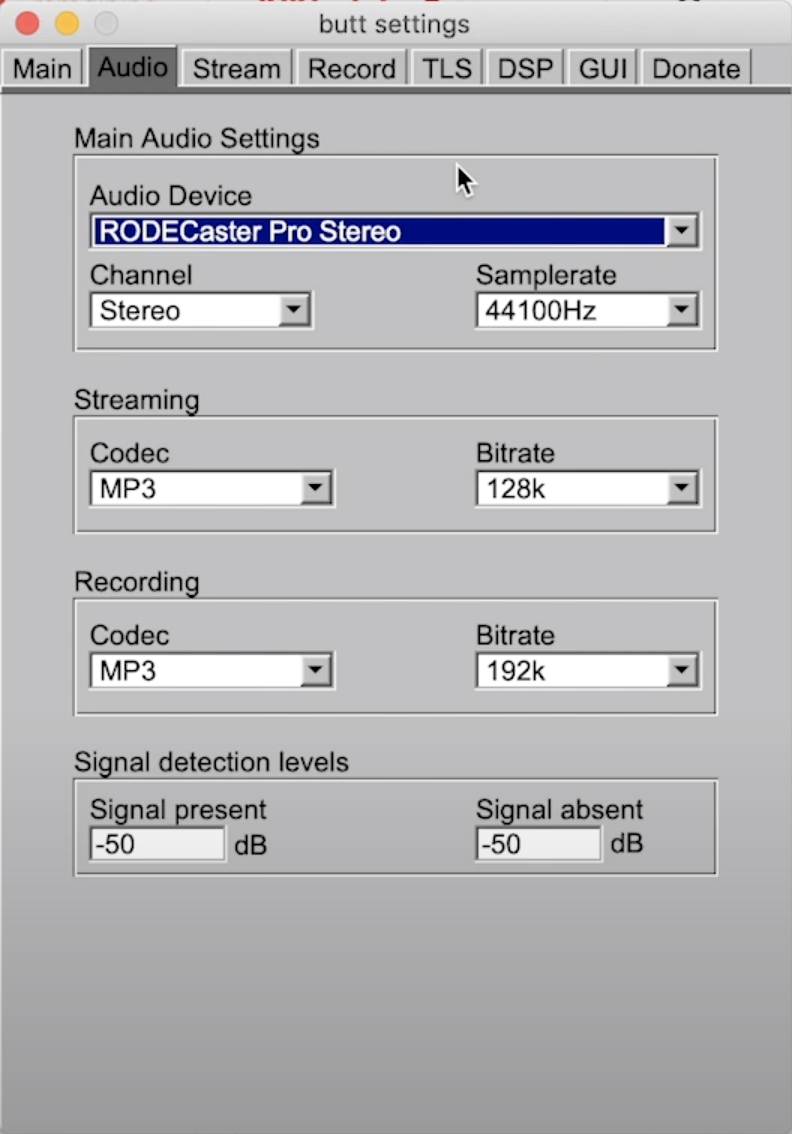
With everything set up, hit the Live Record button in BUTT to start broadcasting radio with the Rodecaster Pro straight to your station.
Broadcast Live Radio with the Rodecaster Pro
Knowing how to broadcast live radio with the Rodecaster Pro puts professional-level features at your fingertips for a reasonable price. And you don’t have to be a tech guru to figure out how to use it!
You can rely on Radio.co for the best online radio solutions to propel your station forwards. Try out your free 7-day trial today.


