Need advice? Let's talk.
Get straightforward guidance from your broadcasting partner. Schedule a call to chat with the team about your radio station.
Book DemoRocket Broadcaster: Audio Encoder for Windows
Rocket Broadcaster is an easy way to simplify your workflow and stream however you want. This guide gives you everything you need for a quick setup.
You have a lot to think about when starting a radio station. Which mic will you use? How will you set up your studio? Just how are you gonna make some cash from this radio shindig?
But a question you may not consider is what software will you use? You may not think it but this makes a huge difference in how smoothly your station runs. More experienced broadcasters are going to get more out of expansive and comprehensive software like Virtual DJ. Starters might want something a bit simpler.
And if anything’s going to make running your station simpler, it’s Rocket Broadcaster.
Rocket Broadcaster: Simple Software for Windows
Rocket Broadcaster is software that can broadcast different applications and media players from your computer. It’s designed to make audio routing easy for your streams with a simple, minimalistic interface.
Setting Up Rocket Broadcaster for Live Streaming
Please Note: Rocket Broadcaster only works on Windows. For a Mac alternative, see Audio Hijack.
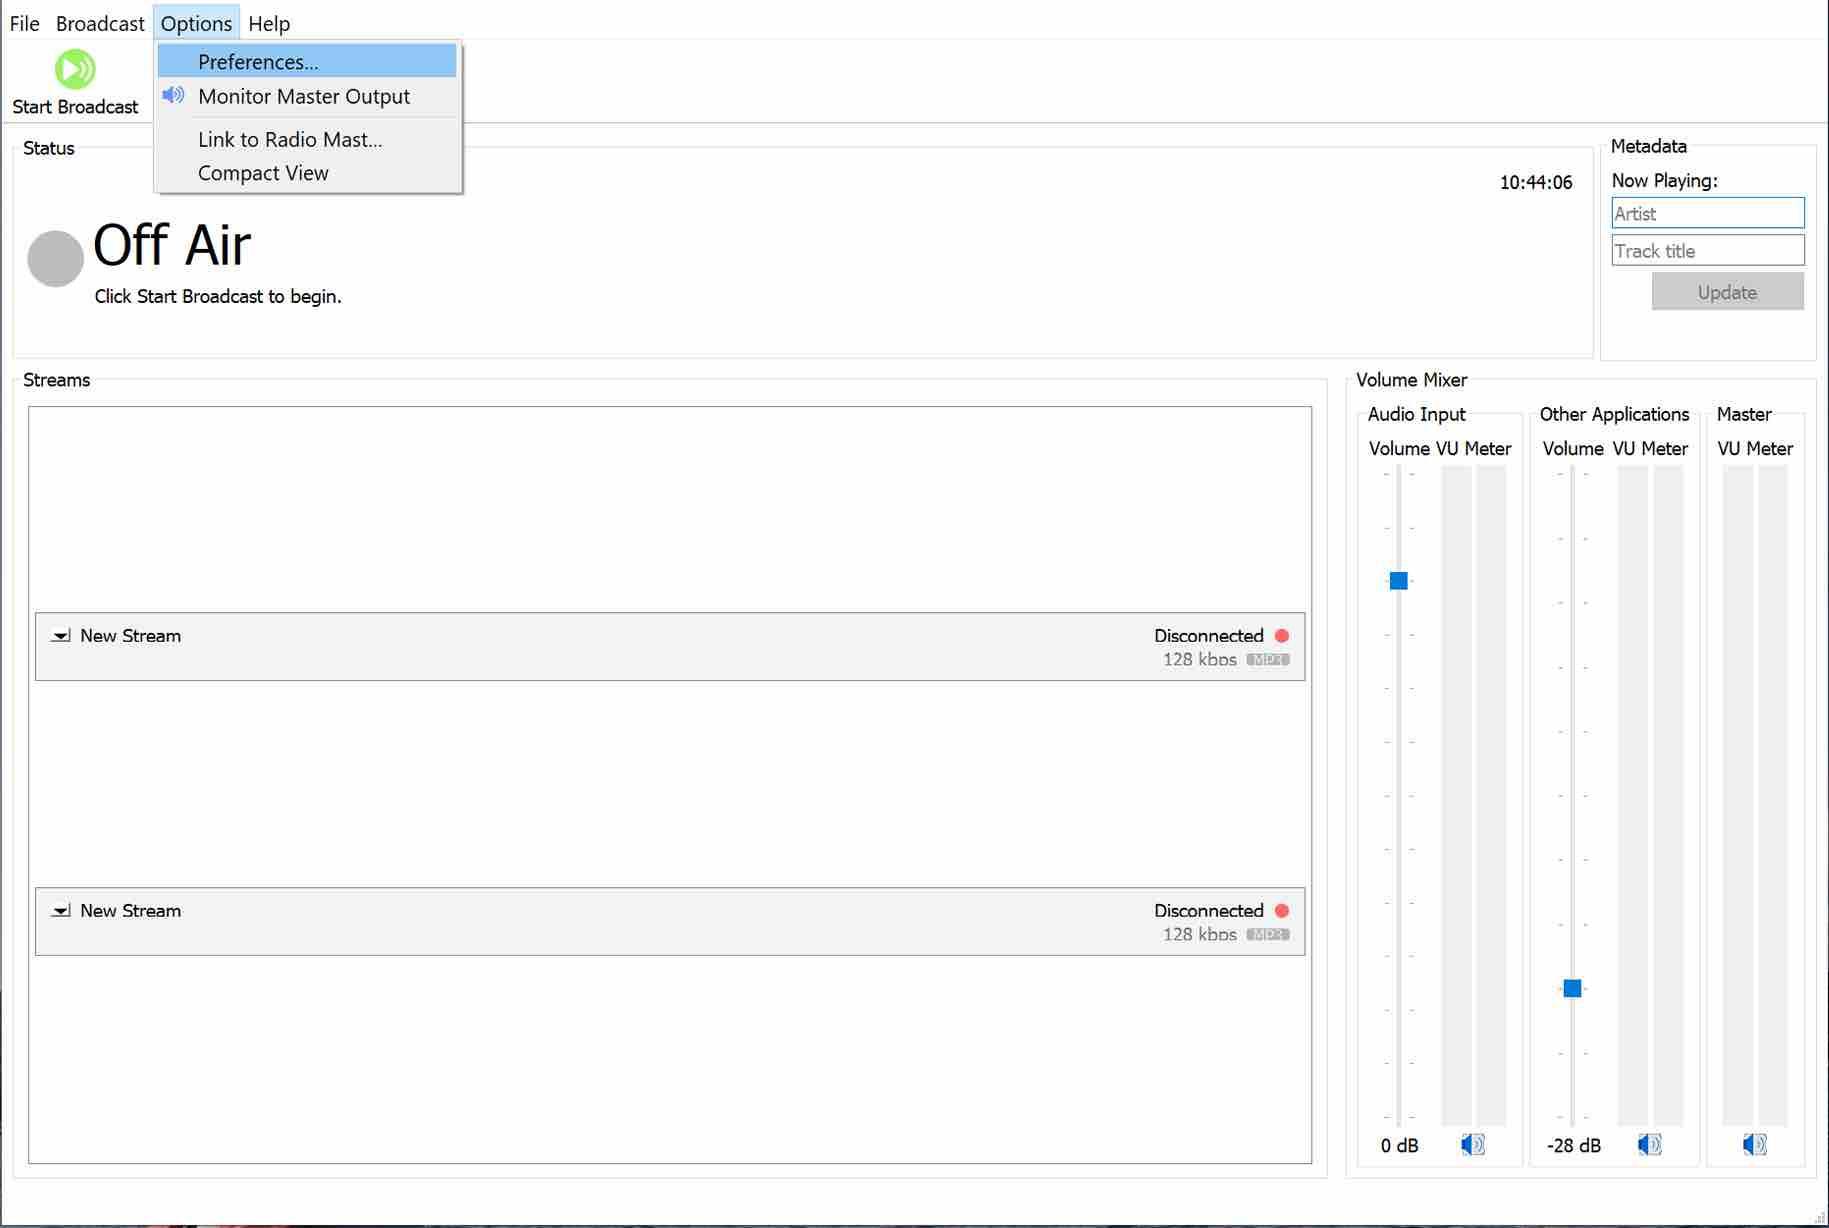
Go into Options>Preferences in the top window to make sure your settings are correct. Your sample rate should be around 44.1Khz (44100). Set your microphone or audio interface as the input device.
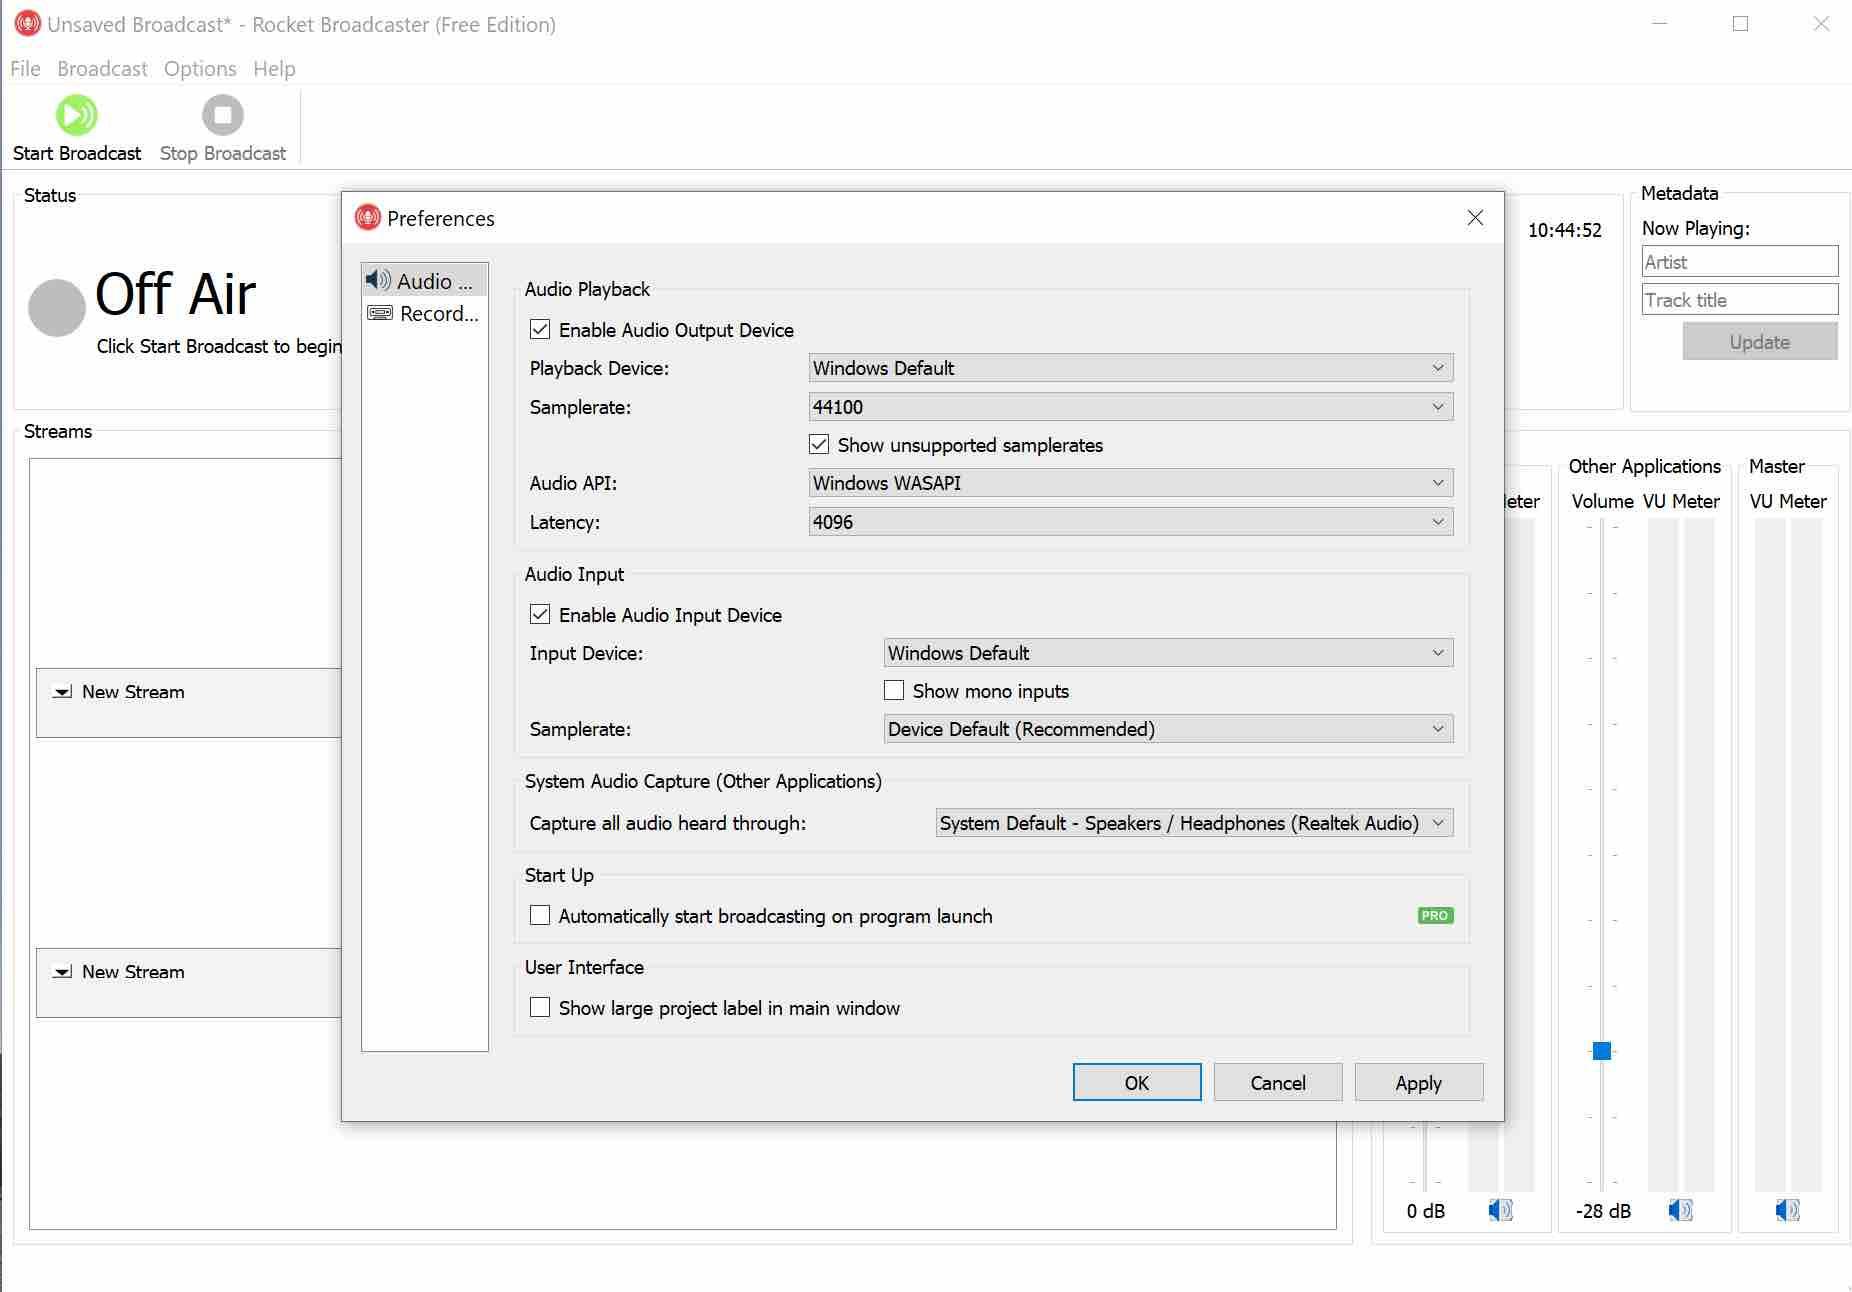
If you use any streaming services or applications to broadcast music from, in Preferences, under System Audio Capture, select System Default. This makes sure any music played is routed through Rocket Broadcaster. With this selected, make sure no other applications are playing other than what you want or the audio will be streamed.
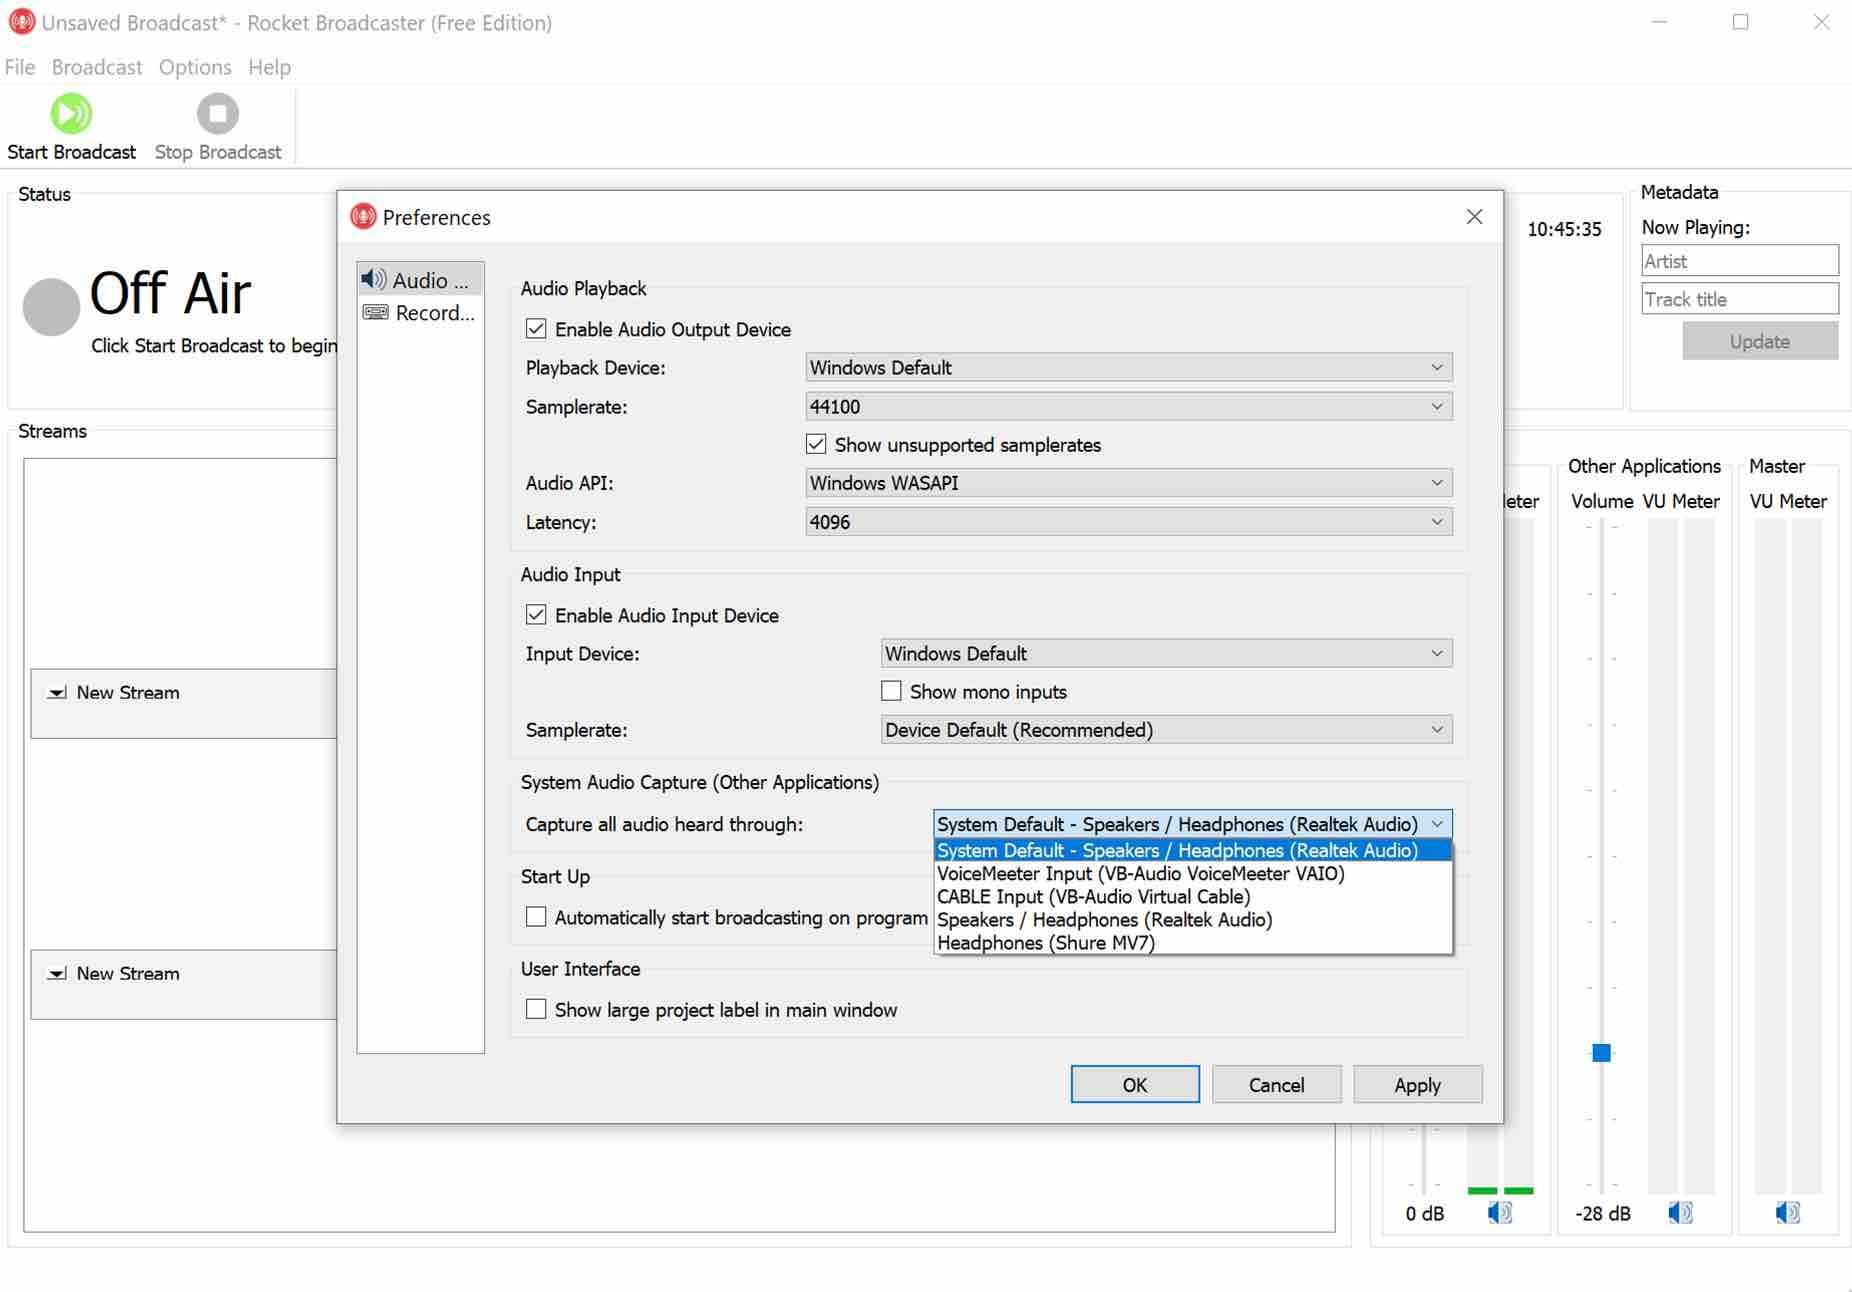
Check on the main screen that your levels are coming through from your microphone and the application you're streaming from.
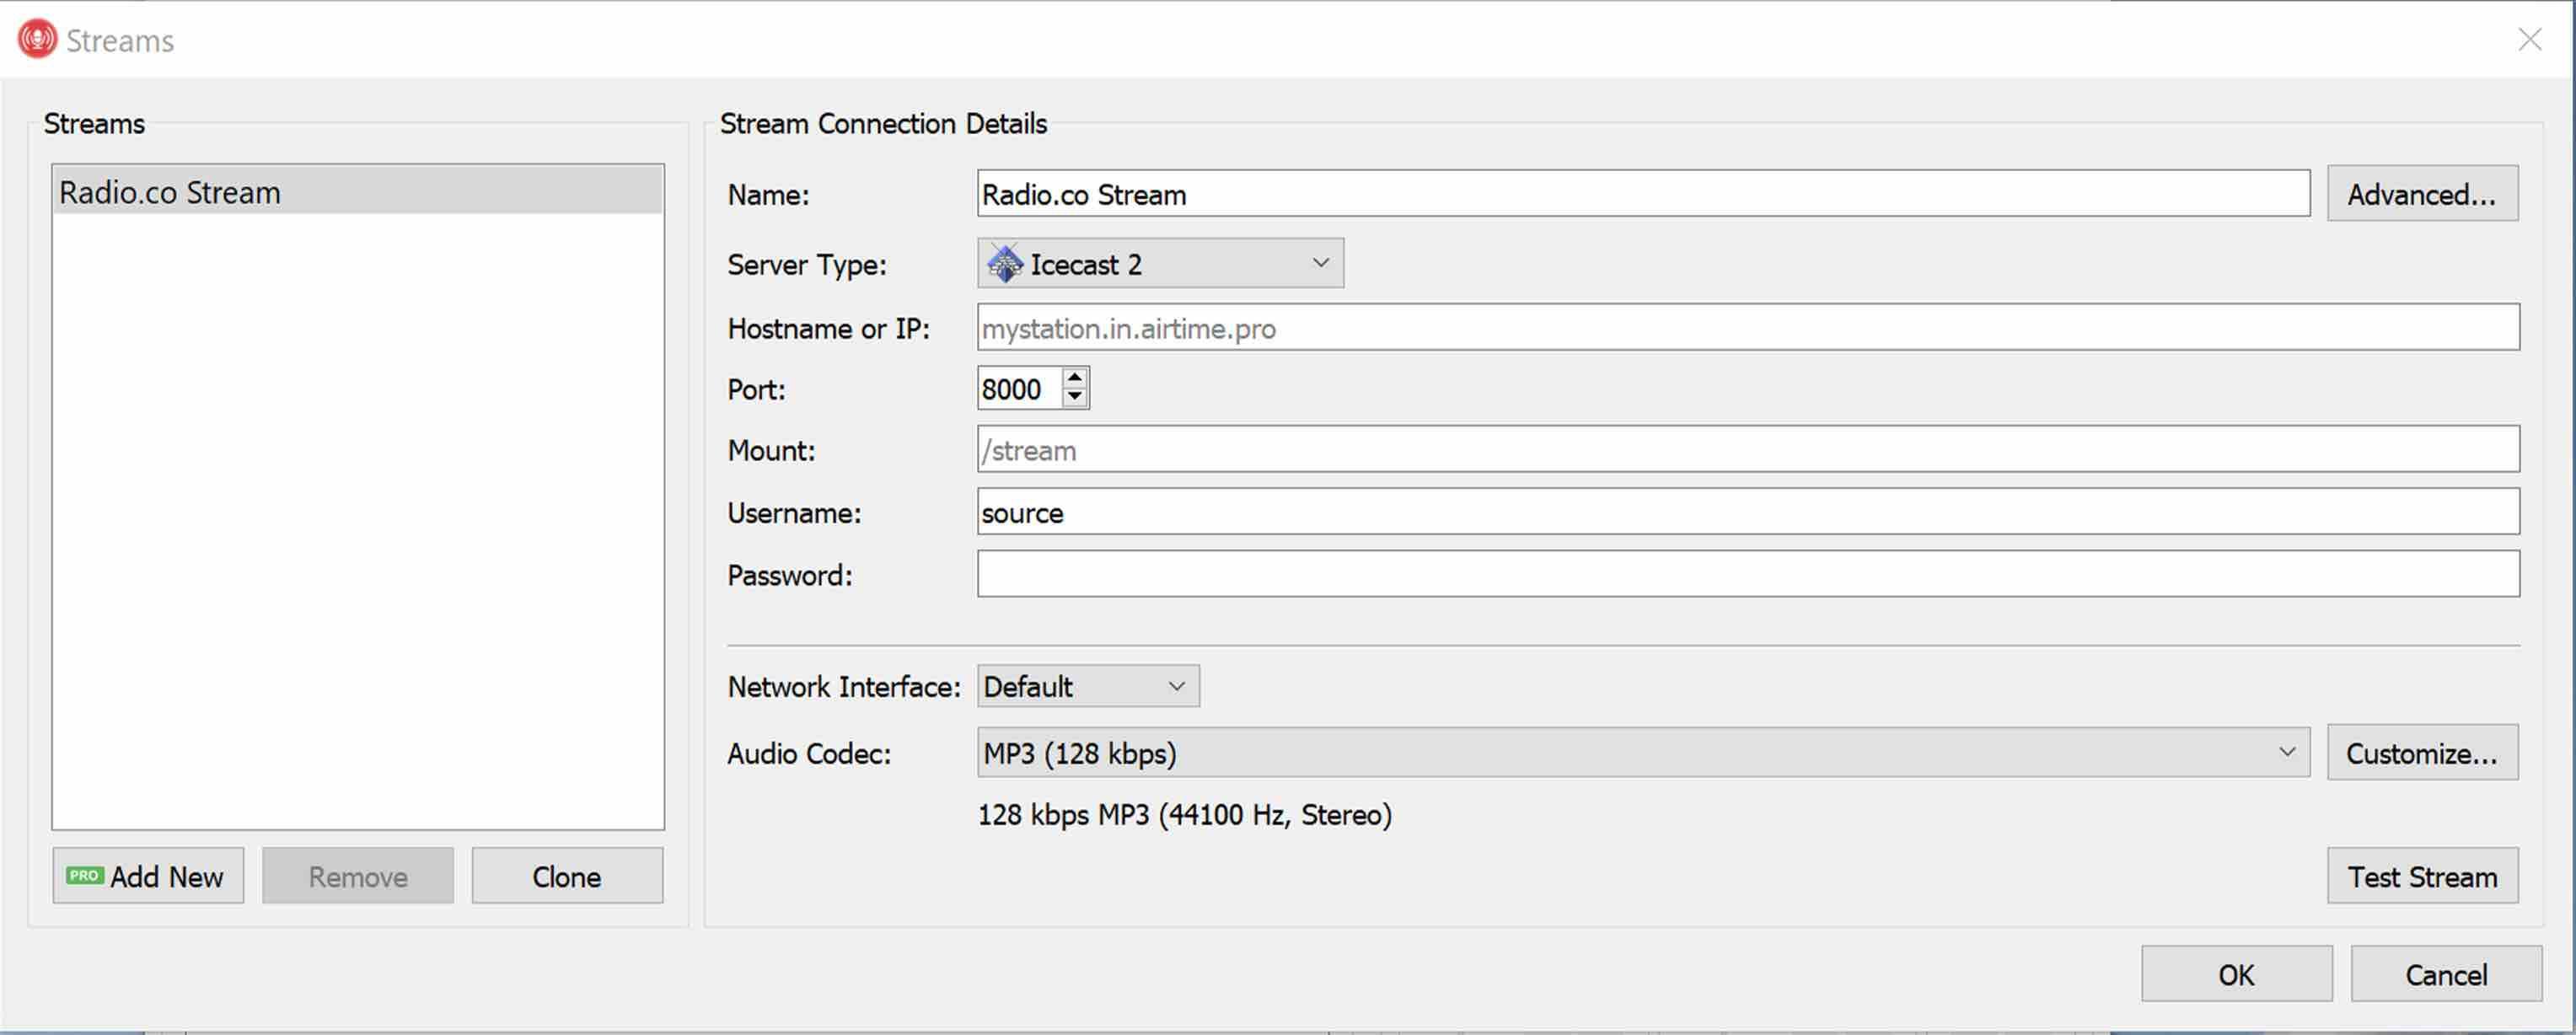
If audio levels are correct, go into Broadcast>Streams and enter your server details. You can find your port and password in your Radio.co Dashboard under the Live tab.
If you’re using broadcast software alongside Rocket you’ll need to make sure your metadata display is correct by going into Preferences>Metadata. Processes for configuring metadata vary between software, so for guides check Rocket Broadcaster’s documentation.
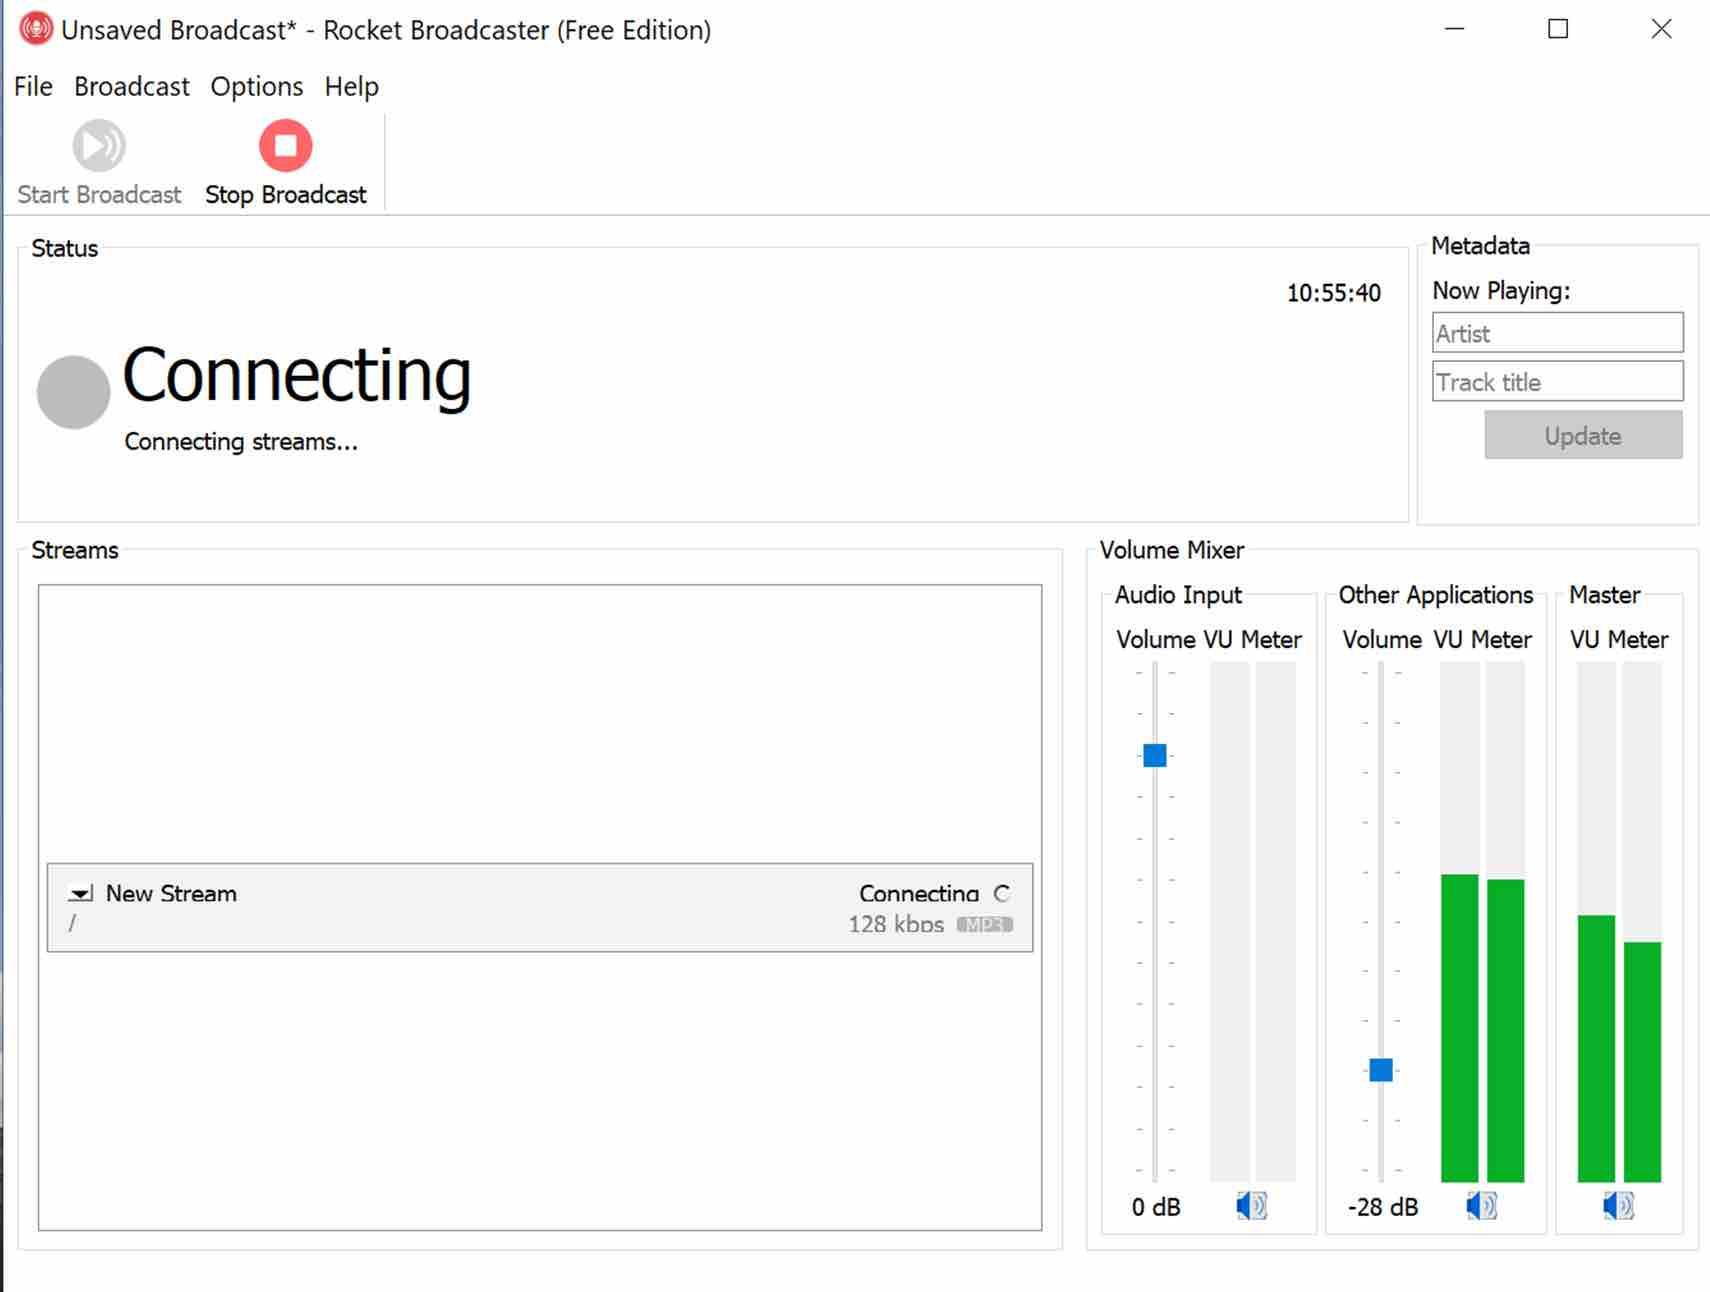
Once all this has been set up you’ll need to test your stream. Do this by clicking on Start Broadcast. If everything is correct you’ll see On Air. If you don’t go live, double-check your stream settings.
Conclusion
Have you used Rocket Broadcaster? How did it handle your live streams, did it make them any easier? Let us know down in the comments.
If you’re interested in starting your own radio station but feel like trying before you buy, get your free 7-day trial today.


