Need advice? Let's talk.
Get straightforward guidance from your broadcasting partner. Schedule a call to chat with the team about your radio station.
Book DemoPlayIt Live: Automated Playout Software For Windows
Streamline your radio production with PlayIt Live. Go live during peak listenership and automate for when no ones around, all with the help of Radio.co.

Gone are the days where a radio station needs to be manned 24/7. Automation keeps a station broadcasting with no need for anyone to do the graveyard shift. Heck, it can even make you sound like you're still live.
Now, Radio.co offers plenty of ways of automating your station. But you may want to use the cart-based software PlayIt Live. While PlayIt Live can help you programme your radio station, it can't broadcast it. That's where Radio.co comes in. We'll show you how you can use PlayIt Live with Radio.co so you can get the best out of both worlds.
What Is PlayIt Live?
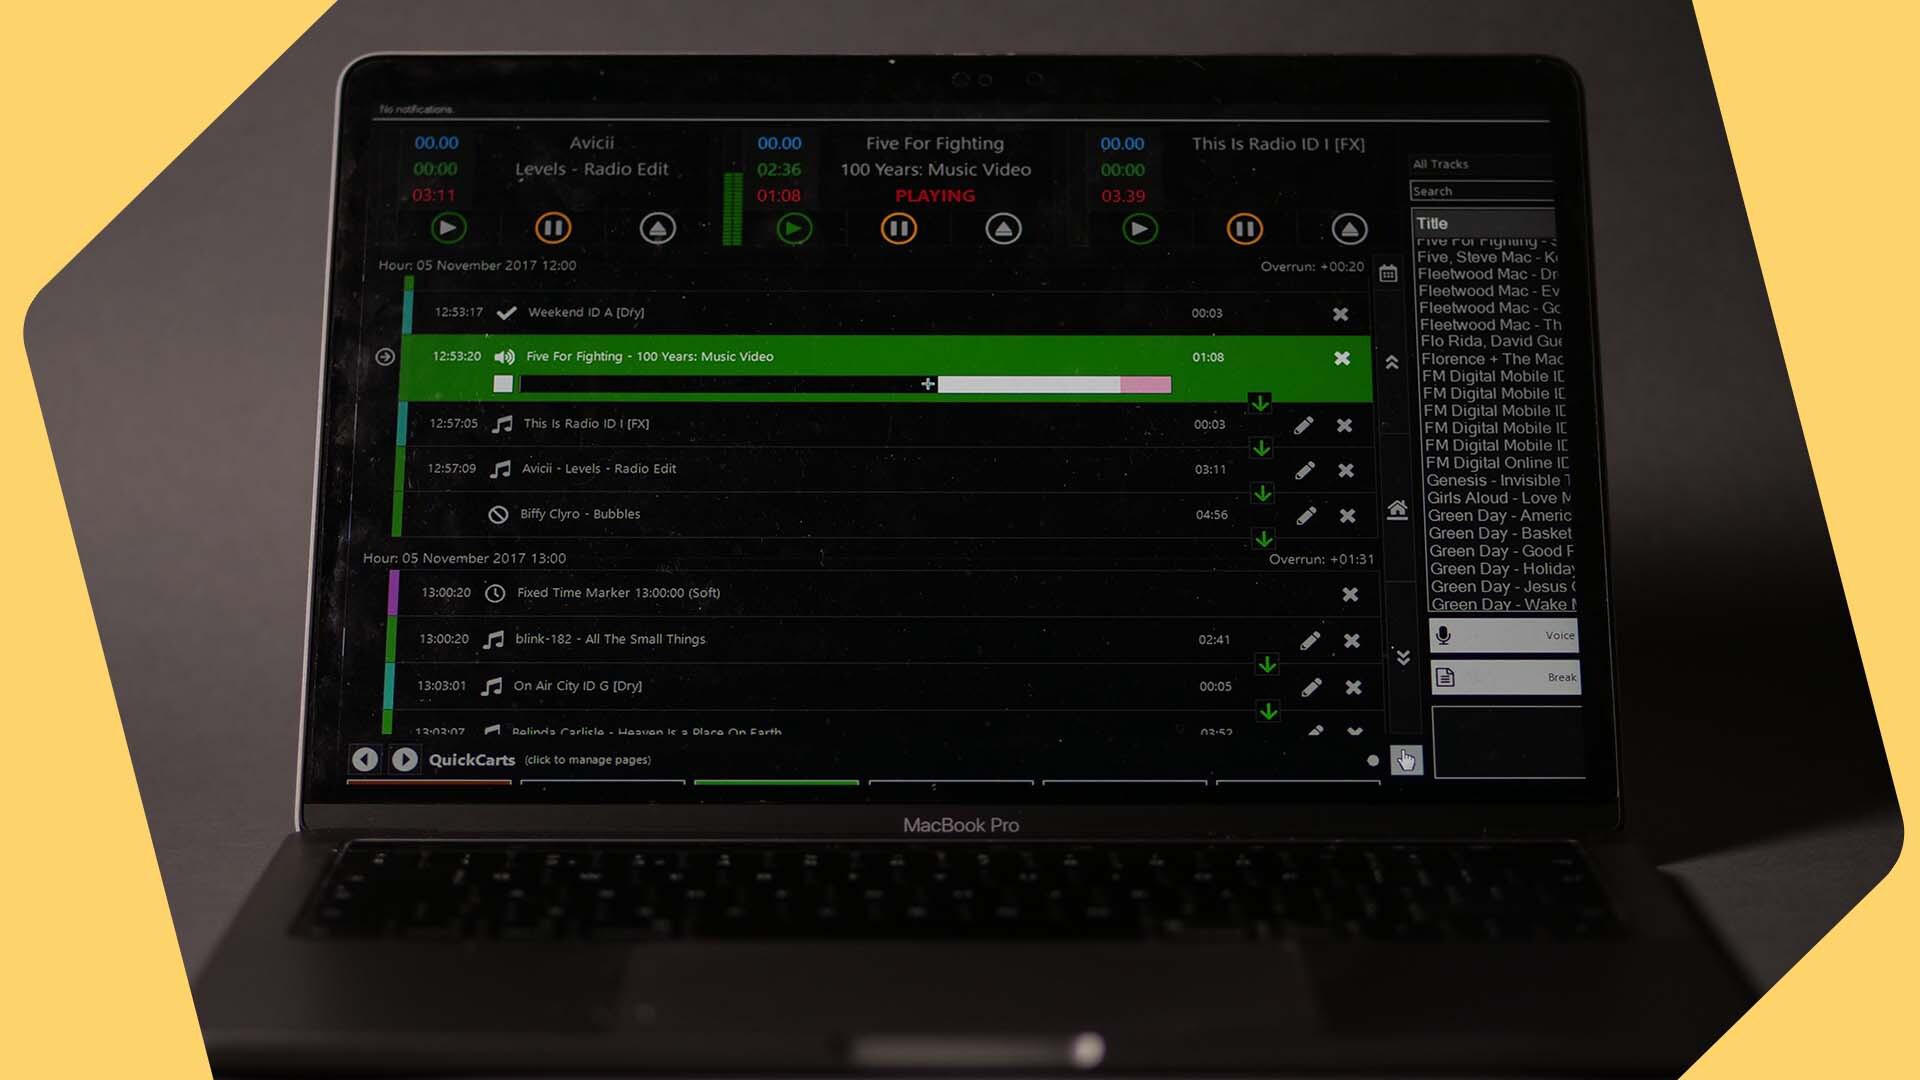
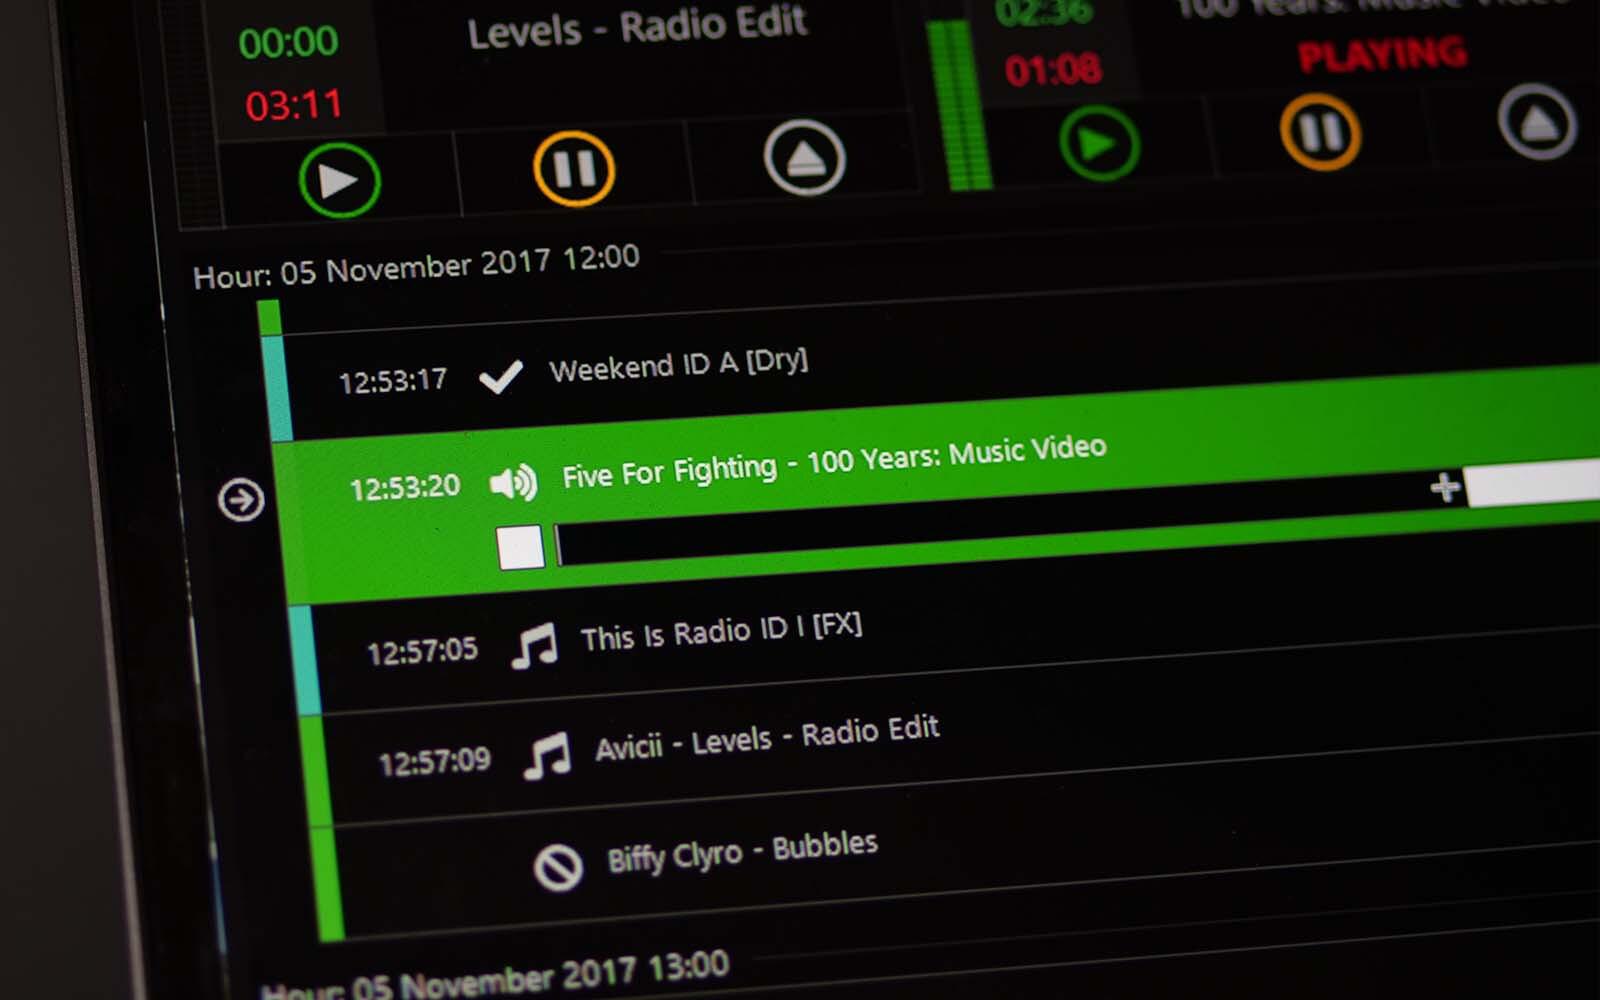
PlayIt Live is automation and playout software. Like Radio.co, it takes what would be manual processes and makes them automatic. So rather than create a playlist song by song, automation software will generate one for you. It reduces the labour of running a radio station, big time.
PlayIt Live uses carts. These are based on the analog days when radio stations used to store and play their jingles, idents and promos on cassettes (carts). Nowadays, software carts typically look like big squares on the interface. They can be connected to audio drivers or uploaded with audio like jingles, idents and promo. The benefit of carts is they can played, paused and stopped very quickly.
Cart-based software is pretty popular within the radio industry. So if you're used to using them, you may want to carry on with PlayIt Live.
How To Setup PlayIt Live with Radio.co
If you don't have a Radio.co account, you can try a 7-day free trial or book a demo to have a look around.
Step 1: Open Radio.co and create a scheduled event
Note: If you have "Live Anytime Enabled" you can go straight to step 3!
- Go to schedule on the left hand side of the Radio.co interface.
- Scroll down to the current time.
- Click on the schedule for the current time and date, this will open up a window to schedule your event.
- Complete the details of your broadcast and "Create Event".
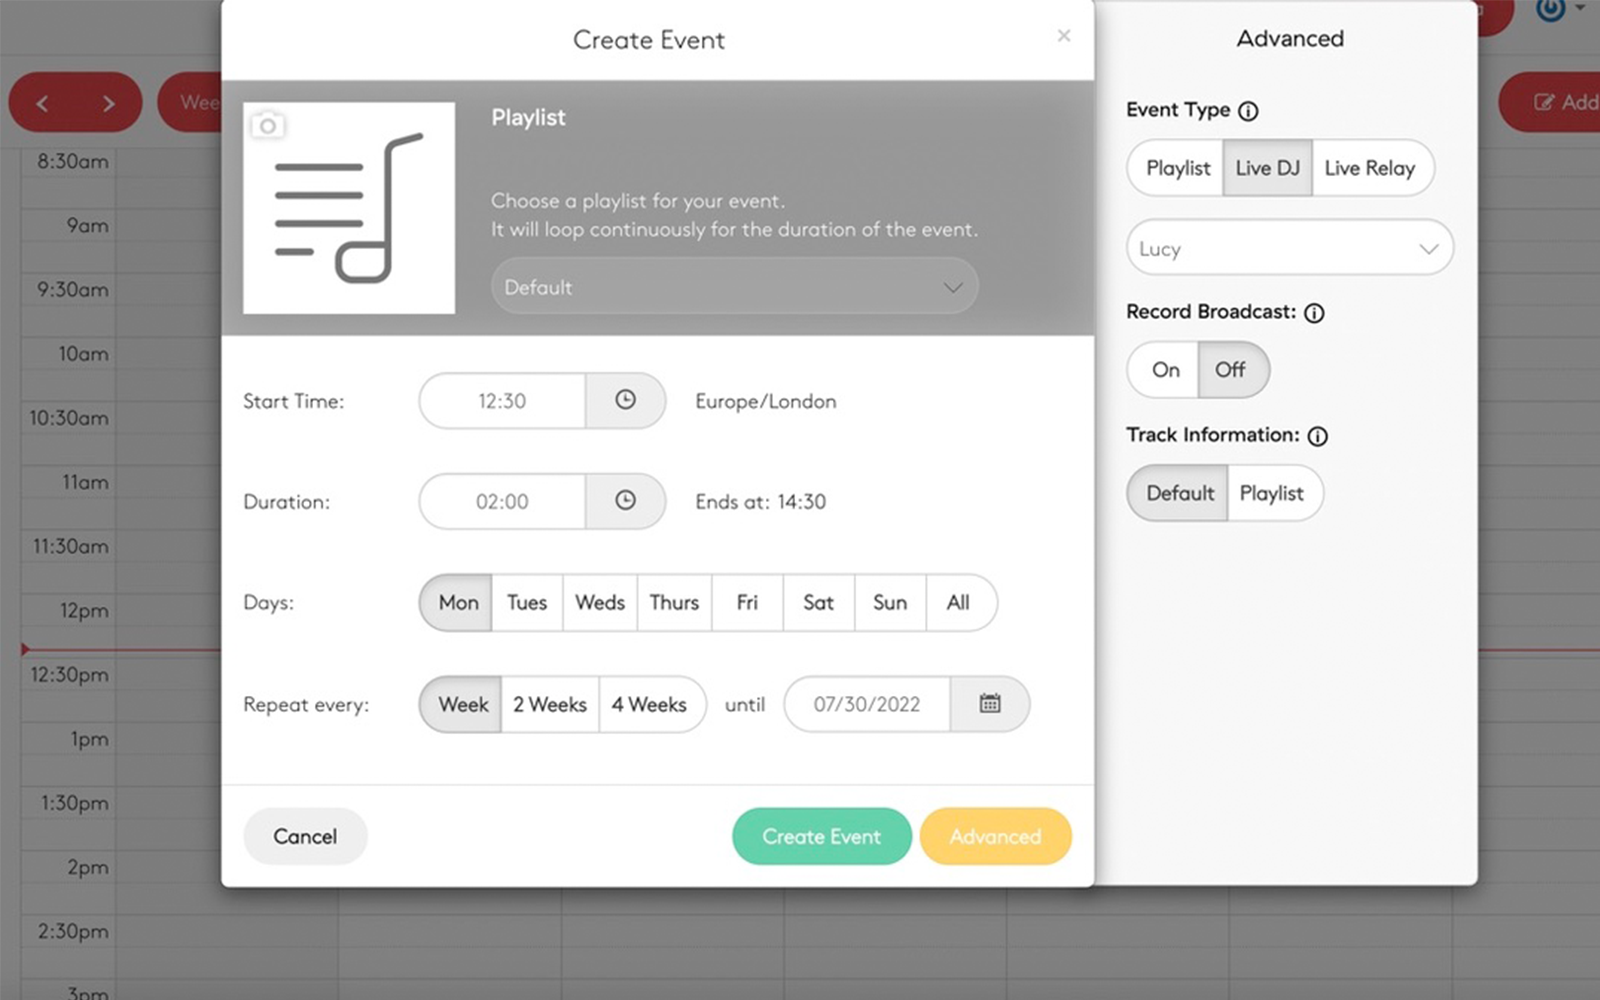
The create event window & advanced settings panel in Radio.co.
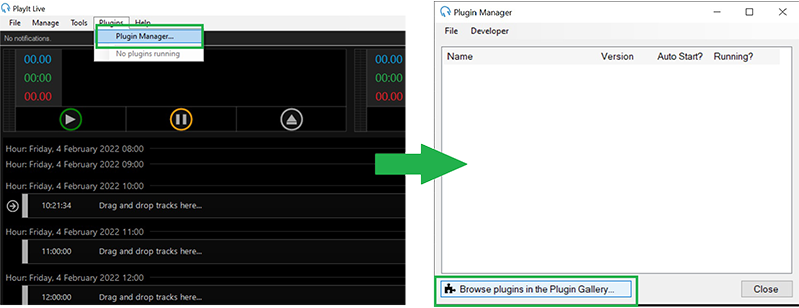
Step 2: Download the "Internet Broadcaster" plugin on PlayIt Live
- Open PlayIt Live.
- Go to Plugins in the toolbar > click "Plugin Manager" to open a new window.
- Click "Browse plugins in the Plugin Gallery...".
The PlayIt Live toolbar and plugin manager window. - To the right of "Internet Broadcaster" plugin, click "Get for Free" and "Get for Free" again in the pop-up window.
Note: You may be prompted to enter your PlayIt Live log in details here.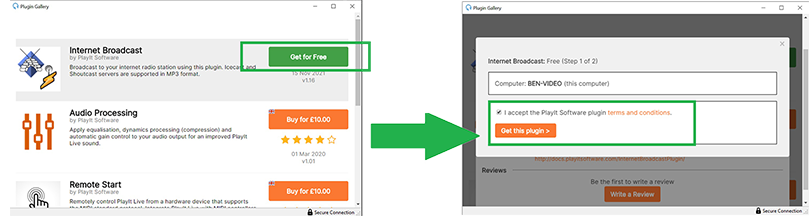
The plugin library windows to install the internet broadcast plugin. - Tick the boxes to accept the terms and conditions and click "Get this plugin".
- Once finished installing you can close this window.
Step 3: Configure the settings
Now, the Internet Broadcast plugin will be showing in your plugin manager.
- Double click on the Internet Broadcast plugin and then click add.
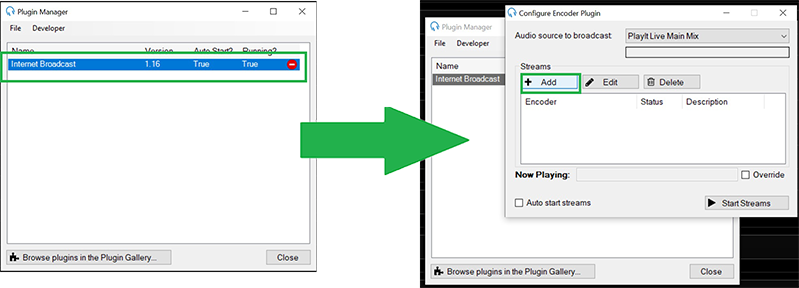
The PlayIt Live plugin gallery window & configure encoder window. - This will open a new window.
- Select SHOUTcastv1 as the Server Type.
- Go to the Radio.co platform and look in the top right corner for your Host, Port and Pass details.
Note: If you don't see this you may need to "Connection Settings" to reveal them. - Copy your host ID in to the server address.
- Copy your port in to the server port field.
- Copy your pass into the password field.
- Then complete the other details, including what format audio you'll be using and your station name.
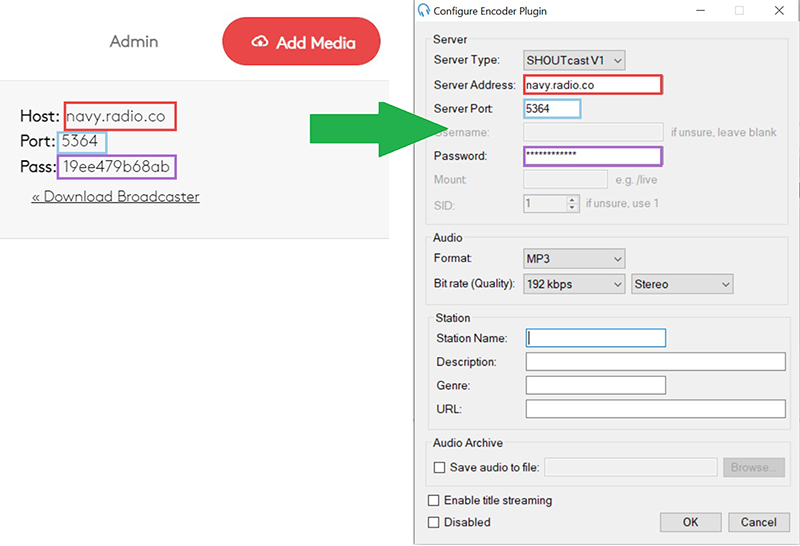
An example of Radio.co connection details and the configure encoder window to paste these details. - Once finished hit "OK".
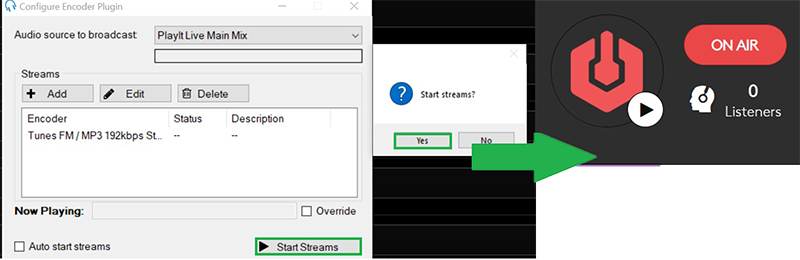
Step 4: Connect the PlayIt Live stream to Radio.co
Now all you need to do is...
- Press "Start Streams" on PlayIt Live.
- Ensure you're on air on Radio.co by checking the button in the top left corner of the Radio.co interface.
Wahoo! Whatever is playing in PlayIt Live will now be broadcasting on your Radio.co radio station. - Alternatively, to stop PlayIt Live broadcasting to Radio.co, you can press "Stop Streams".
Conclusion
Whether you use cart-based software for your radio station or not is really down to personal preference, like using Apple, Android or Google.
The good thing is PlayIt Live is easy to set up and use alongside Radio.co. So you can tailor the software you use for your own ease and familiarity. What one station needs will be different to another.
So, let us know what automation features are essential to managing your radio station.

