Need advice? Let's talk.
Get straightforward guidance from your broadcasting partner. Schedule a call to chat with the team about your radio station.
Book DemoHow to Use Streamlabs for Radio
Use Streamlabs to connect your radio station to platforms like Twitch and YouTube. Stream live and grow your community, interact instantly with fans and even drum up funding.

Why Radio Stations Should Use Streaming Platforms
Radio stations aren’t only heard on the airwaves. Internet radio stations can share their broadcasts with massive networks thanks to the software Streamlabs. Including the likes of Facebook Live, YouTube and Twitch.
Streamlabs is free, open-source software that allows streaming to one platform at a time (or multiple with a paid account). Streaming platforms do differ, but each offer similar benefits:
- They allow you real-time interactions with fans
- They have huge networks of users:
- Facebook: 2.91 billion users
- YouTube: 2.56 billion
- TikTok: 1 billion
Here at Radio.co, we even go live on these platforms too. We use Facebook and YouTube to host our live webinars and Q&A sessions. Look at us go:
What You Need
- A computer with a stable internet connection, preferably wired that can handle 5-10mps
- A computer with the Streamlabs desktop app
- An account for your chosen streaming platform
Once you’ve got all three sorted, it’s time to set up Streamlabs.
How To Set Up Streamlabs With Radio.co
Link up sound and video
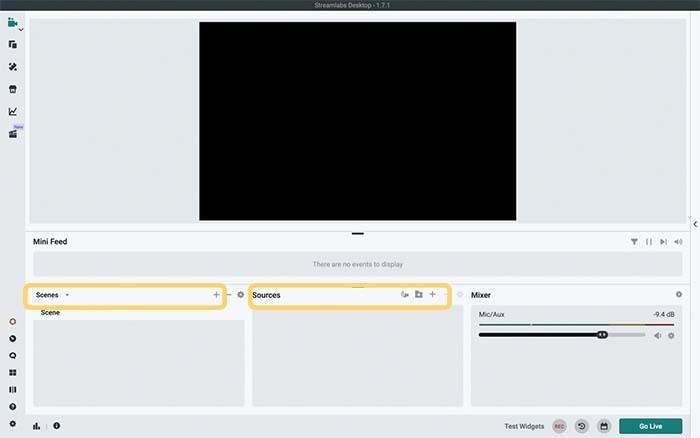
Upon launching the Streamlabs desktop app, you’ll see the default view. To get started, you’ll need to create a scene.
A scene is a collection of audio and visual sources. It’s pretty popular to use a webcam feed for a visual source to show DJs in action. And an audio feed from your mixer alongside it. Let’s keep things simple and run through how to set that up.
In the Streamlabs interface, navigate to Scenes, and click the + to add a new one.
Once you've created your scene, you'll need to add some inputs by clicking the + to the right of 'sources'.
To add your mixing desk or mixer signal to the scene, you'll need to have this routed to your computer via an audio interface.
Once you've done this, you can add the signal to your scene by adding an Audio Input Capture source and selecting your audio interface from the device drop down menu.
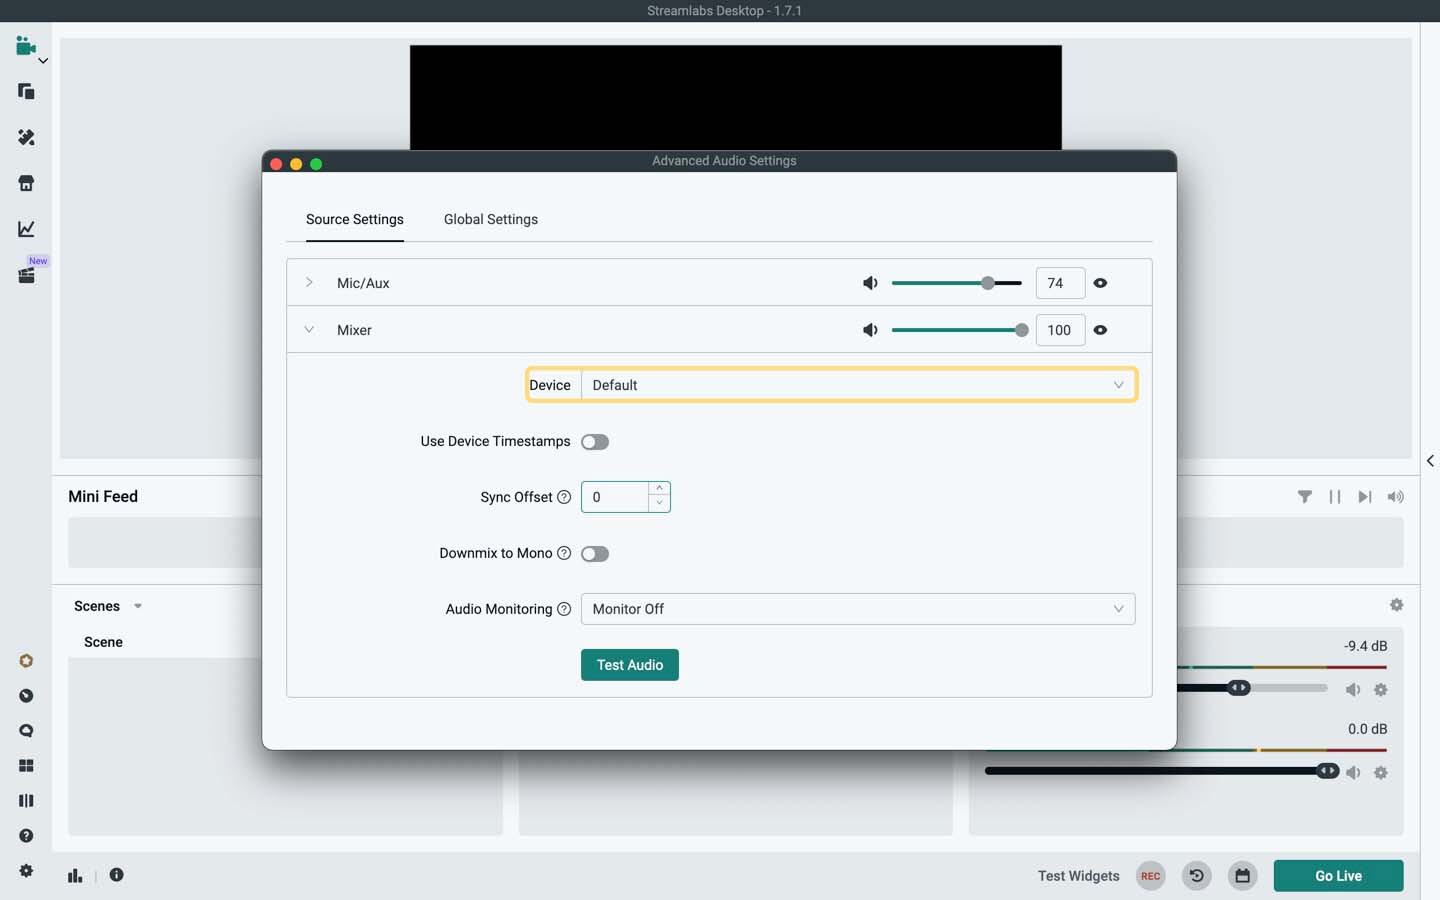
Now, you should be able to see your mixer in the list of sources on the right hand side. This means that your mixer output is now playing in Streamlabs.
To add your webcam to the scene, click the + again, but this time choose the Video Capture Device webcam device and click add. Resize this video and position it by clicking and dragging it around.
Once you've added your sources to your scene in Streamlabs, it's time to configure your settings for your chosen platform.
Stream To Your Chosen Platform
The easiest way to stream to platforms such as Facebook, YouTube and Twitch is to log in to Streamlabs via your account for the platform.

Go to the settings icon in the bottom right of the Streamlabs dashboard, and click 'Log In' when the new window appears.
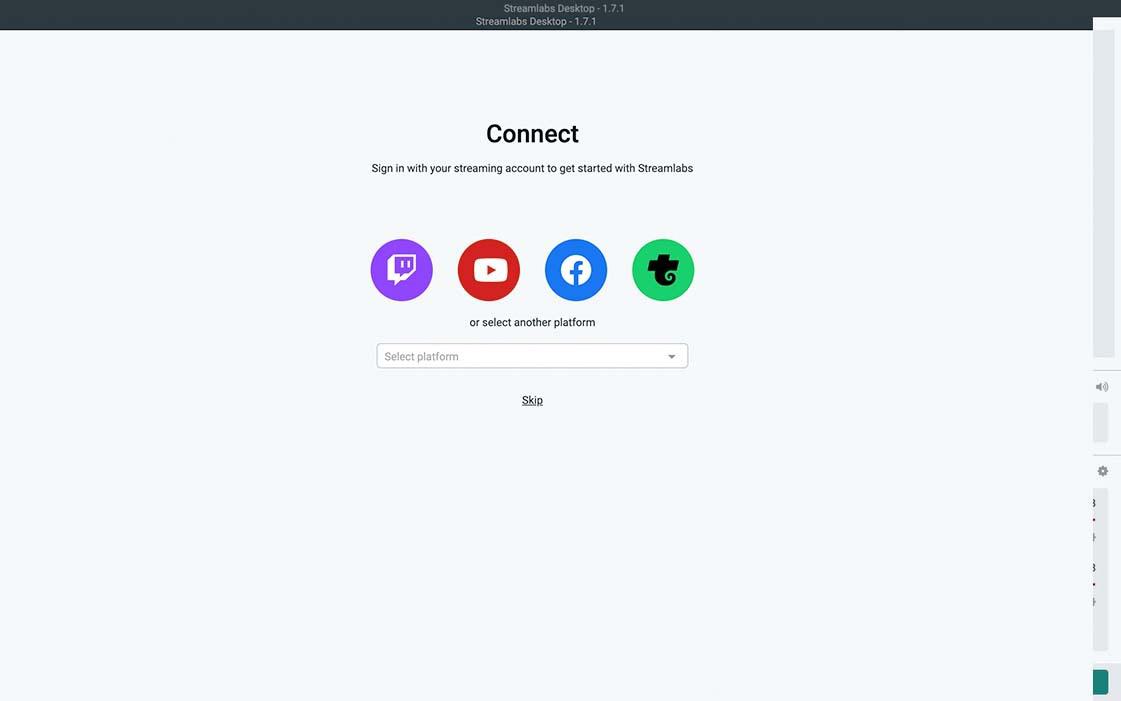
Choose the platform you want to broadcast to by logging in via that account.For example, if you want to stream to Facebook, log in to Streamlabs via your Facebook account.
If you don't want to log in or your chosen platform isn't listed, you can configure the stream settings in Streamlabs manually.
Each platform has different stream settings - specifically a unique Stream Key - which you need in order to stream to them. So, Facebook has particular stream settings, whereas YouTube has different stream settings and so on.

Go to the platform you want to stream to, and create a live or scheduled stream. When the stream settings are generated in your chosen platform, you’ll need to copy these into the stream settings in Streamlabs.
Streaming To Facebook Live
In Facebook, create your live event from the status section of your profile. When it comes to choosing a video source, select streaming software.
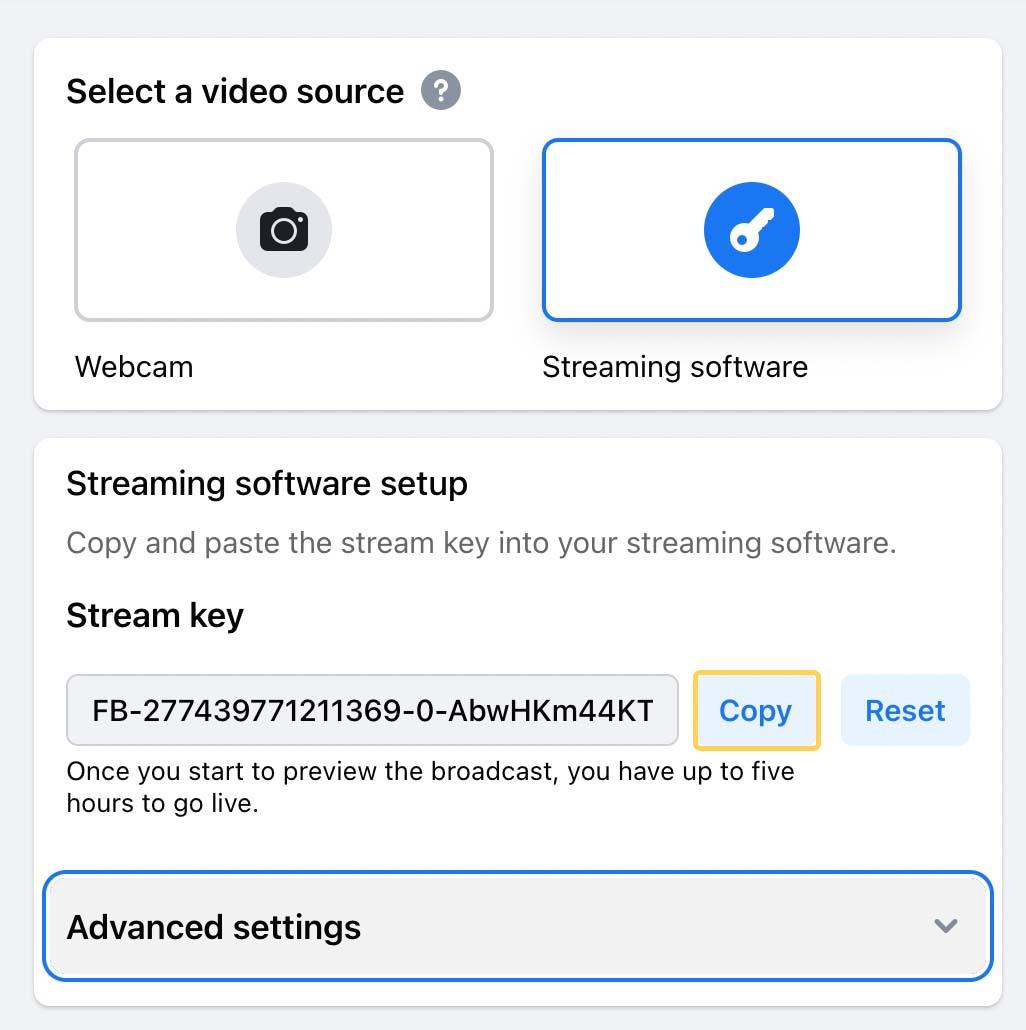
Copy the stream key as you'll need to paste this in to the stream settings in Streamlabs.
Streaming To YouTube
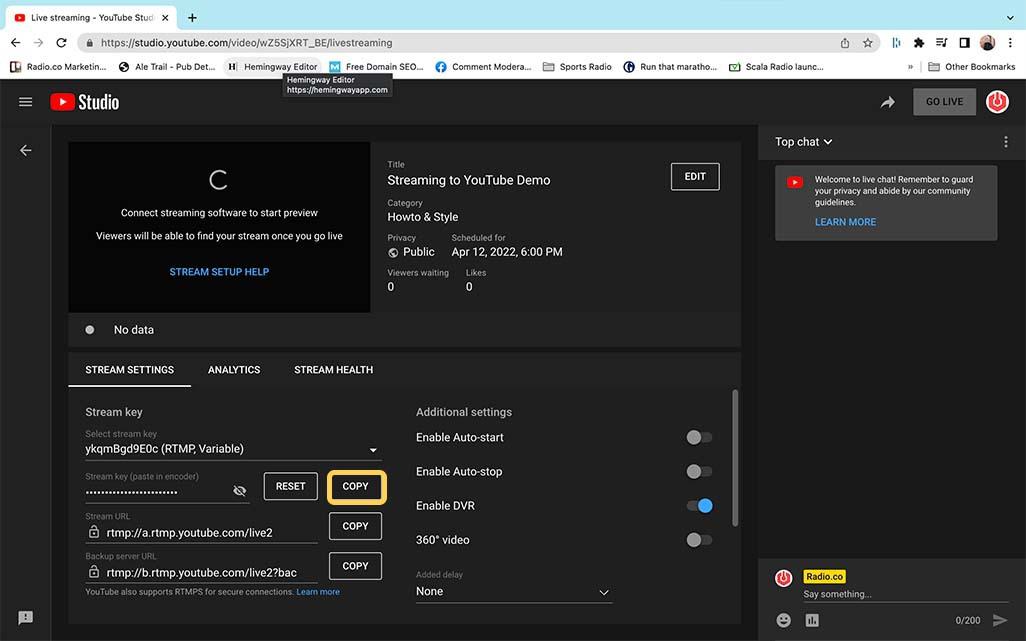
In YouTube click the create icon (the video camera with a + sign in it) from the top right of the page to create a live event.
Once you've completed your event details, you'll be directed to the final page where you can review the details. From here, copy the stream key to be pasted in to Streamlabs.
Streaming To Twitch
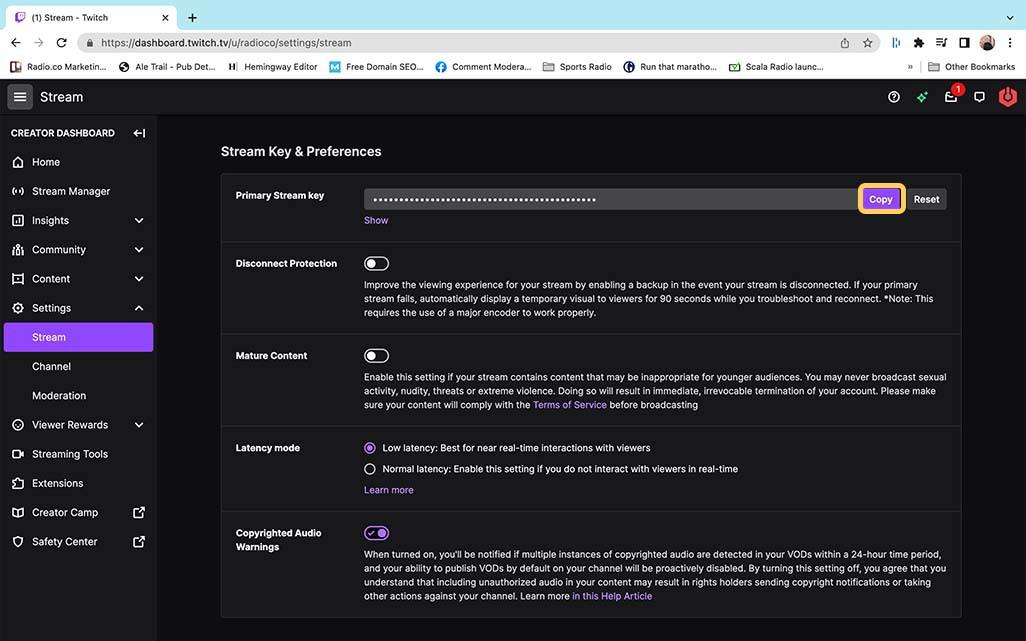
For twitch log in to your account, and click on your profile icon in the top right corner. Navigate to Creator Platform and click on the settings. Here you'll be able to copy the stream key in order to paste this in to Streamlabs.
Go Live
Now you’ve configured your settings for your chosen platform, you can go live by hitting the go live button in Streamlabs.
And once you've mastered this way to stream, explore the other set ups such as broadcasting your Radio.co stream.
Additional Features of Streamlabs
Streamlabs lets you customise your stream with their various themes, overlays and widgets.
Themes and overlays are great ways to change the colour and design of your stream, and you can choose from different categories to give your stream an attractive look.
There’s plenty of cool widgets to play around with too. From an alert box which can thank your viewers with on-screen pop-ups, to a Tip Jar, which is a visual representation of how much money you’ve raised.
Donations and Tips
Set up charity donations on your streams by activating one of four of Streamlabs payment options: Paypal, Paypal Legacy, Credit Cards (for verified accounts only) or Skrill.
Setting up payment options requires a lot of personal details, so it's best to have all of these on hand before you start.
In Streamlabs Browser Dashboard, go to Account > Settings in the lefthand toolbar to set up a donation option for those watching your stream.
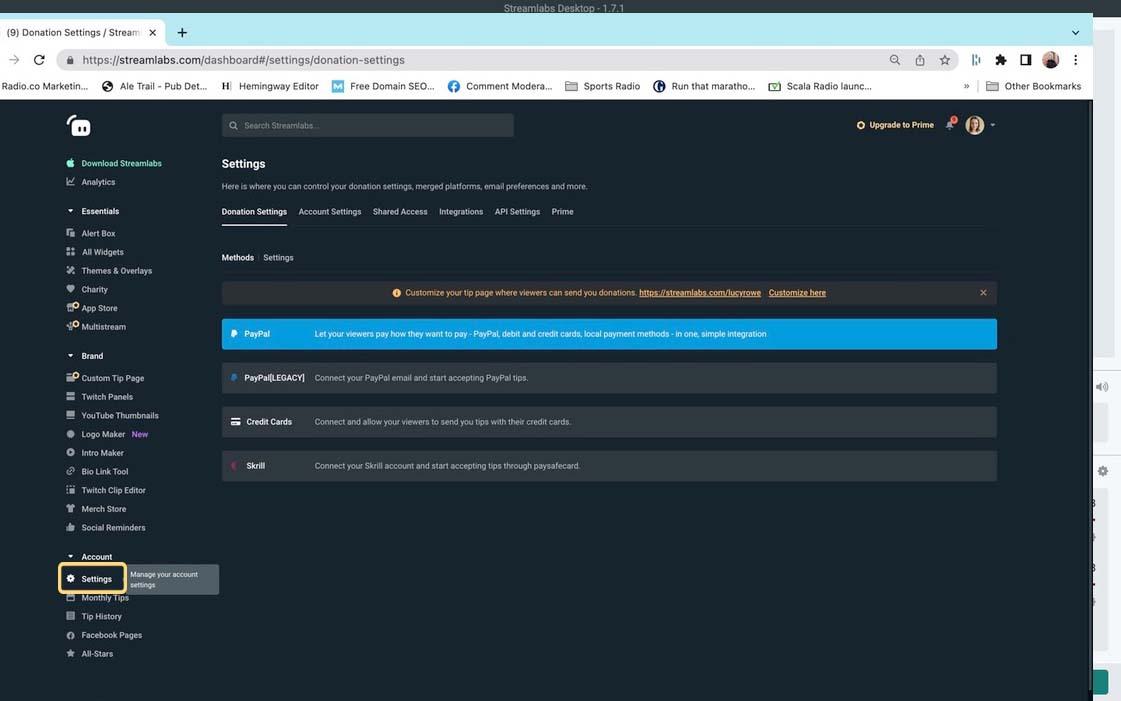
Change details like minimum donation, suggested donation and currency in the Donation Settings tab.
Other Options
You don't have to use Streamlabs for video streaming your radio station. There's other great, free software available to you. Here James runs through a few alternative options...
Conclusion
There’s plenty of ways to use Streamlabs with your radio station. Connect with big-hitting streaming platforms and interact with fans instantly. Use themes and overlays to customise your stream and give it a fresh look. And hook up a webcam to show viewers what’s going on behind the scenes.
Do you go live on a streaming platform? Let us know where to check out your live events in the comments below.


